Best Tips on How to Store Fudge Plus Family Recipe!
Follow these tips on how to store fudge so it will stay fresh and delicious, preserve the creamy texture, and last a long time. I will also share my old family recipe that was handed down to me from my great-grandmother!
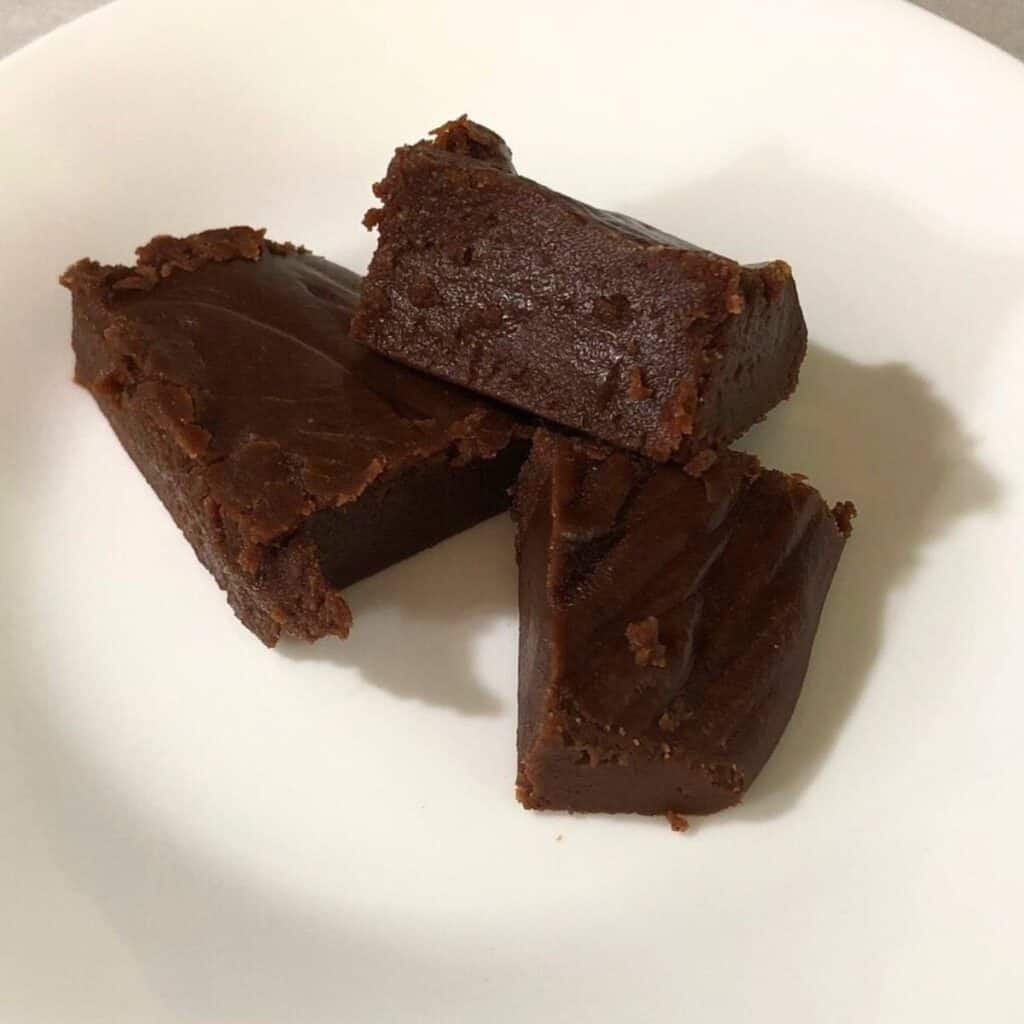
Fresh fudge is commonly found on holiday dessert tables, old-fashioned country stores or general stores, candy stores, fudge shoppes, and my house.
Cooking and feeding people is my love language y’all. It runs in my family. What says “I love you” better than serving different types of fudge to your family and friends?
What is fudge?
Fudge is a soft sugar candy made by heating up sugar with milk or cream and butter with various other flavor ingredients until it reaches the “soft ball” stage, which is 240º F (115º C). It’s a soft and creamy confection and not a hard candy.
Fudge is traditionally made by pouring the soft candy out onto a cold surface and letting it harden as it cools down from cooking.
Whether you’re in the mood to cook this sweet confection for just yourself or for others, you want to make sure that you choose the best storage method.
How to store fudge.
The best way to store leftover fudge is in an air-tight container out of direct sunlight for up to three days at room temperature. If you want to store your sweet treat for longer, a great option is to store pieces of fudge between layers of wax paper and keep it in your refrigerator in a storage container.
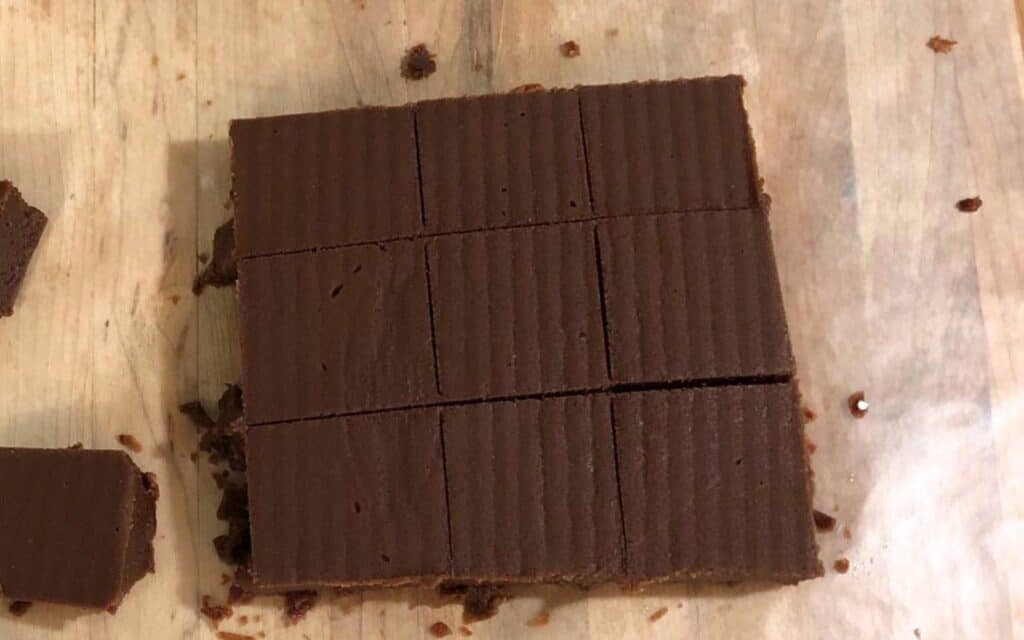
Fudge is best served warm or at room temperature and eaten within 3 days. But you can also make it last longer by following these helpful tips.
Helpful tips for how to store fudge.
- Cool homemade fudge completely before you put it in a sealable container. You don’t want any condensation building up and creating excess moisture inside your storage container.
- Wrap each large piece of fudge in wax paper or layer small pieces of fudge in between wax paper so the fudge won’t stick to each other. You can also use plastic wrap but make sure that whatever you use is non-stick. I have not had good success with parchment paper because when I used it once, the fudge stuck to the paper and there were bits of parchment paper stuck to some of the fudge.
- Store fresh fudge and store-bought fudge in an airtight container. Keeping the fudge in plastic containers with a lid or other sealable containers will help keep it from drying out. If your fudge is exposed to too much air, it will lose its moistness and get dry, hard, and crumbly.
- Store fudge in a cool, dry place out of direct sunlight. Avoid storing fudge near stoves and microwaves because the temperature fluctuations will create condensation issues inside your storage container.
- Refrigerate fudge to extend its shelf life. If you want to extend the shelf life, keep fudge in an airtight container in your refrigerator. When you’re ready to serve it, let it come to room temperature.
- Freeze fudge for longer storage. If you made too much fudge, you can freeze it for later. Just be sure that each piece of fudge is wrapped well in parchment paper first. It’s also a good idea to wrap aluminum foil around the wrapped fudge to help keep it from getting freezer burn. When you’re ready to thaw it, set it out at room temperature for a few hours.
Best containers for storing fudge.
Always use an airtight container for storing fudge. I prefer to use glass storage containers with locking lids to keep air out, but use what you have.
If you’re freezing fudge for later, be sure to store the wrapped fudge in an airtight container or zip lock freezer bag (or both).
How long will fudge last?
The shelf life of fudge can vary from a few days to several months with proper storage. If you store your fudge properly, it can last for a week at room temperature, several weeks in a refrigerator, and several months in a freezer.
My favorite fudge recipe: Old-Fashioned Chocolate Fudge
Have you ever struggled to make homemade fudge? If you’ve struggled in the past, I want to show you how my family has been making chocolate fudge for at least the last 100 years!
I’ve come across a lot of chocolate fudge recipes in the past but I want to share my family’s 100-year-old (at least!) simple recipe for making delicious chocolate fudge from scratch. And you don’t even need a candy thermometer!
Everything in moderation, right? With that in mind, this old family recipe is great for family gatherings, holidays, and special occasions. I want to encourage you to give this chocolate fudge recipe a try for your next event.
My mom is the reigning queen of making fudge. She learned how to make fudge from her mom when she was about 10 years old and my grandmother learned from her mother. We don’t know where my great-grandmother learned how to make fudge, but we’ve used the same recipes for generations.
Whether it’s praline fudge (penuche), blonde fudge, peanut butter fudge, or pure chocolate fudge, my mom has mastered them all.
This post contains affiliate links, which means I make a small commission at no cost to you. See my full disclosure here.
Ingredients
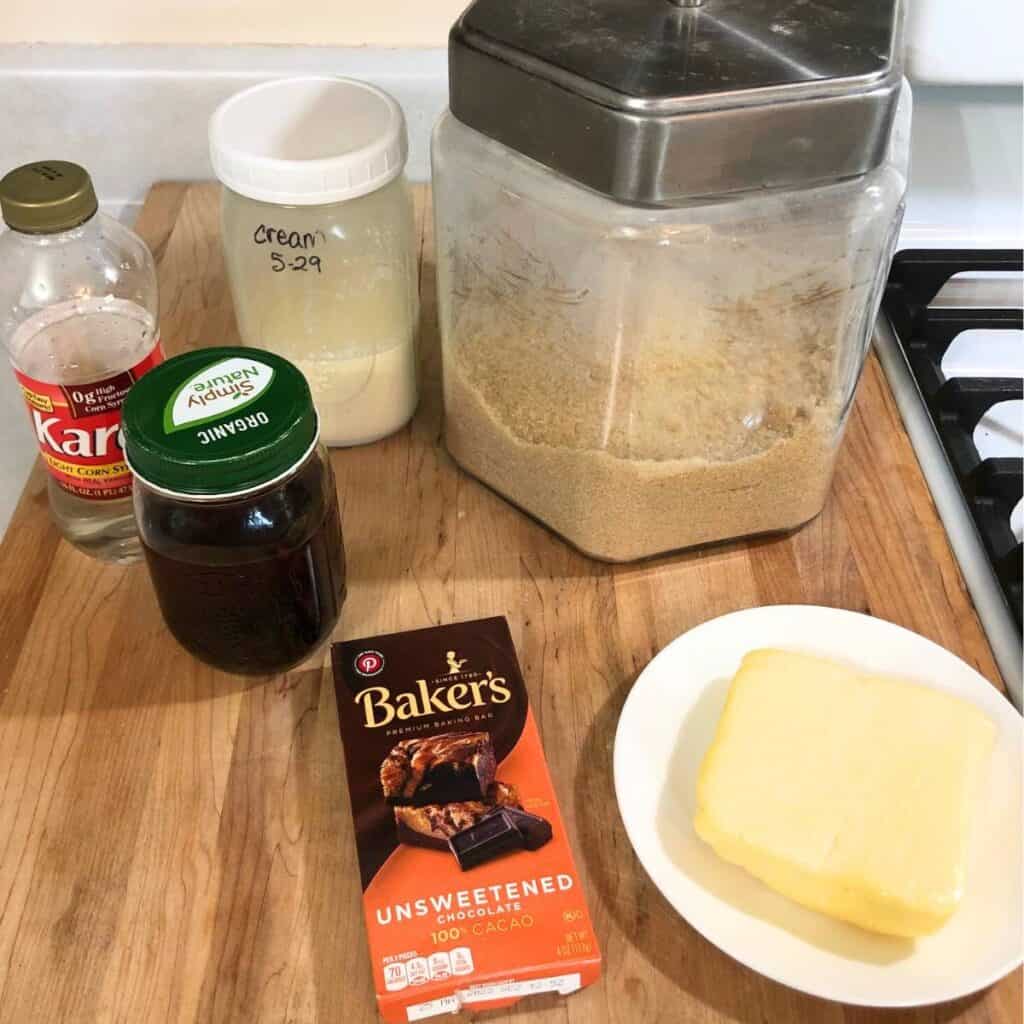
Sugar – Fudge has a high sugar content. I prefer to use organic cane sugar, but use what you have.
Unsweetened chocolate – My family recipe uses Baker’s unsweetened 100% cacao chocolate. I haven’t tried other brands but I imagine it would turn out just as well, too.
Heavy cream or milk – This recipe works just as well with all heavy cream or using half cream and half milk.
Butter – Use unsalted butter for this recipe. But if you like salted fudge, you can also use salted butter.
Vanilla extract – Adding vanilla extract gives a nice depth of flavor to your fudge. Learn how to make your own vanilla extract in this blog post!
Light corn syrup (optional) – You can add light corn syrup for additional creamy texture but it’s not mandatory.
Tools you may need
Heavy bottom stainless steel saucepan
Large stainless steel spoon
Wax paper
Cutting board or cookie sheet
Candy thermometer or small bowl
Knife
Measuring cups
Measuring spoons
Glass storage container with lid
Instructions for making old-fashioned chocolate fudge.
This is the best fudge recipe! You can decrease or increase this recipe based on your family’s size. Just be sure that your saucepan is at least twice as large as the combined ingredients.
Cook your fudge to the soft ball stage.
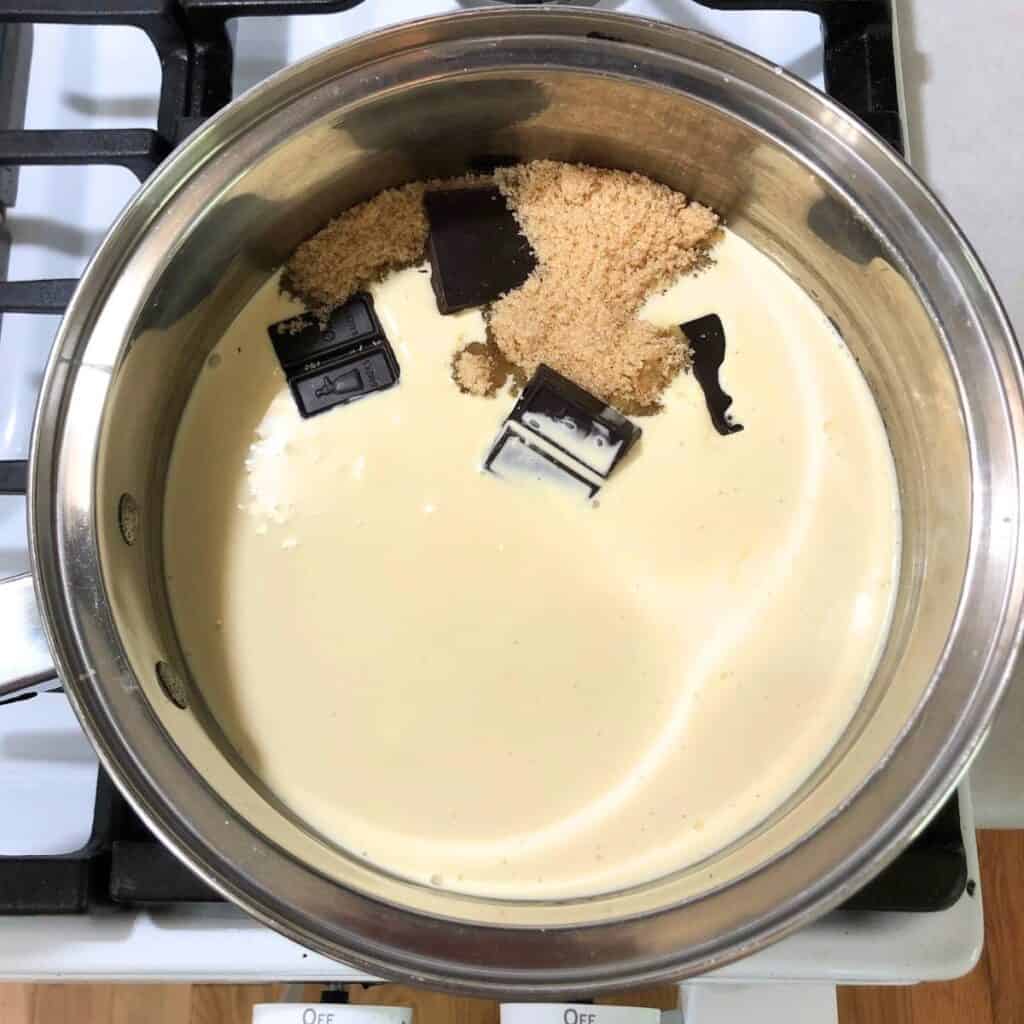
First, fill a large stainless steel saucepan with 3 cups of organic sugar, 3 ounces of Baker’s unsweetened 100% cacao chocolate squares, 1 and 1/2 cups of heavy cream (or milk), and 2 tablespoons of light corn syrup. The corn syrup is optional but will make the fudge have a smoother texture.
It’s important to use a saucepan that isn’t coated with anything that can scrape off into your fudge because we will be scraping it often with a spoon. A stainless steel pot is the way to go!
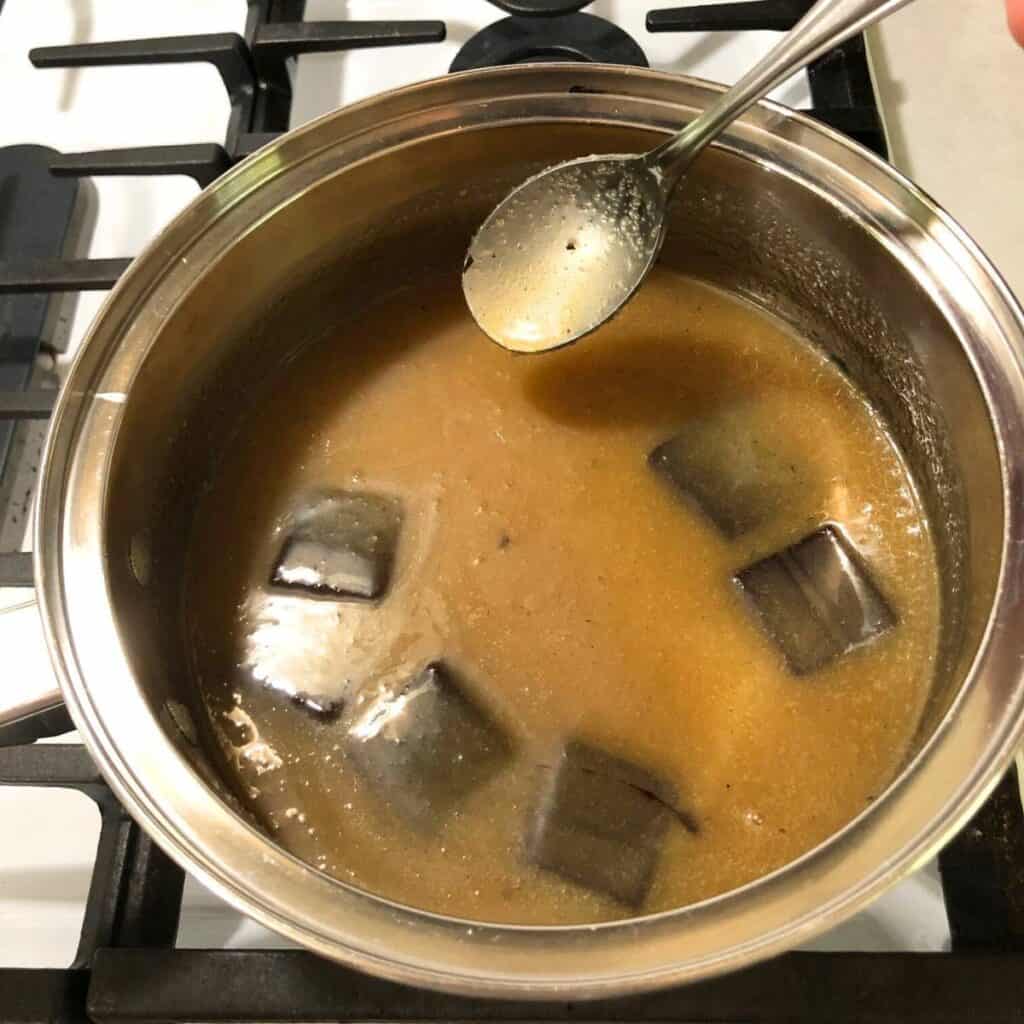
Next, put your saucepan on the stove and stir the ingredients together over medium-low heat until the chocolate has melted and it starts to get bubbly.
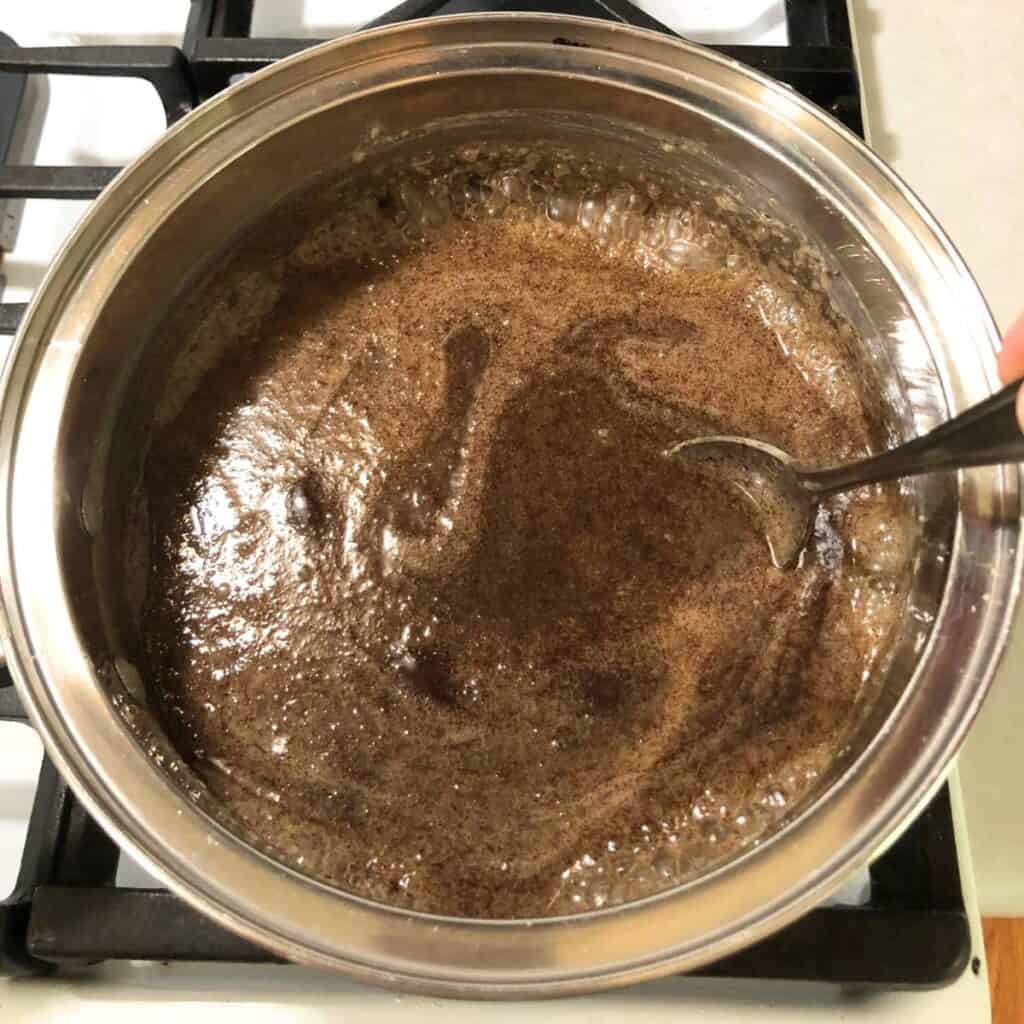
Continue stirring the chocolate mixture over medium-low heat until it doubles in size and starts to shrink back down. It will thicken and bubble less as it shrinks.
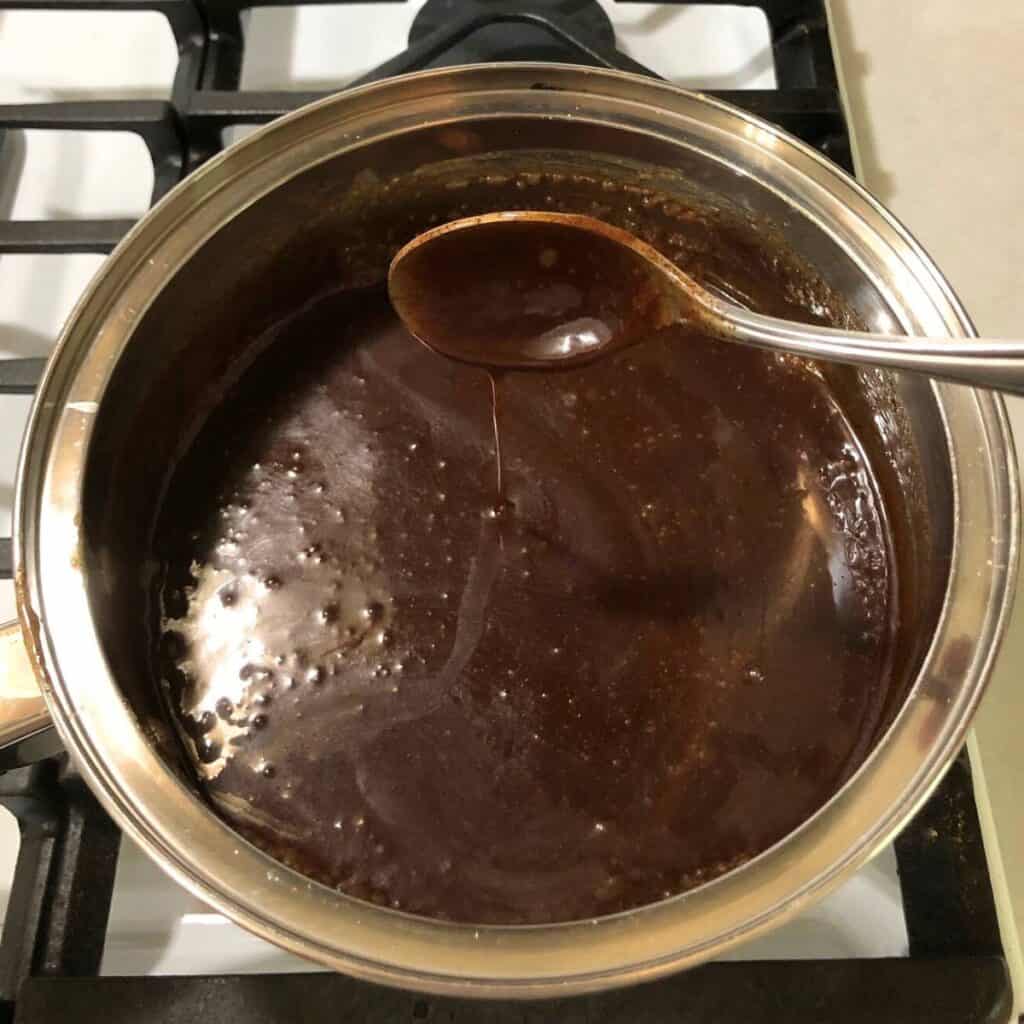
When the chocolate mixture starts to shrink down and coat the spoon, it’s time to test if it’s reached the soft-ball stage. Prepare a small bowl filled half-way with water. (You can skip this if you plan to use a candy thermometer…but this is a fun way to test your fudge.)
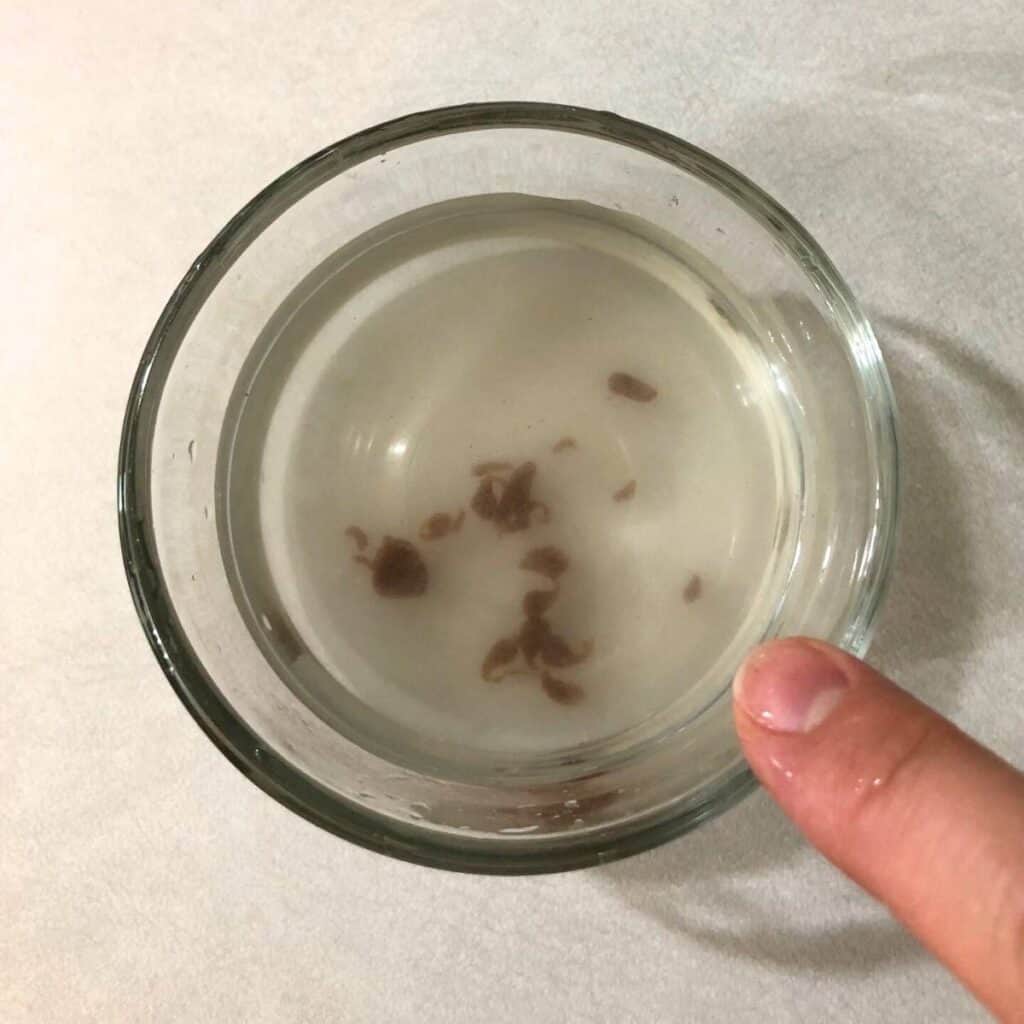
Stir the chocolate mixture and let a few drops of chocolate drip into your bowl of water. If the chocolate spreads out on the bottom of the bowl, it’s not ready yet. Pour the water out (taste the chocolate if you want) and fill the bowl with water again.
The soft-ball stage is reached in a matter of seconds once the chocolate shrinks and coats your spoon. So every 30 seconds or so, drop a few drops of chocolate into your bowl of water.
You will start to notice the chocolate sticking together more. Do this until you reach the soft-ball stage.
The soft-ball stage has been reached when your chocolate drips turn into soft globs as they float down in your bowl of water.
Feel the chocolate with your finger in the water and push it around. It should feel soft and pliable and not hard.
If your fudge has cooked too long and becomes hard in the water, read the tips at the end of this post on how to save it.
Cool the hot fudge down slightly.
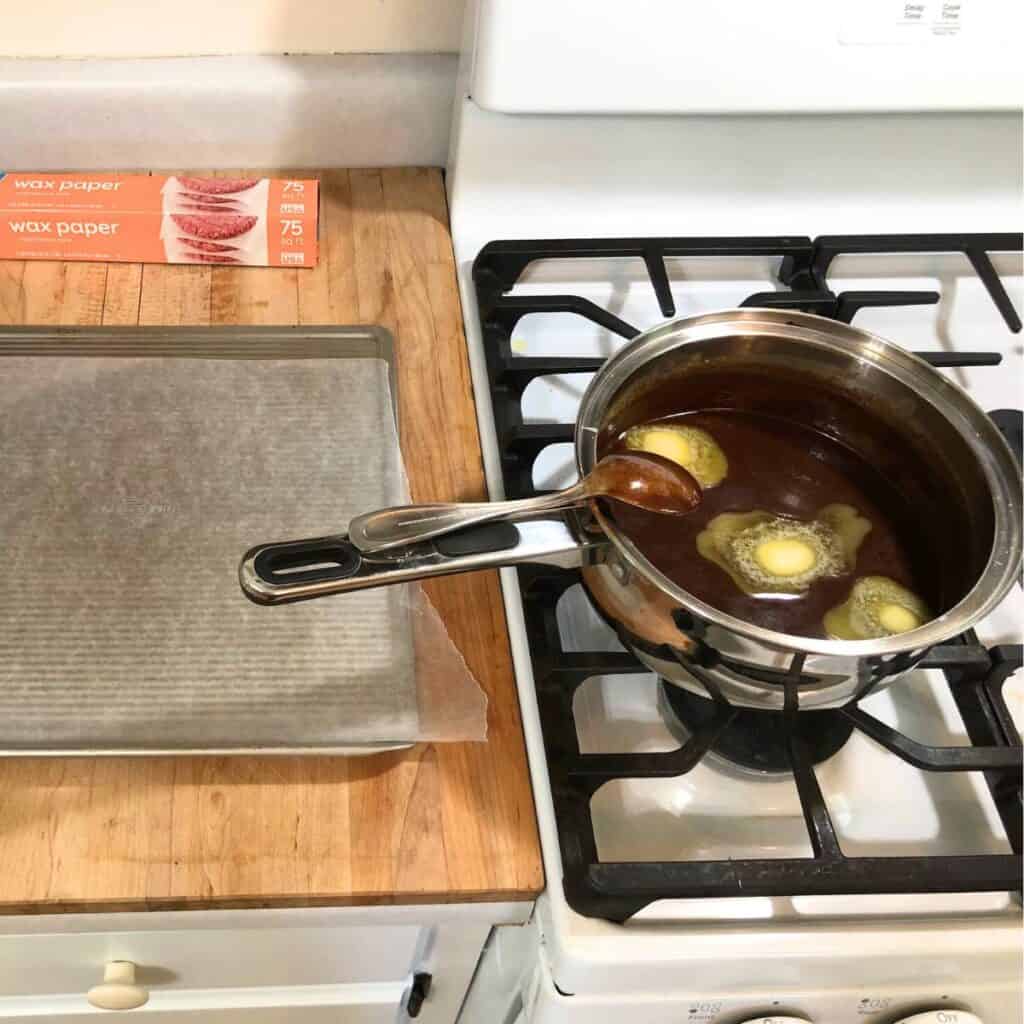
Remove the saucepan from the heat when it reaches the soft-ball stage.
Add 3 tablespoons of butter to the chocolate mixture but don’t stir it in. Set your timer for 10 minutes.
Get ready to pour out your fudge by placing some wax paper down on a cutting board or cookie sheet. (It’s my experience that parchment paper sticks to fudge so I recommend only using wax paper.)
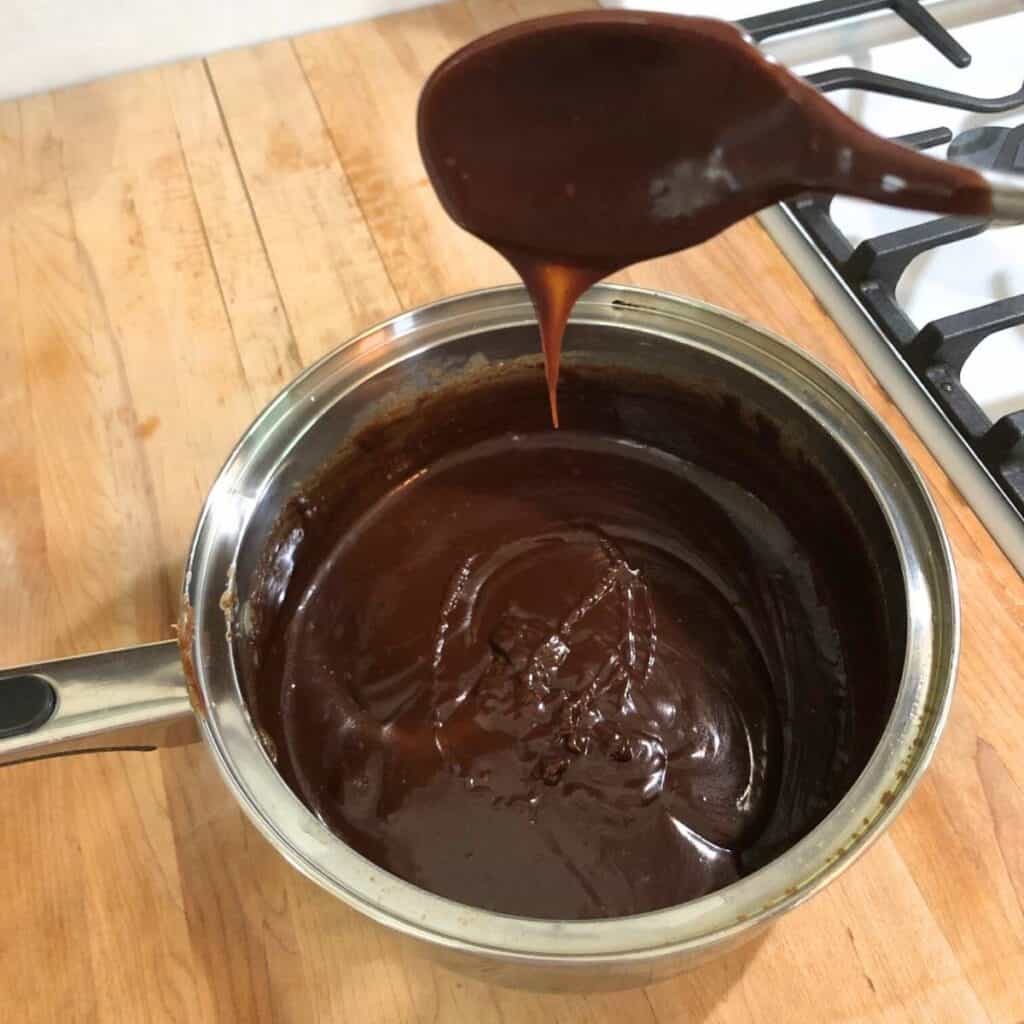
After 10 minutes, add in 2 tablespoons of vanilla extract and start stirring the chocolate fudge.
You don’t have to stir fast, so go at a pace you are comfortable with. Stir for about 5-10 minutes until the shine starts to go away and when the fudge starts to hold a shape in your saucepan.
Pour the fudge out so it can harden and set.
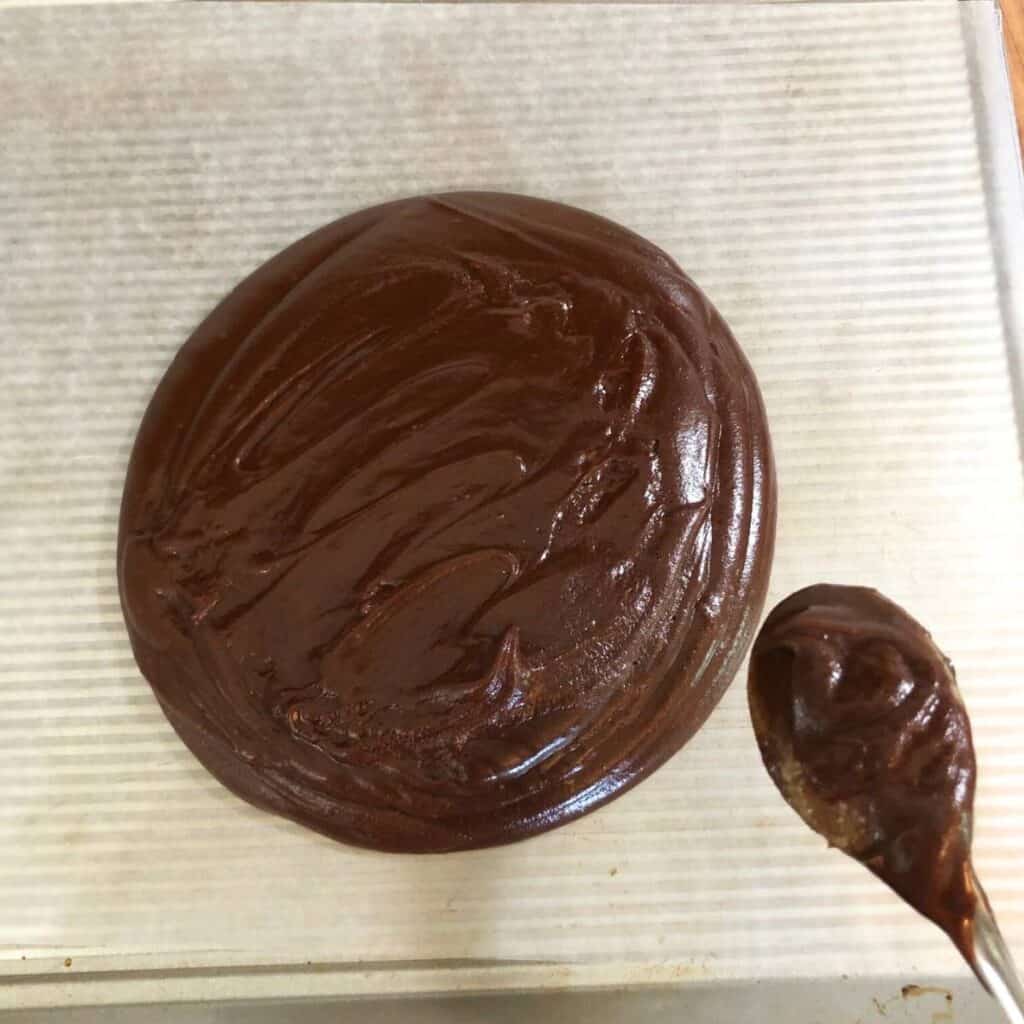
Pour your chocolate fudge out onto your wax paper and smooth the top with your spoon the best you can. Let it sit undisturbed until it cools down (about 20-30 minutes).
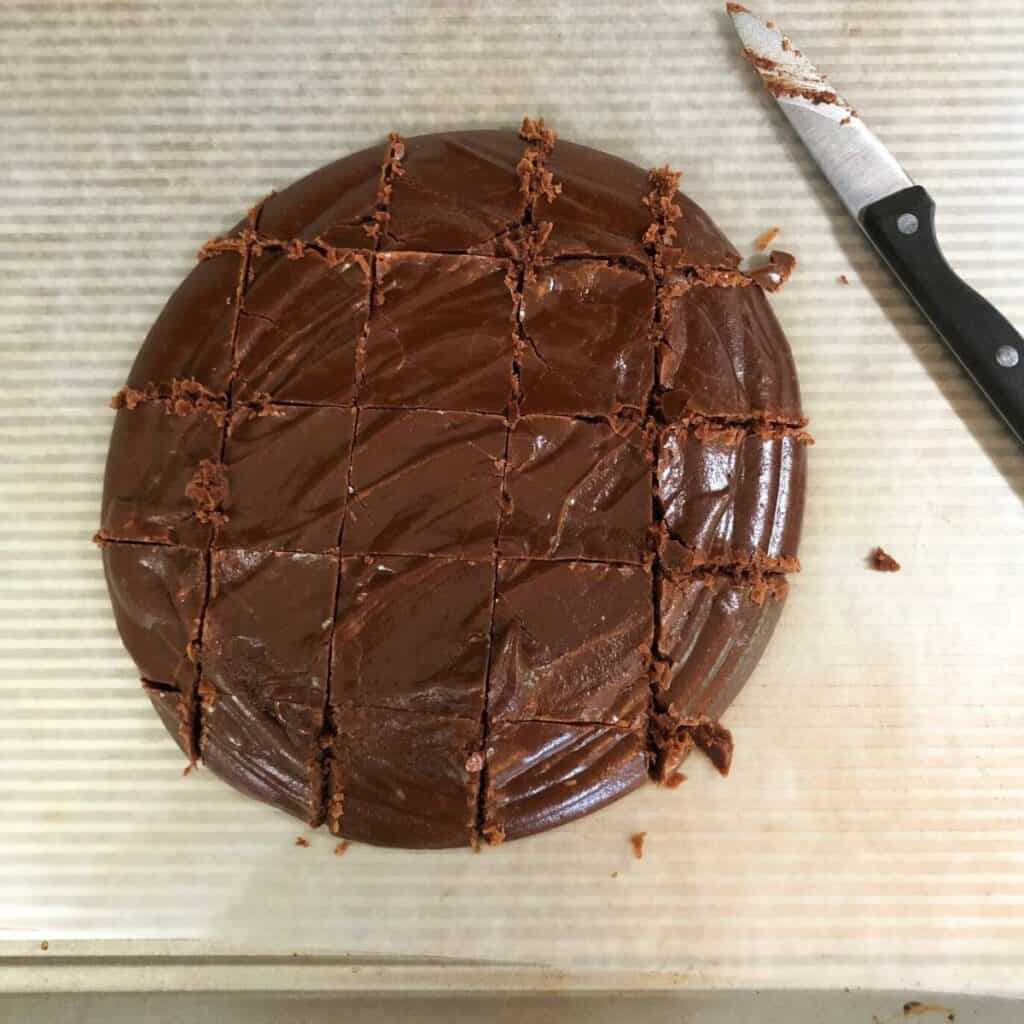
Cut your fudge into squares using a sharp knife after it has cooled down and hardened.
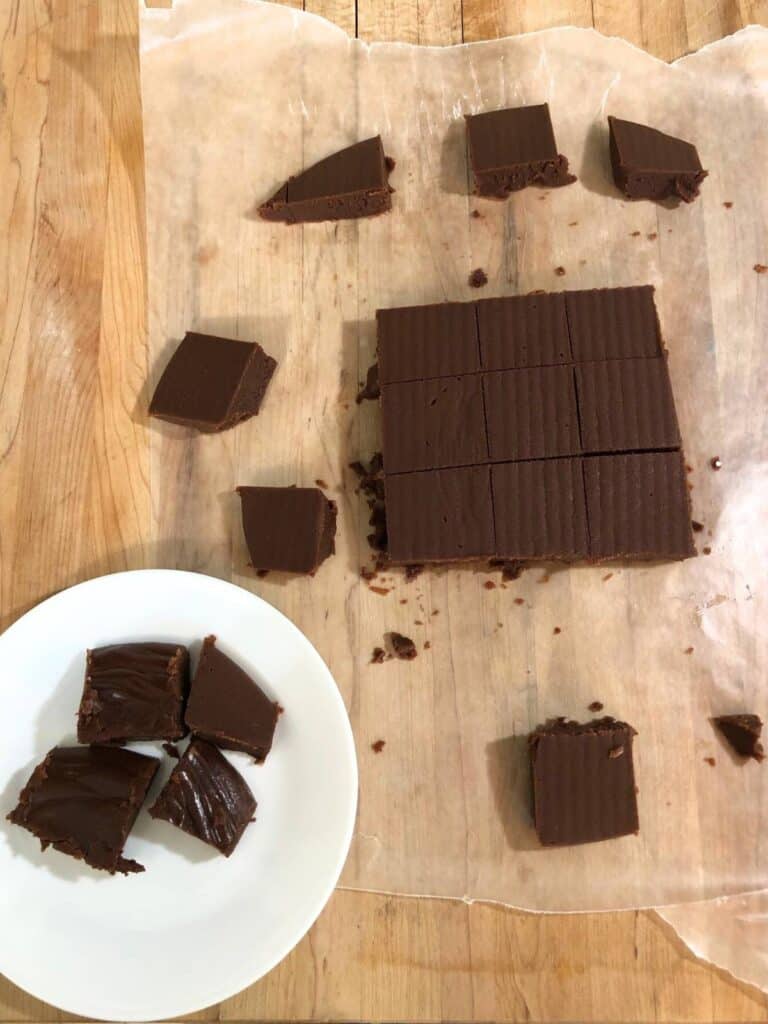
Place another sheet of wax paper on top of your fudge and then grab the cutting board or cookie sheet and flip it all over upside down onto your counter.
Slowly remove the wax paper from the top of your fudge so that the underside (now the top) can also cool down and harden.
And that’s it! Break apart your chocolate fudge squares when it cools and hardens.
Be sure to store your fudge properly in an air-tight container!
Recipe Card
Old-Fashioned Chocolate Fudge
Equipment
- large stainless steel saucepan
- large stainless steel spoon
- wax paper
- knife
- measuring cups
- measuring spoons
Ingredients
- 3 cups cane sugar (Organic sugar has a better/deeper flavor but white sugar works fine, too.)
- 3 ounces Baker's unsweetened 100% cacao chocolate squares
- 1 1/2 cups heavy cream (You can also use skim milk, whole milk, or half and half. Heavy cream gives it a richer flavor and smoother texture.)
- 2 tbsp Karo light corn syrup (Optional but makes the fudge smooth.)
- 3 tbsp butter (Optional but gives good flavor and makes the fudge smooth.)
- 2 tbsp vanilla extract (Optional but gives good flavor.)
Instructions
- Fill a large stainless steel saucepan with sugar, chocolate, heavy cream, and light corn syrup.
- Mix together with a large stainless steel spoon over medium-low heat until the chocolate has all melted and it starts to bubble.
- Continue to stir the chocolate mixture until it doubles in size and starts to shrink back down again as it thickens.
- When the chocolate mixture starts to shrink down and coat the spoon, it's time to test if it's reached the soft-ball stage. Prepare a small bowl filled half-way with water. (You can skip this if you plan to use a candy thermometer…but this is a fun way to test your fudge.)
- Stir the chocolate mixture and let a few drops of chocolate drip into your bowl of water. If the chocolate spreads out on the bottom of the bowl, it's not ready yet. Pour the water out (taste the chocolate if you want) and fill the bowl with water again.
- The soft-ball stage is reached in a matter of seconds once the chocolate shrinks and coats your spoon, so every 30 seconds drop a few drops of chocolate in your bowl of water. You will start to notice the chocolate sticking together more. Do this until you reach the soft-ball stage.
- The soft-ball stage has been reached when your chocolate drips turn into balls in your bowl of water. Feel the chocolate with your finger in the water and push it around. It should feel soft and not hard like caramel.
- Remove the saucepan from the heat when it reaches the soft-ball stage.
- Add butter to the top but don't stir it in. Set your timer for 10 minutes.
- When your timer goes off, add in your vanilla and start stirring the chocolate fudge. Stir about 5-10 minutes until the shine starts to go away and when the fudge starts to hold a shape in your saucepan.
- Get ready to pour out your fudge by placing some wax paper down on a cutting board or cookie sheet.
- Pour your chocolate fudge out onto your wax paper and smooth the top with your spoon the best you can. Let it sit undisturbed until it cools down (about 20-30 minutes).
- Cut your fudge into squares using a sharp knife. Place another sheet of wax paper on top of your fudge and then grab the cutting board or cookie sheet and flip it all over upside down onto your counter. Slowly remove the wax paper from the top of your fudge so that the underside (now the top) can also cool down and harden.
- Store fudge squares in an air-tight container. It's best served warm or at room temperature and eaten within 3 days, but you can also store it in your refrigerator to make it last longer.
Variations to the recipe.
If you want to add any nuts to your chocolate fudge, add them after it has reached the soft-ball stage when you add your vanilla extract. Walnuts and pecans add a delightful crunch.
Troubleshooting fudge issues.
If you missed the soft ball stage and accidentally cooked your fudge to hard ball, add more milk and keep cooking.
If you’ve accidentally cooked your chocolate fudge too long and see that it hardens to the hard-ball stage when you test it in your bowl of water, simply add about a half cup of milk to your saucepan and continue stirring over medium-low heat.
It will bubble a lot as you add the milk so don’t be alarmed. The milk will thin out the chocolate mixture and you can reach the soft-ball stage after just a minute or two.
If you notice that your chocolate fudge is rock-hard after you’ve poured it out onto your wax paper, just break it apart the best you can, return it to your saucepan, add about a half cup to one cup of milk, and stir it over medium-low heat until it melts again and reaches the soft-ball stage.
Or…you can just eat it as hard candy. The taste is still delicious!
If your fudge is too soft or runny, keep cooking it.
Is your fudge is too soft and runny? You probably won’t know that until after it has been poured out onto your wax paper.
If that’s the case, scrape it off the best you can back into your pot, add a little bit of milk, and continue cooking your fudge until it reaches the soft-ball stage.
Shop This Post
Baker’s unsweetened 100% cacao chocolate
Glass storage container with lid
Pin it for later!
Other Related Posts
How to Make Jello Using Beef Gelatin


I love when people share family recipes, they’re always the best!
Thank you!!