How to Hatch Eggs Using an Incubator
Do you want to learn how to hatch eggs using an incubator? We have a lot of fun watching and hatching our own baby chickens. And it’s one of the ways that we save money on the farm each year!
But most importantly, it’s one of the ways that we can be self-sufficient. We don’t ever have to worry about having enough eggs or chicken meat to feed our family. Plus, we are able to be generous to others from our abundance.

This post contains affiliate links. As an Amazon Associate I earn from qualifying purchases. That means I make a small commission at no cost to you if you place a qualifying purchase through any of the links. Read my full disclosure here. Thanks for your support!
Are you interested in becoming more self-sufficient, saving money, or being more generous?
Farming and homesteading have a lot of values…including all of the above.
The main reason we left the city and moved to a farm was because we wanted freedom. We didn’t want to be dependent on grocery stores for our food and we wanted the freedom to produce better quality food than grocery stores sell.
But we are happy to also save money on food while being able to be generous to others!
Don’t get me wrong. Grocery stores and conventional farming deserve a place in the world. But we like to do things differently and are more of a take-charge kind of family.
Plus, the flavors and textures are better with food you grow and harvest yourself.
Terms to Know
Before we get going, here are some terms to know.
Hen – Adult female chicken, duck, quail, pheasant, or turkey.
Rooster – Adult male chicken.
Drake – Adult male duck.
Cock – Adult male quail or pheasant.
Tom – Adult male turkey (also known as Gobbler).
Chick – Baby chicken, quail, pheasant, or turkey. (A baby turkey is also known as a Poult.)
Duckling – Baby duck.
Broody – When female hens stop laying eggs and desire to sit on a clutch of eggs to hatch babies.
Clutch – A group of similar things. (In this post it is a group of eggs.)
Hatch – An opening; the process of baby chicks chipping away at the eggshell from the inside so they can be free.
Incubator – An enclosed device that provides a controlled environment to hatch fertilized eggs artificially.
Candling or Candle – Holding an egg against a light. This is usually done in the dark so you can see what’s happening inside the egg.
How to Hatch Eggs Using an Incubator
The main reason to hatch eggs using an incubator is so that you can protect and control the environment of the fertilized eggs until the babies hatch.
Here are the steps you’ll need to follow to hatch your eggs.
1. Collect enough fertilized eggs to fill up your incubator.
Collect clean, fertilized eggs to fill up your clean incubator. This means you will need to keep a rooster (or Drake or Cock or Tom) with your hens if you want fertilized eggs.
If you don’t have enough eggs to fill up your incubator in one day, you can keep your fertilized eggs out on your counter for a few days (max 5 days to retain healthy fertilized eggs) until you have enough to start your incubator.
Don’t refrigerate or wash the eggs you plan on incubating.
Eggs have a natural coating on the outside (the bloom) that keeps bacteria out of the egg. If you wash the egg, you may introduce bacteria that can kill the developing baby.
Additionally, you should keep your fertilized eggs on your counter until you get enough to fill your incubator. There’s no reason to refrigerate your eggs and doing so may cause a hatch failure.

Do you like the old commercial nesting box setup we have going on? The barn chickens finally have a favorite spot to lay all their eggs!
How can you tell if your eggs are fertilized?
Have you ever cracked an egg into a bowl and noticed a white, circular spot on the yellow egg yolk? That’s the germinal disc.
Eggs that are not fertilized will have a solid white germinal disc to indicate that only female cells are present.
Fertilized eggs will have a clear center or a clear bullseye ring at the center to indicate that male cells are present with the female cells.

The only way to know for certain if an egg is fertilized or not is by cracking it open and checking for the bullseye center on the germinal disc. But you can’t crack open an egg you hope to incubate.
If you confine your hens and rooster to a coop, chances are the eggs are going to be fertilized.
If you want to be certain that the eggs are fertilized, crack some open on any given day to check for the bullseye center. Hens will continue laying fertilized eggs as long as they are with the male.
If you need to remove the male, the hens will continue laying fertilized eggs up to 3 weeks.
We like to let our chickens free-range, so it’s a little less certain if the eggs we collect are fertilized. Most of our hens like to hang around our protective roosters but some of the more independent hens run away from them.
So when you’re taking your chances on whether or not an egg is fertilized, it’s even more important to candle your eggs at 7 days of incubation. (See the fourth step.)
2. Candle the eggs and select the best ones to incubate.
It’s important to candle the eggs you want to incubate so that you can check for weak spots or large pores in the egg shell.
Egg shells with weak spots, large pores, or many small pores are not good candidates for incubation.
Select solid eggs for incubation.
The egg below has a solid shell and no distinguishable weak spots, cracks, or large pores. It’s symmetrical, fairly large, and it’s not too pointy at one end.

Use porous eggs for cooking.
Use porous eggs for cooking because they are not good candidates for incubating. The one below has several large pores and chances are slim that it would ever be able to sustain an embryo.
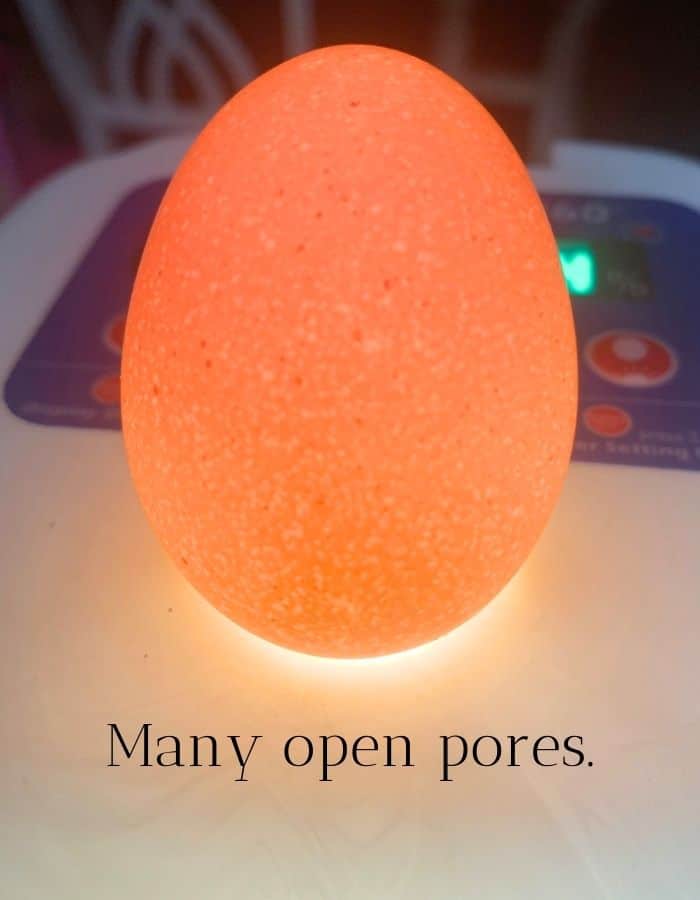
The hen that laid this egg isn’t getting enough protein, calcium, or both. The good news is that I can stop that hen’s inferior genetic line right here. She’s free to eat anything she wants, and she’s not eating what the other hens are eating.
We will hatch several batches of chickens this year, so there’s still a chance that her line will continue if she’s just having a bad day. However, it’s important to us to breed for strengths.
We don’t want fussy animals on our farm if we can help it! Fussy animals require more time, effort, and possibly money.
Incubate the best chicken eggs that you have.
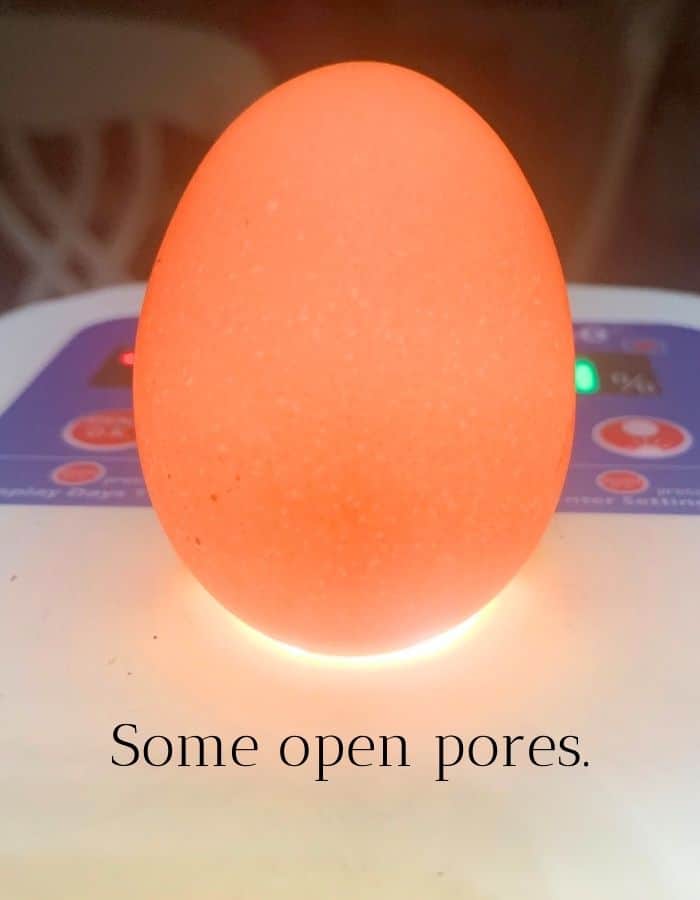
Use the best eggs that you have in your incubator. If you have an egg that’s in between and has some pores but not many, it’s an acceptable candidate for incubation.
If you don’t have any better eggs and you have space in your incubator, give it a shot. You’ll either be down one chicken egg for cooking or you’ll gain a baby chick!
In the picture below, candling shows some pores but not many. It will probably be able to sustain an embryo until hatch day.
When you collect enough eggs, start your incubator so that it’s warm and humid when you put your eggs in. Most eggs (including chicken eggs) need to be 99.5°F (37.5°C) with about 50% humidity on days 1-17 of a 21-day hatch.
Do your own research for ideal temperature and humidity levels for other species because some have different needs.
3. Situate the eggs so that the pointed end is facing the center of the incubator or downward.
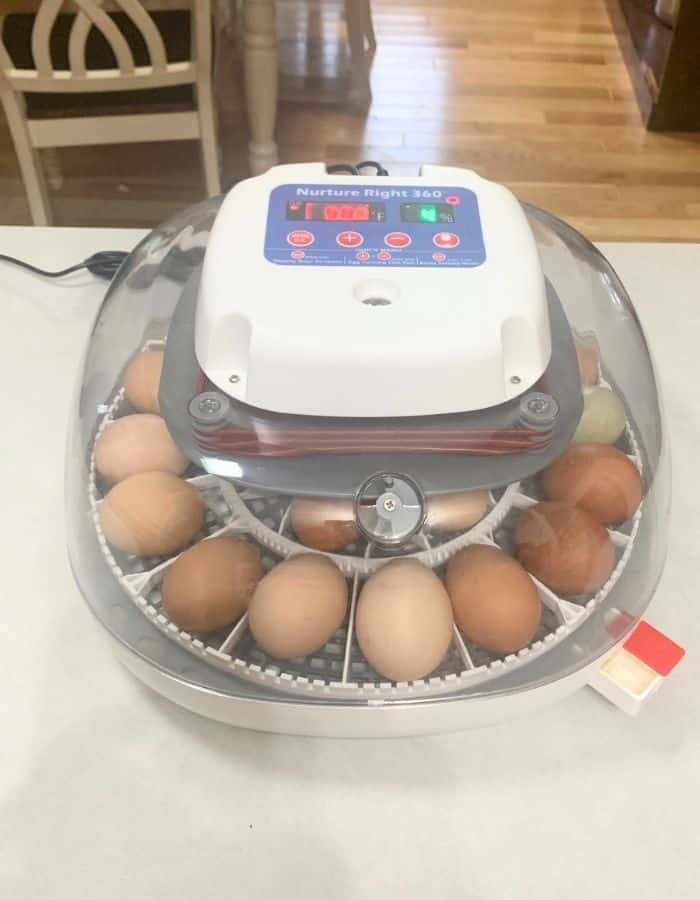
Place your fertilized eggs into the incubator with the pointed end facing the center or downward depending on your incubator type. The air pocket inside the egg needs to be in the correct location so that the developing embryo doesn’t get stuck to the inside of the shell.

Then put the lid on and observe the temperature and humidity until you’re sure it’s where you want it.
Your incubator should have an air vent to allow for ventilation. Make sure it’s at least half-way open.
If your incubator has an external water tray, try to add just enough water to achieve the correct humidity. Humid climates may need less water.
You’ll need to add some water every day as it evaporates out. Never let your incubator run out of water or otherwise let the humidity drop drastically.
4. Candle the eggs at 7 days of incubation to check for veins.
At 7 days of incubation, candle each of the eggs to check for veins so you’re sure that an embryo is forming.
If you don’t see any veins or embryonic growth, the egg was either not fertilized or the shell was too porous and bacteria entered somehow. Either way, remove the egg from the incubator.

If you’re not sure if an embryo is growing, put a question mark on the shell in pencil (never ink) so you can re-check it in another week. If you forget to toss out the bad eggs, you may jeopardize all the good eggs inside the incubator if/when the bad egg explodes.
5. Check your incubator daily and adjust the temperature and humidity until the babies hatch.
Pay attention to your incubator so you can adjust the temperature and humidity at the appropriate times.
Then just sit back and listen for the chicks to start chirping and peeping from inside their shell. When you hear them, it’s a clue that they’ll be hatching in the next couple of days!!
6. Stop turning the eggs and remove the egg turner tray when your chicks have 3 days left before hatching.
You want the baby chick to position itself in the best way to hatch out with its egg tooth (also called beak tooth), so quit turning the eggs when there are 3 days left until hatch day.
Also, remove the egg turner tray so that there is plenty of room for the chicks to kick off the egg shell and walk around.
Be sure to increase the humidity to around 70% (65% to 75% is acceptable) during the final 3 days. Higher humidity is necessary so the membrane doesn’t stick to the baby chick.
And try to be patient!
You may hear chirping from inside the incubator during the final few days. Feel free to talk back to the babies and enlist excited, young helpers to keep watch over them.
You’ll first notice that eggs have a small hole (pip).

Then the babies will start pecking away an almost perfect line straight along the circumference of the shell, dividing it in half.
7. When the chicks are hatching, prepare a warm brooder for them.
The best practice is to let all the chicks stay inside the incubator until they all hatch and are dry and fluffy. I can’t say I’ve always followed that rule. However, it’s worth mentioning that the chirping seems to encourage everyone else to hatch.
Baby chicks can survive up to 3 days without eating or drinking anything. Hanging out in the warm incubator as everyone else hatches isn’t going to hurt them.
And that’s all there is to hatching eggs using an incubator!
When should baby chicks transition to a brooder?
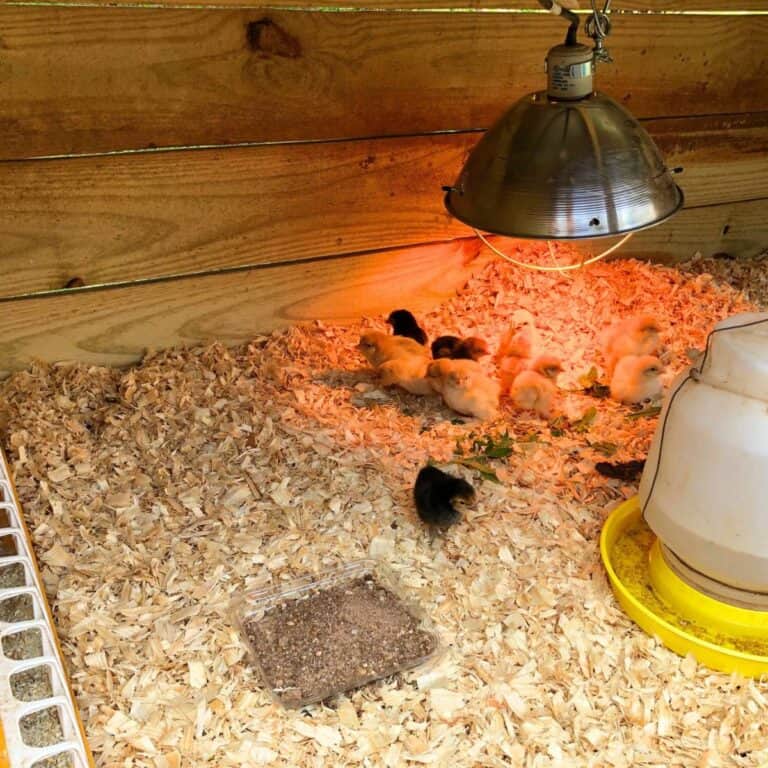
Brand new baby chicks are wet and clumsy, and are not ready to go into an outdoor brooder. My solution is to have a nursery inside my house so little babies can dry off, fluff out, and learn how to walk.
My nursery is usually a cardboard box with some paper towels lining the bottom (for easy cleanup) while a heat lamp shines on one side. Just be sure you’re not creating a fire hazard.
Using paper towels for bedding encourages the curled feet to flatten out as the babies learn how to walk. They grow rapidly and you don’t want their feet to be deformed!

I use a plastic mason jar lid to put the chick starter food in. Another lid for filtered water, some drops of apple scrap vinegar, thyme, and slices of fresh garlic is also a good idea. It gives the chicks a health boost when they take their first drink.
I also add some grit (a.k.a. sand and tiny pebbles from outside) and fresh yard greens like clover, grass, plantain, and dandelions.
Baby chicks need to be exposed to any bacteria on the farm right away while they still have immunity from absorbing the yolk right before hatching.
The mother hen’s immunity is passed on through the yolk but quickly disappears from the baby chick after hatching. They have about 3 to 4 days before it disappears.
The baby chicks graduate from the nursery and go to the outdoor brooder when they are dry, fluffy, and can walk around well.
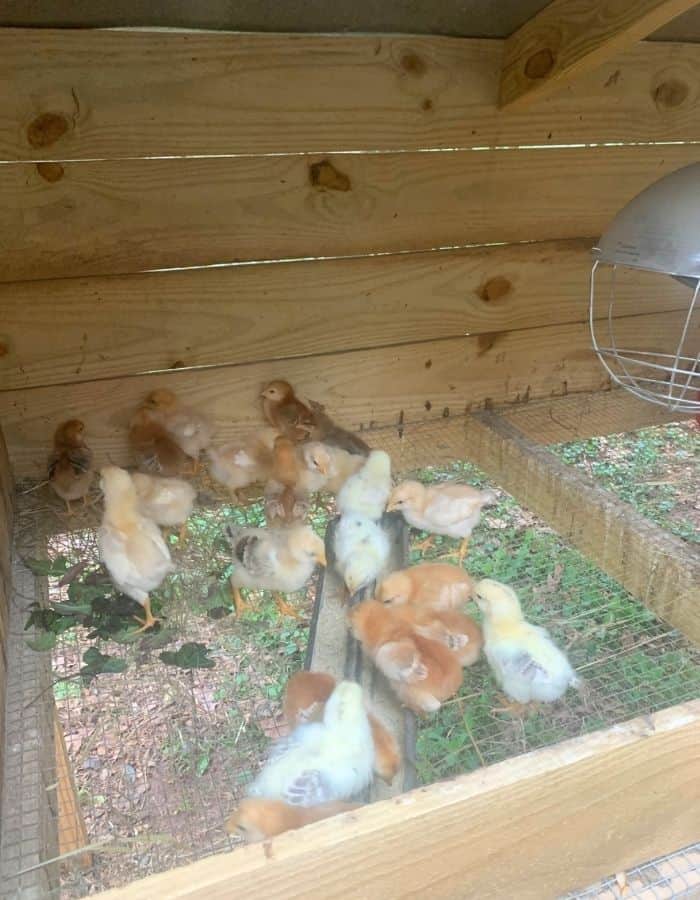
The baby chicks stay in the heated brooder for a few weeks and then they go into a protected mobile coop.
Where should you put an egg incubator?
Keep your incubator in a visible spot in your home so that you can monitor the eggs and refill the incubator with water daily. You don’t want to forget about the baby chicks, so put them where you can check on them often throughout the day.
Also, keep your incubator away from windows to protect the eggs from direct sunlight and drafts.
I like to keep our incubator on the kitchen counter.
How long does it take chickens to hatch?
Chicken eggs need 21 days of incubation to hatch. The hatch rate is determined by humidity, temperature, egg rotation, egg fertility, and the quality of the egg shell.
You can hatch eggs using an automatic incubator, which takes all the guess-work out, but a good broody hen (or turkey!) will happily do the job for you, too. We use both methods.
How long does it take ducks to hatch?
Duck eggs generally need 28 days of incubation to hatch. However, Muscovy duck eggs need 35 days to hatch.
How long does it take quail to hatch?
Quail eggs need 16 to 23 days of incubation to hatch. The exact incubation period is different for different breeds.
How long does it take pheasants to hatch?
Pheasant eggs need 23 to 37 days of incubation to hatch. The exact incubation period is different for different breeds.
How long does it take turkeys to hatch?
Turkey eggs need 28 days of incubation to hatch. If your egg turner tray (if your incubator is automatic) isn’t large enough for large turkey eggs, you’ll have to manually turn your eggs to be sure the babies grow properly.
Will all the eggs in the incubator hatch?
All the eggs in a warm and humid incubator will hatch as long as they are fertilized eggs and the shells don’t have large pores allowing bacteria in. That’s why candling your eggs to select good eggs right from the beginning is important.
You’ll need to keep a rooster if you want your hen’s eggs to be fertilized. Generally, you want one rooster per seven to ten hens. There’s no way to be certain that an egg is fertilized when you put it in the incubator but you can be pretty certain that the rooster will do his job with the hens.
Additionally, candle the eggs you want to incubate and select the eggs that have a solid shell when you sit it on a light.
Shells that have large pores and allow light to pass through several weak spots in the shell are not good candidates for the incubator. They’re still fine for eating, though!
What do you do if your eggs don’t fit inside the egg turning tray?
If your eggs are either too large or too small to correctly fit inside the egg turning tray, you can buy different size trays.
The Nurture Right incubator we use has different size options.
The small tray fits quail and other small eggs.
The medium tray fits standard chicken eggs.
The large tray fits goose and turkey eggs.
The extra-large tray fits Emu eggs!
What temperature do you hatch eggs in the incubator?
Chicken eggs need to be 99.5°F (37.5°C) to hatch in the incubator. They also need to have consistent humidity.
Aim for 50% humidity (48% – 55% is acceptable) until your eggs have 3 days left before their hatch day. Then increase the humidity to around 70% (65% – 75% is acceptable).
Do your research for ideal temperature and humidity levels for other species because some have different needs.
How do you manually turn eggs if your incubator is not automatic?
You should manually turn eggs at least three times per day so that the babies inside grow properly. Always turn eggs an odd number of times so that the side during the long overnight hours is different every night.
You can lightly use a pencil to mark one side of every egg. You can label one side “A” and the other “B” for example. Doing this will help ensure you’re turning all of them.
Should you help baby chicks hatch from the incubator?
You generally should not help baby chicks hatch from an incubator because it’s important that they hatch on their own timeline. But there are some exceptions to consider.
Baby chicks have the equivalent of an umbilical cord running from their belly to the yolk sack. If you start pulling off the egg shell prematurely, you may rip the cord out and kill your baby chick on accident.
When should you help baby chicks hatch from an incubator?
If you have a baby chick in an incubator that has been struggling to hatch for at least 24 hours, you may want to help them hatch.
This happened to us.
We have hatched several batches of baby chicks in our automatic incubator and we never had any issues…until recently.
In the picture below, you’ll see a baby chick that has hatched and one that is hatching but still inside the shell. The one that was inside the shell actually had a good 12-hour head start on hatching. However, after 24 hours I decided to take a closer look to see what was going on.
I found that the chick had mostly broken through the eggshell but for some reason still couldn’t get out.
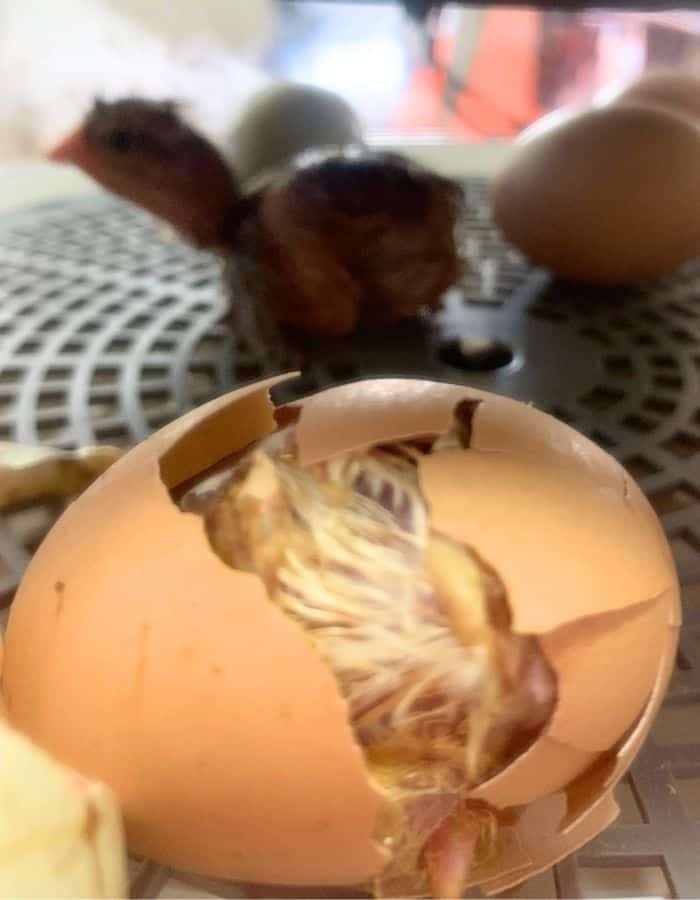
I knew it was time to intervene when I saw the eggshell was mostly broken all the way around but the chick was still struggling.
How should you help baby chicks hatch from an incubator?
If the baby chick has been trying to hatch for at least 24 hours and you’ve decided to provide assistance, you need to take the chick out of the incubator and drip clean, lukewarm water on the eggshell being careful not to drown the baby chick.
I put some clean, lukewarm water in my sink and soaked a clean wash cloth. Then I held the baby chick in my hand and large pieces of eggshell came off but the chick was still stuck inside the membrane.
This can happen if the humidity drops too low during the last 3 days in the incubator. My incubator humidity never dropped and was on the higher side, though.
I eventually realized that the baby had used the bathroom inside the egg. Then the bathroom mess dried and basically glued the little guy to the membrane.

Warm water was all we needed to soften the membrane and the bathroom mess. I was able to carefully remove the loosening portions of the egg shell.
If you’re ever in this situation, don’t rush the process. Give the warm water time to soften everything up. You don’t want to rip any baby feathers out!

Let warm water drip onto the baby chick to keep it warm and comfortable as you continue removing the shell and membrane. But be careful around the nose and mouth so you don’t drown it.

The precious baby was weak from fighting so hard to hatch.
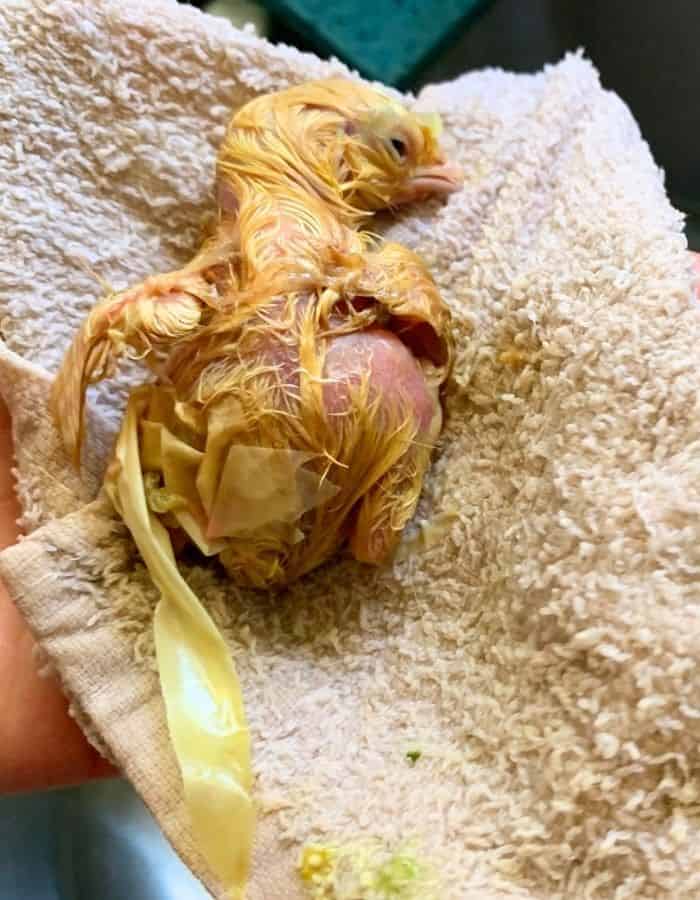
I gave him a warm bath to get the rest of the residue off and wrapped him up in a warm towel. And then that sweet little face looked at me.
The precious little thing melted my heart and I’m so glad I intervened! I know he would have died if he didn’t get any assistance.
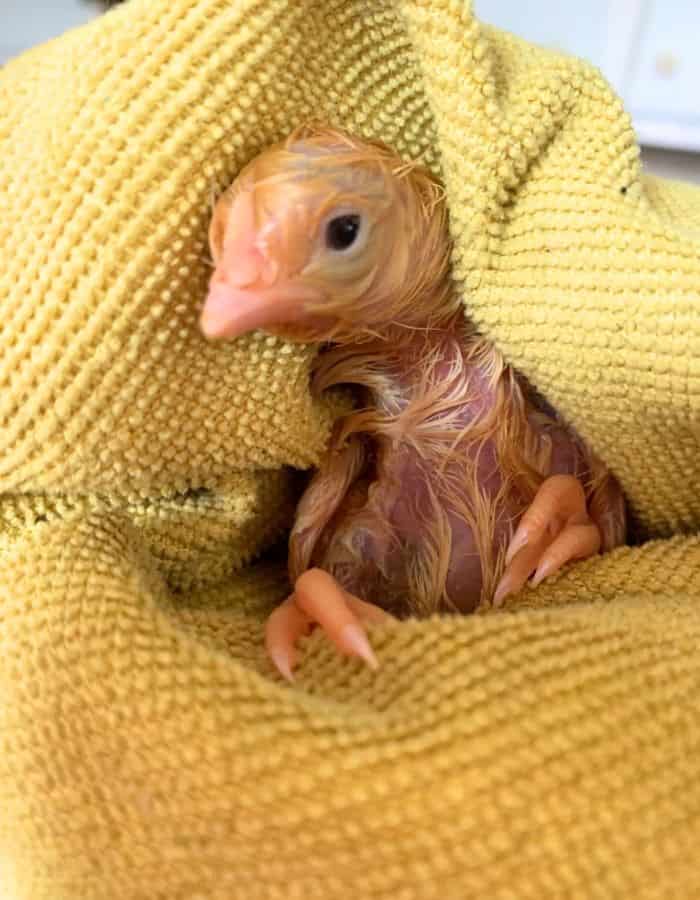
So always check the eggs inside the incubator. Give the babies 24 hours to hatch on their own but be ready to provide assistance if they need help.
Leave a comment.
Leave a comment and let me know if you found this post helpful! It’s really easy to hatch your own baby chicks in an incubator.
Shop This Post!
Manna Pro Harris Farms Nurture Right Incubator
Egg Trays for Nurture Right 360 Egg Incubator (Various Sizes)
New Country Organics Soy-Free Poultry Starter, 25 lbs
Other Posts You May Enjoy
How Much Worm Castings Should You Add to Soil?
How to Raise Chickens for Cheap!
Pin “How to Hatch Eggs Using an Incubator” For Later!



So helpful! Thank you!