Homestead Chicken Harvest Day! (Part 2)
(This is not a tutorial!) We had seen a lot of YouTube videos on harvesting chickens before moving to the farm. You can successfully harvest a chicken with as little as a sharp knife, a pot of scalding hot water, and some string to hang the chicken from. However, it goes by a lot quicker if you have some additional equipment.
This post contains affiliate links, which means I make a small commission at no cost to you. Click here for my full disclosure.
I hope this post encourages you to consider growing and harvesting your own meat chickens if you have the space. You can read Part 1 in this series here. The price for chicken and other food keeps going higher in the grocery stores, but you can inflation-proof your meals if you dedicate 12-13 weeks to growing your own meat chickens and harvesting them yourself. It’s a great skill to have!
Equipment We Use on Chicken Harvest Day
This is everything that we use on harvest day:
- Killing cones (we use two to make the process go quicker)
- table (for evisceration)
- 5-gallon buckets for the offal
- Sharp filet and/or boning knives
- poultry shears (for cutting off the head, neck, and the oil gland on the tail)
- turkey fryer pot (for the scalding water; this pot also comes with a useful thermometer)
- hot plate (for the scalding water)
- heat-proof gloves (to keep hands from burning in scald water and later for shrinkbags)
- lead- and bpa-free water hoses (we use two on harvest day)
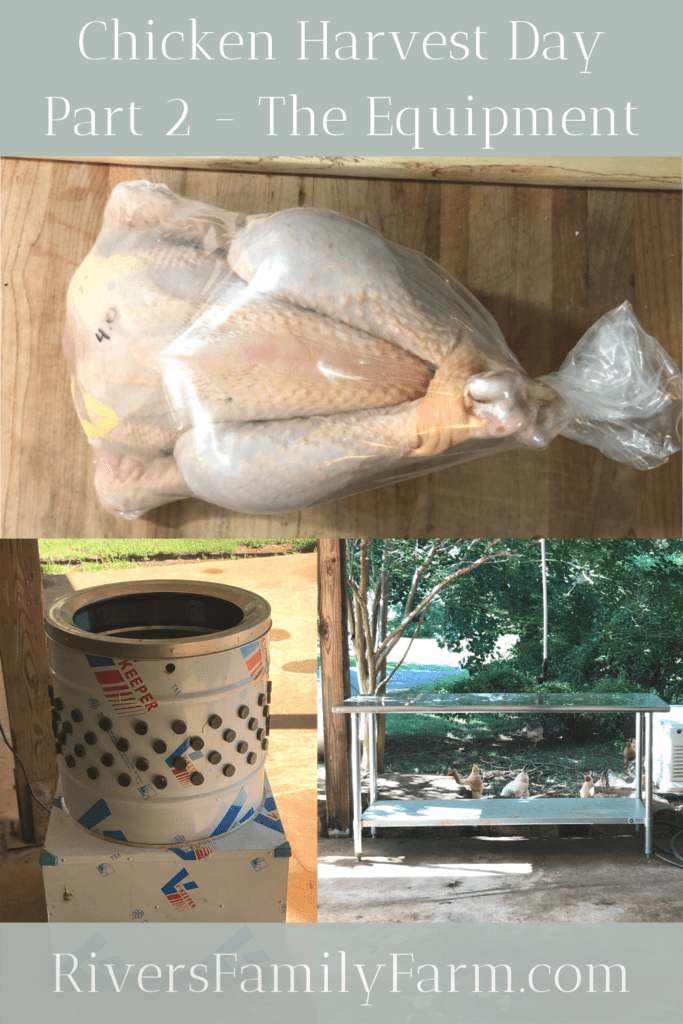
- feather plucker (this is an investment but helpful if you’re harvesting a significant number at any one time)
- coolers filled with ice water
- chicken shrink bags (go with the USA-made shrink-wrap here; there’s no nasty chemicals in them)
Killing Cone(s) and Scalding Water Station
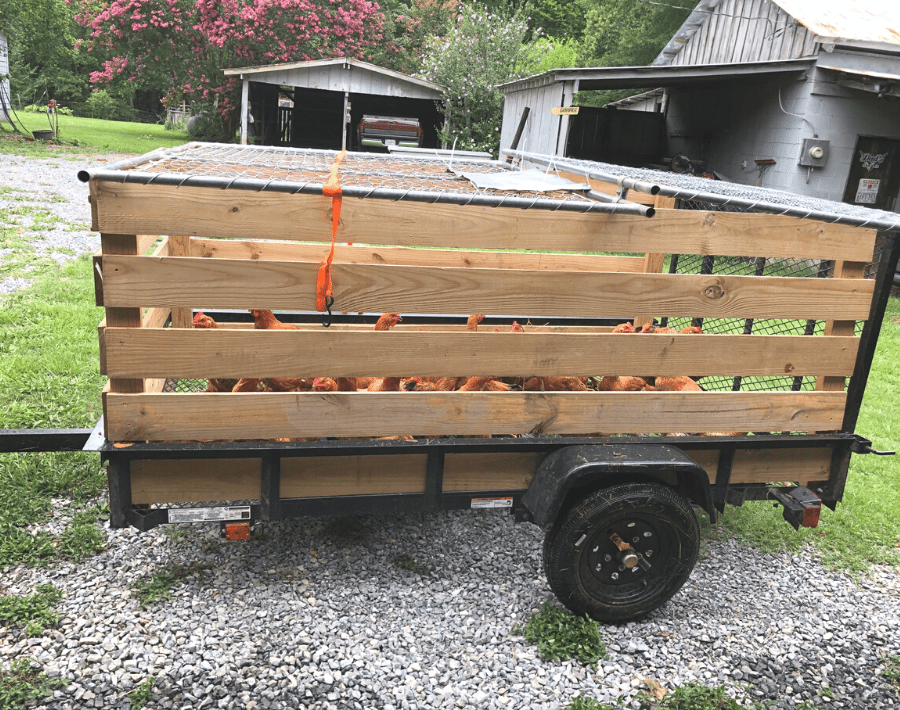
First, it’s helpful to have your killing cone(s) close to the chickens and the scalding hot water station. We like to put all the live meat chickens in the back of our trailer and then drive it up to our carport where we do all the processing. The level concrete pad is ideal for our equipment but it’s also easy to clean.
Keep efficiency of movement in mind when you’re setting up your processing stations.
The chickens get pulled out of the trailer one by one and go to the killing cone. Make sure you have a 5-gallon bucket directly underneath the cone. (This is not a how-to post, so I’m going to be skipping some steps here.) Once the bleeding has stopped, we put on a heat-proof glove and repeatedly dunk the chicken in a big 32-quart turkey fryer pot of scalding hot water (145 degrees) with a little bit of Dr. Bronner’s liquid castile soap. The pot sits on a hot plate to keep the scald water at the right temperature. The bit of soap in the water helps to break up the surface tension so the scald water reaches the skin to better loosen the feathers. When the feathers start to pull out easily and the skin on the legs is easy to push off (anywhere from 30-90 seconds in the scald water), it’s time to move on to the next station…the feather plucking machine if you have one or you’ll be doing it by hand.
Feather plucking machine
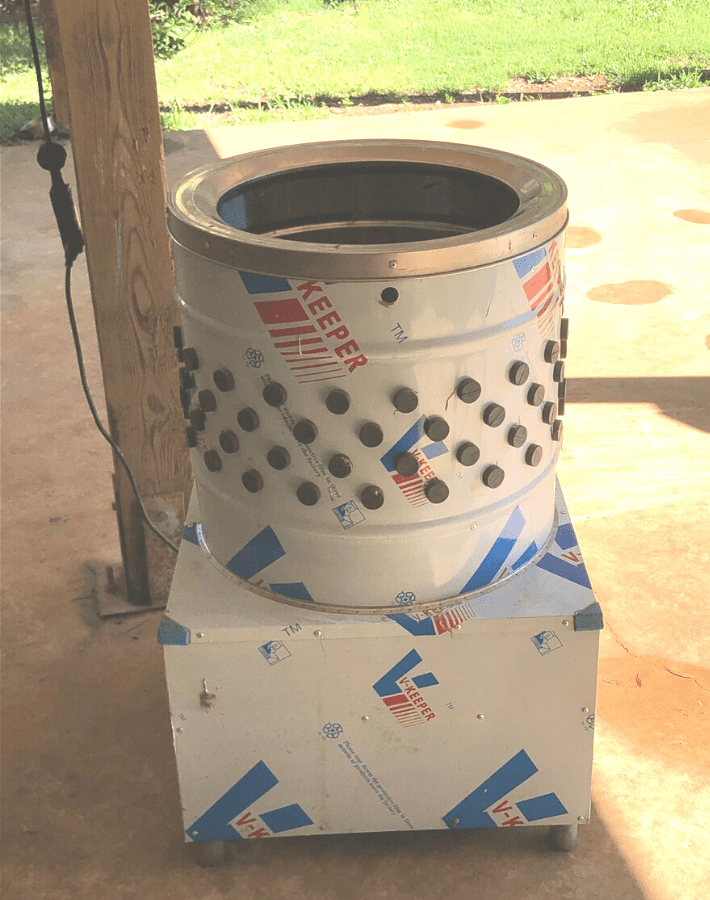
Buying a feather plucking machine is an investment but it saves so much time that it’s worth it if you’re harvesting a lot of chickens at once and you intend to harvest your own meat birds year after year. The feathers all come out in about 30 seconds in this machine.
The model we purchased has worked very well but I’d buy this plucker if I had to buy another one. The main reason I’d switch is because the one we have is cumbersome to move. It takes two of us to lift it up and put it into a wheelbarrow and then it’s a struggle to move it for storage. If I needed to buy another one it would have wheels and be easier to clean.
We also use a lead-free water hose at this station because when the chicken comes out of the scald water, shocking with cold water helps the feathers come out easily.
If DIY is more your style and you want to try to build your own plucker, try this popular one!
Evisceration Station
After the feathers are plucked, it’s time for the evisceration station.
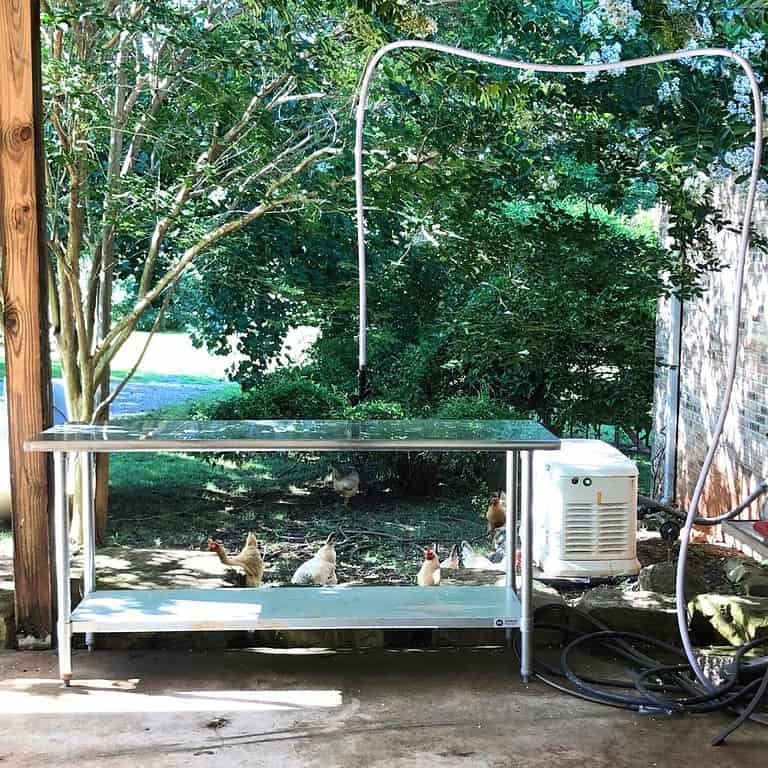
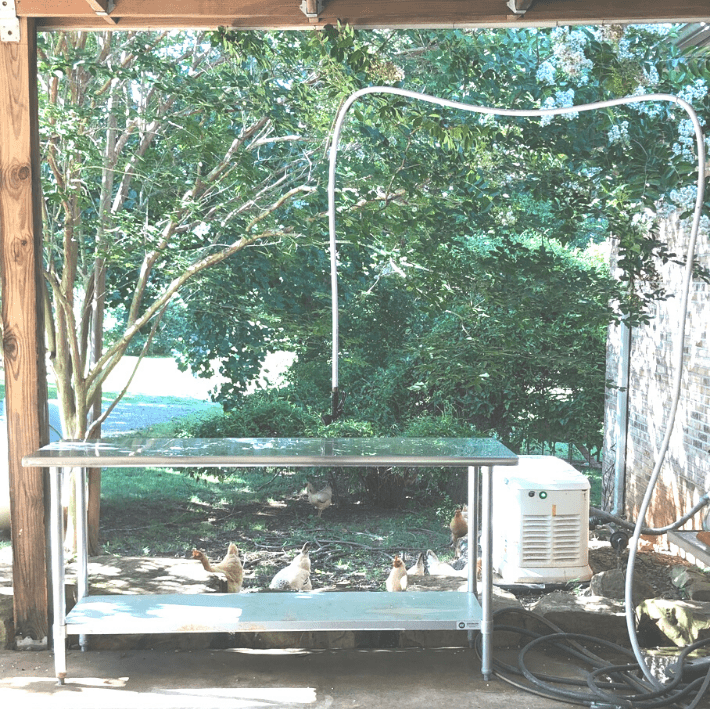
It’s handy if you have an evisceration station complete with a table, some sharp knives, poultry shears, and 5-gallon buckets for the offal. We have a stainless steel 72″ x 30″ table without a backsplash but I recommend getting one with a backsplash to prevent slippery chickens from sliding off the back side. This one is what I’d buy if I had to buy another one. There are two of us on evisceration table duty so the extra space is handy; however, if only one person is eviscerating, you can get by with a smaller table.
We also use another lead-free water hose at this station. It’s simple to suspend it on wire clothes hangers from the roof. The hose is necessary to spray off the chicken, the table, and to keep hands clean throughout the evisceration process.
Coolers or Chill Tanks
We use coolers filled with ice and water to store our chickens in after processing them. We break for lunch after we harvest the last chicken for the day and the processed chickens stay nice and cold in the coolers until I come back outside to shrink-wrap them.
Shrink-wrap Station
I like to shrink-wrap the chickens for the freezer using shrink bags made in the USA. Other shrink bags have BPA and other chemicals in them that I try to avoid, but the USA-made bags are the best ones on the market right now. They also hold up for a long time in the freezer. I haven’t lost a frozen chicken to freezer burn yet!
The other items you’ll need for the shrink-wrap station include a clean, large turkey fryer pot on a hot plate along with heat-proof gloves. The hot water (180-200 degrees) shrinks the bags around the chickens to create a good seal and get all the air out. You can use the same turkey fryer pot as was used in the scald water station, just make sure it’s good and clean.
A lot of tutorials will have you use a knife or pin to puncture a hole in the bag before dunking in the hot water and after zip-tying the chicken inside the bag. That creates a vent hole that lets air escape when the bag shrinks around the chicken. I don’t like to do that because I’m not a fan of juices running out of the bag when thawing out a frozen chicken. Instead, I insert a large, reusable straw into the cavity of the chicken and out the bag as I zip-tie it shut around the straw. I’ll pull the straw out after shrink-wrapping the bag around the chicken and then I’ll tighten the zip-tie to close it up.
That’s it! That’s everything that we use to process chickens on chicken harvest day! If you want to watch a tutorial on how to harvest chickens, this YouTube video is very instructive.
Leave a comment.
Are you ready to take your self-sufficiency to the next level? Are you ready to start growing and harvesting your own meat animals? Please leave me a comment to let me know if this post has encouraged you to give it a try!
Shop This Post!
killing cones
table (a small table works for one person; get the larger one if two will be on evisceration table duty)
boning knives (we use three: one for the killing cone and two for each of us at the evisceration table)
poultry shears
turkey fryer pot
hot plate
heat-proof gloves
water hoses (go with these lead- and BPA-free hoses)
feather plucker
chicken shrink bags
Other Posts You May Enjoy
How to Make and Store Rendered Chicken Fat (Schmaltz)
When is the Best Time to Order Baby Chicks?
It’s a Homestead Chicken Harvest Day! (Part 1-Why and What)
Preparedness Tips to Save Money on Food
Pin It For Later!
