How to Trim Cow Hooves the Easy Way
Do you have a cow and would you like to learn how to trim cow hooves the easy way? Some cow hooves wear down and grow at about the same rate and don’t require any hoof trimming. However, some cows grow hooves at a faster rate than they can wear down and will require an occasional trim.
If you find yourself in the latter boat, let me assure you that you are capable of being a farrier to your cow. I’ll walk you through each of the steps we use to trim our dairy cow Belle’s hooves.

This post contains affiliate links, which means I make a small commission at no cost to you if you place a qualifying purchase through any of the links. Read my full disclosure here. Thanks for your support!
Anatomy of Cow Hooves
Cows are cloven-footed animals. That means they have two digits instead of one solid hoof like that of a horse. The two digits are called claws and they’re named for their relative location on the foot. There is an outer, or lateral claw, and there is an inner, or medial claw.
The lateral claw is slightly larger on the back feet and the medial claw is slightly larger on the front feet.
The space between the two claws is called the interdigital clef and the skin is called the interdigital skin.
The hard, outer covering of the hoof is called the hoof wall, or horn. The cells that form the hoof wall are produced by tissue directly underneath, called the corium.
The corium is a nutrient-rich tissue that has many blood vessels and nerves. It’s similar to the quick in human fingernails because it continuously produces new cells that are gradually pushed away from it and they eventually die, are keratinized (or cornified), and form the hard hoof wall.
Underneath the hoof is a softer area called the sole, which is produced by the corium of the sole. Inside the hooves are bones and fatty tissue, which provide the framework for the general shape of each claw.
Cow hooves grow an average of 2.5 to 3 inches per year.
What are cow hooves made of?
Keratin, the structural proteins that makes up your fingernails and toenails, makes up the cow hoof wall, sole, and heal. It’s also what covers the bone of cow horns.
How much does it cost to trim cow hooves?
A farrier will typically charge you around $100 to come out and trim your cow’s hooves. The price goes higher if there’s anything wrong with the hooves that require special attention, such as severely overgrown hooves, abscesses, cracks, and foot infections like foot rot (a painful, contagious bacterial infection making the feet swell and causing the cow to go lame).
If you do it yourself, trimming cow hooves only cost your time, a scrap piece of plywood, a one-inch bevel chisel, and a hammer.
Is trimming cow hooves painful for cows?
Trimming cow hooves is not painful for cows, unless you cut too far back on the hoof and draw blood.
Cows may get shocked if they’ve never had their hooves trimmed before, but it won’t hurt them as long as you cut and trim the dead hoof horn. If you go too deep and draw blood by trimming too much hoof, that’s when you’ll hurt your cows.
Cow Hoof Trimming Tools
For the purposes of this post and trimming healthy cow hooves at home, the main tools you need are:
- large piece of plywood (a 4-foot square piece is what we used)
- one-inch bevel chisel
- hammer
- old rag, or a grooming brush
- leather work gloves (optional)
You’ll need your cow to stand on something hard, like plywood, while you trim the hooves. It also helps to clean the hoof with an old rag or grooming brush. If you like to wear gloves while working, I love my soft, leather gloves.
Unless your cow is very tame or lays down a lot and will let you work on its hooves, you won’t need a professional farrier set which includes nippers, file, knife, and hoof pick brush.
Why would you trim cow hooves?
You would trim your cow’s hooves as part of an overall maintenance program, to prevent injury, and to maintain proper body movement.
As mentioned at the beginning of the post, not all cows need to have their hooves trimmed but some of them do. Especially if it happens to be a dairy cow that you’ll keep year after year.
Our dairy cow Belle walks a lot on pasture and is able to keep her front two hooves worn down pretty evenly, but her back two hooves get long and start to chip. I didn’t want her long hooves to crack and risk infection, so she needed a trim.
Another reason to trim your cow’s hooves is to keep her ankles in the right position. When hooves get too long, it changes the way the cow stands and walks.
Imagine yourself walking on a beach with flippers on and that’s kind-of how a cow feels with long hooves. Exaggerated body movement and motion might hurt her.
Important Tip: It’s best to limit any unnecessary stress to your cow. If she’s a dairy cow, make her feel comfortable just like when you milk her. Keep your dogs (or other animals) away from her and only have people she’s familiar with around her. Also, keep it short if it’s her first time. You’ll want to train her to have her hooves trimmed.
How to Trim Cow Hooves the Easy Way
These instructions are for a dairy cow that is regularly milked.
First, put plywood on the ground in front of your stanchion.
We used a 4-foot by 4-foot square piece of plywood, but you can use something similar that you might already have on hand.
The main goal is to have something hard for your cow to stand on that won’t damage your chisel.
Second, lead your cow into the stanchion, and lock her head into place.
We put Belle into her stanchion since she’s our dairy cow. The stanchion locks her head into place, and it wasn’t a new location that might cause her stress. It also helps if your cow can eat while you work on her.
We don’t tie Belle’s legs or do anything else when we milk her except rub her down with her grooming brush, wash and dry her udder, and then milk her. However, if you tie your cow’s legs to her stanchion when you milk her, continue what you’re both used to.
Third, select the hoof that needs the most attention and clean it.

Evaluate each cow hoof and select the one that needs the most maintenance. Then, clean the hoof with an old rag or hard bristle brush.
The main goal of cleaning the hoof is to see the hoof very well and any ridges that naturally form.
Fourth, trim the cow hoof with a chisel and hammer.
Get your one-inch bevel chisel and hammer ready, and put your gloves on.

Position your one-inch bevel chisel on top of the hoof at the outer edge. With the bevel pointed toward your cow so that it cuts away from her hoof, tap the end of the chisel with your hammer so that it cuts a small bit of the hoof tip off. It’s a good idea to move out of the way quickly in case your cow kicks sideways.
The first time I trimmed Belle’s hooves, she kicked sideways because she was shocked. But I was already out of the way and she didn’t kick me. You want to be careful and get out of the way quickly after each cut.
I trim the outer claw first, and cut little bits off with the chisel. You don’t want to cut big chunks off, and small bits are better. I stop trimming when I think we’ve trimmed enough back.
The tip is the hardest part of the hoof to cut, so cut bits of hoof off little by little. The goal is to cut the inside between her claw at rounded angles.
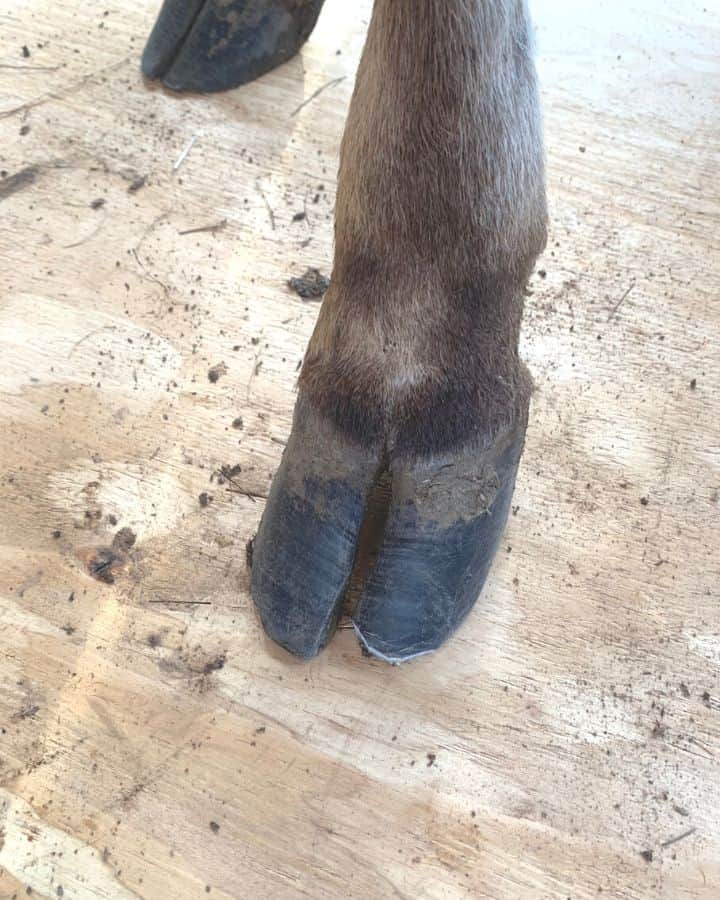
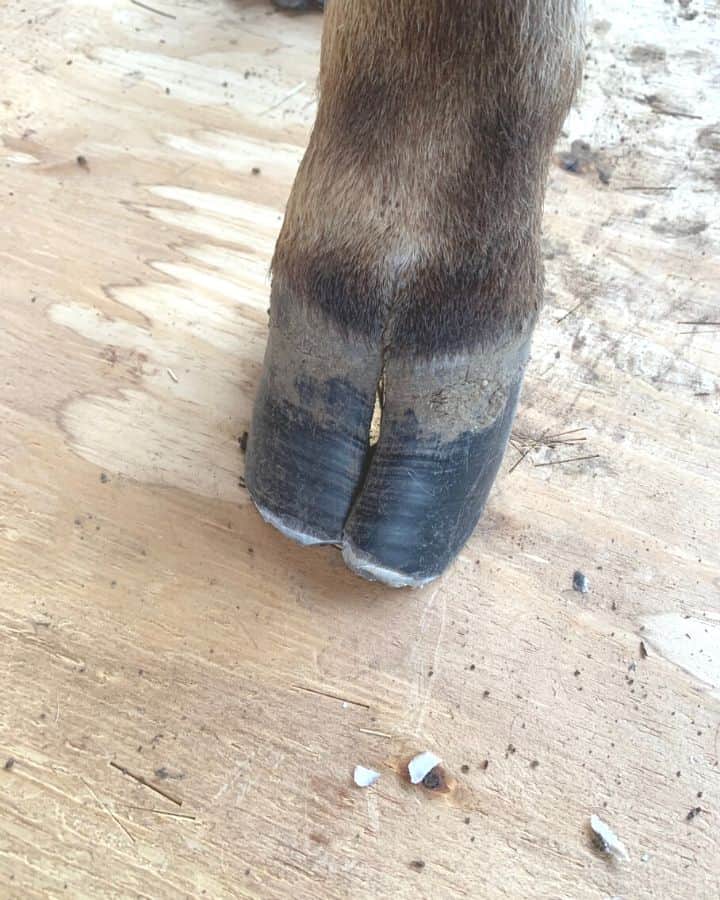
Then, I trim the inner claw to roughly match the length of the outer claw. Be sure to keep the outer claw longer on the back feet and the inner claw longer on the front feet.
If your cow’s hoof claws overlap and cross at the front, be sure to work slowly and carefully to remove enough hoof to fix the overlap issue. They shouldn’t be crossing when you’re done trimming, unless your cow hoof has other issues.
Summary of Cow Hoof Trimming: Step-by-Step Instructions
Tools you need to trim cow hooves.
First, get out a one-inch bevel chisel (or any size you feel comfortable with) and a hammer. Make sure your chisel is sharp and clean. Then, put a piece of plywood down. Have a cleaning rag or grooming brush nearby along with work gloves if you use them.
Step 1. Prepare your working area, such as a stanchion.
- Put a piece of plywood down on the ground in front of a stanchion so your cow can walk on it.
Step 2. Position cow in the stanchion.
- Lead your cow into her stanchion on top of the plywood floor, and lock her head into place. Give her plenty of food so she’s happy and distracted.
Step 3. Select a hoof to trim and clean it.
- Select the cow hoof that needs the most maintenance, and clean the cow hoof with a cleaning rag or grooming brush.
- Clean well enough to see the natural growth lines of the hoof.
Step 4. Trim cow hoof with chisel.
- When you’re both ready, place your chisel on the inside tip of her outer hoof claw with the bevel facing her leg so that it will cut away from her. Do not cut a large chunk off…it’s best to trim little by little.
- With your chisel firmly in your hand and in place on her hoof, tap two light taps with your hammer and immediately pull your hands and body away from her. This will give you a baseline of what her reaction will be if you’ve never trimmed her hooves before. If you need to tie her leg to the post of her stanchion because she kicked, do so now.
- Place your chisel again to cut away from her, and hammer hard two times. If she picks up her foot, wait for her to settle it down again before continuing.
- Continue using your chisel and hammer to cut the hard tip off of her hoof. You should be able to see clean hoof each time your chisel takes a piece off.
- Once you cut the hard tip off of her hoof on one side of her claw, continue trimming back the hoof until you get to a good length or you start to see a color change. Stop trimming back the hoof when you see a color change. That may indicate that you’re about to get close to the alive part of the hoof.
- Finish trimming one claw. Then trim her other claw on the same foot. Remember to keep the outer claw longer on the back feet, and the inner claw longer on the front feet.
Step 5. Repeat the process to trim other hooves.
- Finish with one hoof, and then switch sides to trim the other hoof.
- If one of the claws is chipping, trim back at least that far to get rid of any chips or cracks.
Important Tips to Remember
- Limit any stress to your cow before you start trimming hooves.
- The beveled side of the chisel should always face your cow’s leg so that it will cut away from her.
- The tip is the hardest part of the hoof and may take several hammer swings before your chisel can cut the pieces away.
- Cut little by little, as your cow allows.
- Keep your trim time short if this is your first time trimming your cow’s hooves. Limit to two feet for your first session.
- Keep the outer claw longer on the back feet and the inner claw longer on the front feet.
- Don’t chisel back any farther when you start to see a color change in the cow hoof, which may indicate that you’re about to get close to blood vessels and nerves. (Belle had a color change on one of the claws of her back foot. This could mean that I trimmed back far enough and would have gone into blood vessels and nerves if I had trimmed any farther. However, it could also be a bruise from stepping on a rock. I’m going to have to lift her leg to see if there’s a rock stuck in her hoof.)

I hope this post gave you the confidence you needed to trim your cow’s hooves at home!
Shop This Post!
Other Posts You May Enjoy
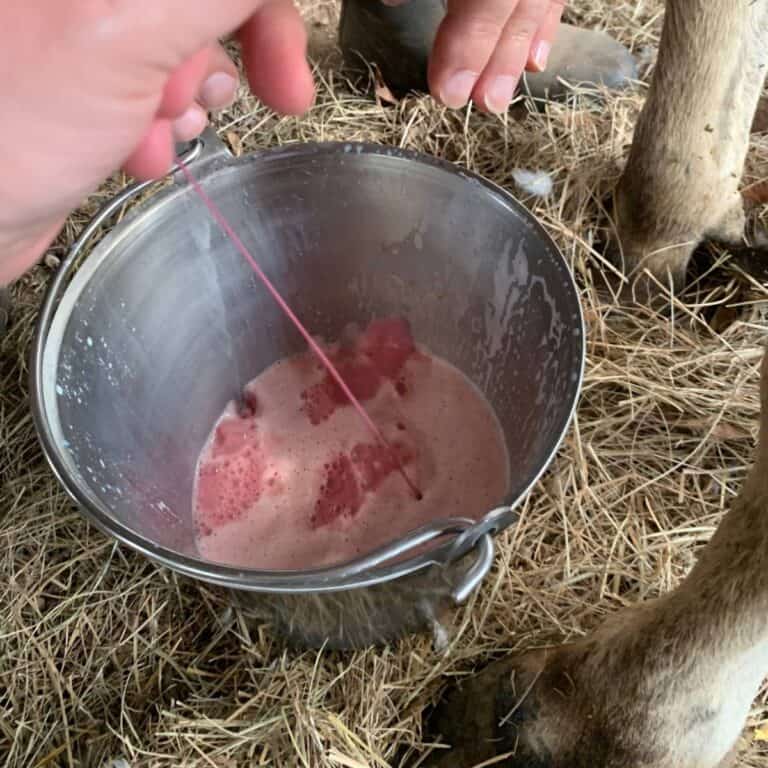
Got blood in your cow milk? Why and what to do about it.
The Secret to Raising Livestock for Cheap
Pin “How to Trim Cow Hooves the Easy Way” For Later!




Thank you for this! We’ve really needed to get our cow’s hooves trimmed and haven’t been able to find anyone to come do it. This is really helpful to giving us some confidence on how we can do it ourselves. Thank you!
That’s the same boat that we were in, too! We couldn’t find anyone around here who would come trim cow hooves. Our only option was someone that had started shoeing horses that the feed store recommended. He came out and did the best he could. It wasn’t his fault that Belle tried kicking him when he grabbed her foot and pulled up (like you do with horses)…bless his heart…and HERS! He was only able to trim two hooves and called it quits after an hour. He declared then and there that she was his first and LAST cow trimming. But I assure you, you ARE capable of trimming your cows hooves right at home and it’ll be much less stressful using the method I describe in the post! Good luck!!
This is great info. I’ve never seen people trim cows hooves. Wouldn’t have even thought to do it. This will be a great reference when we make our move.
Hopefully you won’t need to trim any hooves because not all cows need a trim. But I’m glad this post is helpful if/when you do!
This is great!! My horse is barefoot and I would love to learn how to completely trim his feet. But this is a good start 🙂
I’m glad you liked this post! I believe there is a lot of similarity in trimming cow hooves and trimming horse hooves but I’ve never done horses before.
Thank you for this info! I trimmed my girls hooves but now the claw splay out? Did I do something wrong?
You’re welcome! Depending on how your cow is standing, it’s OK if her claw is spread out. In fact, that’s how it’s supposed to look! You probably did everything right. The main thing is to not cut too much off of her claw and to keep the lateral claw (outer claw) slightly larger on the back feet and the medial claw (inner claw) slightly larger on the front feet….for balance.
Thank you! It’s just her back hooves. Now I’m wondering if they were always a little more splayed in the back.
I know what you mean. If she’s walking fine, I bet you did a great job and I’m sure she appreciates it!