How to Milk a Cow by Hand
I wished I had found a post on how to milk a cow before we got our dairy cow but I couldn’t find one anywhere. I hope this helps first-time-milkers and takes some of the uncertainty out of the equation. It’s a really simple process to milk a cow but there is a skill involved.
In this tutorial, I’ll share with you our whole process from how to milk a cow by hand to how we filter and store the raw milk.
This post contains affiliate links. As an Amazon Associate I earn from qualifying purchases. That means I make a small commission at no cost to you if you place a qualifying purchase through any of the links. Read my full disclosure here. Thanks for your support!
When we first moved to our farm, we dove into the deep end with full enthusiasm. We had been researching for years and watching others on YouTube live this lifestyle and we thought we knew what we were doing.
For the most part, we’ve done pretty well. And people say that the best teacher is experience. That’s been true for us.
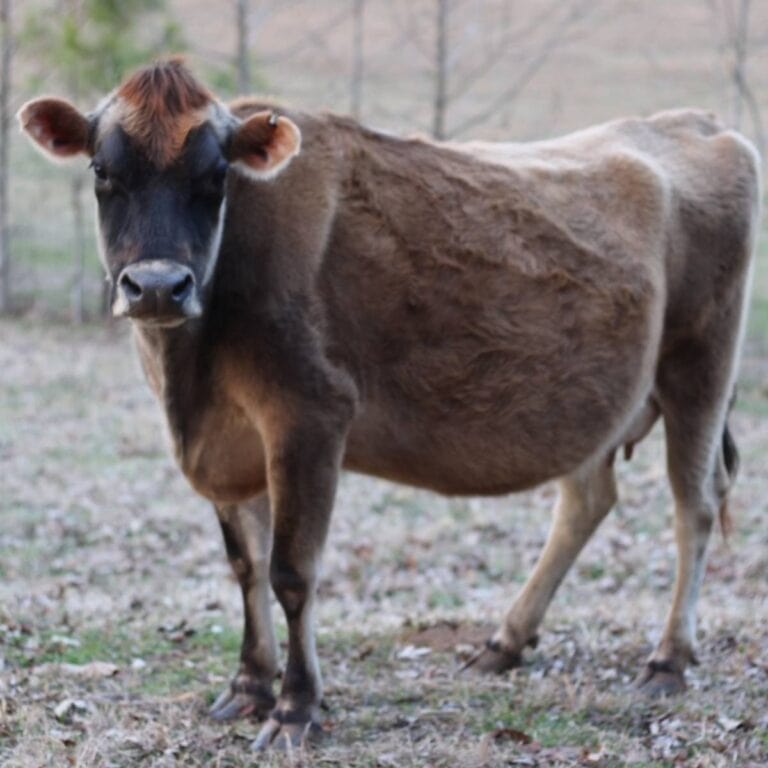
That’s how it was when we bought Belle, our precious Jersey dairy cow, sight-unseen from a sweet lady in Ohio we met through Facebook.
I don’t ever buy anything from strangers and I would certainly never spend so much money on a farm animal sight-unseen. But for whatever reason, we felt REALLY good about this lady and all the pictures and videos she sent us on Belle. And we talked to her for hours before and after she drove Belle to our farm. She was truly a God-send…such a great mentor.
We bought Belle as a 2-year-old bred heifer. That means she had never had a baby calf before but was pregnant.
She was tested for various diseases and everything came back clean. She also had A2A2 milk which was something I wanted in a home dairy cow.
When she calved and “freshened” (started producing milk), we didn’t really know what we were doing. We only had a general idea from watching others do it on YouTube.
But here’s everything you need to know about how to milk a cow by hand.
What you’ll need for the milk:

Milk Bucket and Lid
You’ll want to have at least one good quality stainless steel milk bucket but preferably two milk buckets with at least one lid.
If you plan on using a dishwasher to sanitize, make sure you get buckets that will fit in comfortably.
We use a 9-quart milk pail to put under Belle when we milk her. When the milk pail is about half-full or so, we pour the milk into a larger 2.6-gallon milk transport bucket with a lid. That keeps the milk clean and safe.
Both of these buckets plus the lid fit nicely into the bottom of our old dishwasher. Measure your space, though, and get buckets that will fit inside your dishwasher, too. Unless you plan to wash by hand.
Stainless Steel Milking Funnel with Ring
Getting a good quality stainless steel dairy funnel with a tight-fitting ring (to hold your filter in place) will make filtering your milk easier. You’ll be pouring from a large bucket and having a large funnel will catch all your milk without spilling any.
The filter and ring fit nicely into the top rack of my dishwasher when we wash our milk buckets.
Filters
There are disposable filters made specifically for filtering dairy.
They’re almost like a really thick coffee filter. If you prefer, you can also use a reusable stainless steel filter or flour sack towel.
Make sure you get the right size filters for your stainless steel funnel and ring. They come in two standard sizes.
Half-Gallon Mason Jars and Lids
Using half-gallon mason jars are easier to pour from than the gallon size. However, use what you have on hand until you can find a good deal.
I like to use plastic mason jar tops for my milk but the flat lids and rings that come with your mason jars are perfectly fine, too.
What you’ll need at the barn:

Stanchion
It’s easier to milk your dairy cow if you’ve built a stanchion for her.
My sweet husband built our stanchion in one of the stalls at our barn. It’s good if it also has a mechanism for locking your cow’s head in place; although I find that Belle will stand still even without her head being locked into place.
Stanchion Food
Your dairy cow will stand still in her stanchion and even be excited about going in if she knows that she will get some food.
Use what you have on hand or what you can build to make a platform for her food. We slid the discarded base of a grill we found up to the stanchion and put a large rubber bowl on top of the grate. Any food that falls down is happily eaten by the chickens and turkeys that like to hang out at the barn.
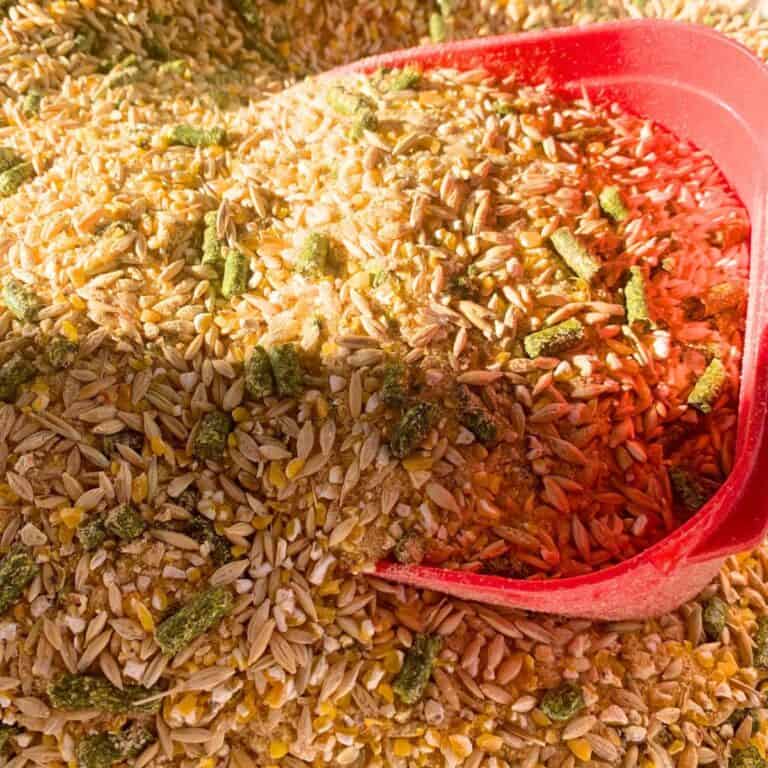
We like to put some alfalfa pellets, a bit of cracked corn, a sprinkling of food-grade diatomaceous earth, and about a fourth of a cup of homemade apple scrap vinegar in her bowl.
Belle gets excited about the alfalfa and the corn. The diatomaceous earth (DE) is to keep her digestion clear and to kill any intestinal parasites that may have found their way into her. Homemade apple scrap vinegar provides an extra probiotic boost for her since it has the mother in it.

Vet Visit: Easy and Cheap Way to Kill Parasites
I took a sample of Belle’s stool to our local veterinarian to check for parasites when Belle’s cow patties changed in spring. He met me in the lobby and asked me what I give Belle for parasites. My heart sank as I admitted we didn’t give her anything.
He then called me into the back room with a serious look on his face and I thought for sure I’d killed our cow because of my lack of experience and knowledge on animal husbandry. The vet took me to the lab where he explained that there wasn’t a single parasite in her stool.
He was certain that I’d given her something to kill off parasites and that I’d wasted his time to request him to fish around in her stool looking for little critters. My heart lifted and I told him that we only give Belle a sprinkling of DE over alfalfa when we milk her in order to naturally rid her body of any parasites.
He didn’t seem convinced…maybe he’d never heard of using DE before. But I’m convinced that Belle has immaculate digestion because of the DE!
And the best part is that DE is completely natural and healthy!
The vet told me that all cows have changes in their stool when the spring grasses start to grow rapidly. Loose stools are normal in spring and not something to be concerned with.
Milking stool
You’ll want to sit down on something when you milk your cow.
This can be as inexpensive as an overturned bucket or a homemade wooden bench. I used to sit on a small cooler until my sweet husband built a stool for me. Use whatever works for you.
Grooming brush
It’s handy to have a coarse bristle grooming brush.
We brush Belle’s belly and teats before we wash her. This removes any loose hair or dried mud. It also stimulates her to have a let-down. (A let-down is when her milk drops into her teats.)
Rags
Get some rags to keep at your stanchion so you can clean your cow’s teats before you milk her.
We keep Belle on pasture all the time so her teats are generally clean. But since her baby nurses, it’s important to wash and clean her teats anyway.
Hot, Soapy Water
You’ll want to bring some hot and soapy water with you when you’re ready to milk your cow.
I use Dr. Bronner’s organic liquid castile soap in a foaming hand pump. I put about four squirts of foamy soap into a pitcher filled about half-way with hot water.
Bucket or Laundry Basket for Dirty Rags
When you clean your cow’s teats, you’ll need something to put your dirty rags in to be washed.
I use 5-gallon buckets and laundry baskets. Use what you have on hand.
Empty 5-Gallon Bucket
Sometimes cows have a bad day or their routine is disrupted. If your dairy cow doesn’t like the way that something is going while she’s locked in the stanchion, she’ll let you know by hunching up her back, lifting her tail, and producing a big BM.
To cure her of this behavior, have an empty 5-gallon bucket handy to catch anything that falls. It helps if you have a bit of clean, dry hay in that bucket at all times.
You can dump the contents on your compost pile later. The bucket will prevent her from hearing the satisfying “plop” that she’s looking for and she is unlikely to do that again while in the stanchion.
Instructions for How to Milk a Cow
When you have everything you need in your kitchen and at the barn, it’s time to let your cow into her stanchion.
Step 1: Let your cow into her stanchion and lock her head in place loosely.
Make sure her food bowl has some goodies in it so she’s excited to get into her stanchion. It’ll take a few tries to get her to understand that there is food on the other side of her head lock if this is her first time going in.
Some cows are easier than others to train. Jerseys are especially easy to train to milk. It generally only takes them three or four times of doing the routine and they’ll remember from then on.

Step 2: Brush her and clean her teats with hot, soapy water.
Once her head is locked in place loosely, set up your stool next to her udder along with your hot, soapy water.
First brush her belly and teats to remove any loose hair or dried mud. Then dip a clean rag into hot, soapy water and wash each teat as well as the udder.
Throw the used rag into the dirty rag bucket and get another clean rag to repeat the process until you’re satisfied that her udder and teats are clean. Then wipe her dry with another clean rag.
I generally only use two rags for this process. Belle is on pasture and stays pretty clean, so I only need one rag for washing her and then another rag for drying her. However, if we’ve had a lot of rain and she’s muddy, it could take 5 or more rags to clean her up.
Step 3: Strip her out.
This just means to squirt the first few squirts of milk from each of the four teats onto the ground or into a separate bowl for thirsty dogs, cats, and chickens.
The reason you want to strip her out is because there may possibly be bad bacteria near her teat opening and it’s best to get it out of the way.
If you have barn cats like we do, squirt the first few squirts of milk into a small bowl so that they can drink it. We like to get five squirts out of each teat before we start milking into our bucket.
Step 4: Time to milk her.
Put your milk bucket under her udder.
Here’s where this gets technical. You’ll want to grab her teat as close to the udder as you can and kind-of pinch the teat at the crook of your thumb and point finger. This keeps the milk in the teat from backing up into the udder, which could create problems down the road.
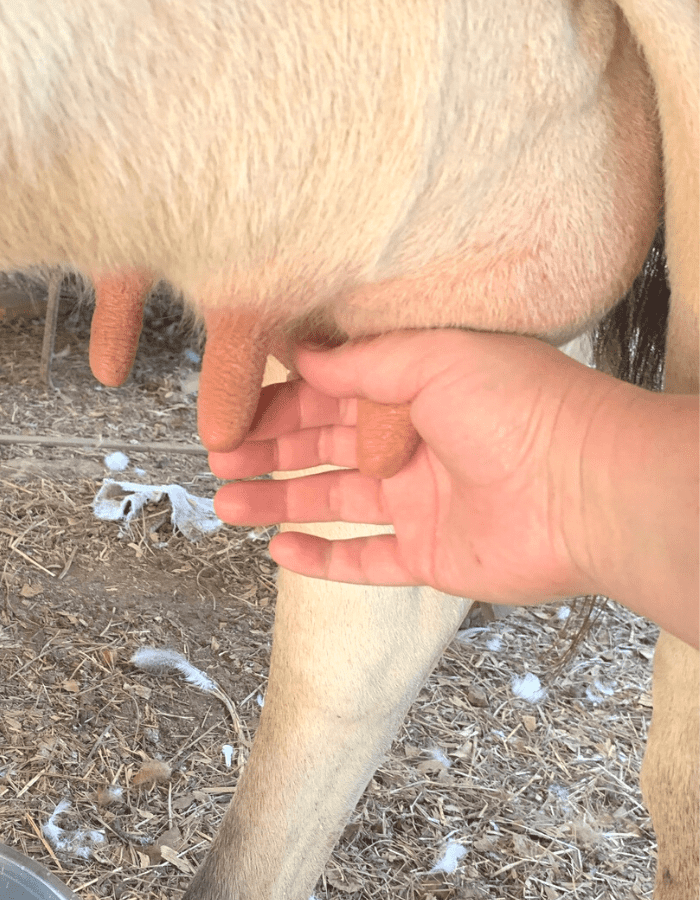
Then start closing your fingers around the teat so that your point finger and then your middle finger (if her teat is long enough) closes around the teat. At the same time, gently pull the teat downward toward the bucket. A stream of milk should squirt into your bucket.
When the milk stops flowing or slows down, relax your hand and fingers, go back to her udder, and pinch with your fingers and pull her teat repeating the process. It’s best to find a good rhythm.
You can alternate with your left and right hand so that you’re pulling at different times or you can pull two teats at the same time. It’s also important to rest your elbows on your knees. This may mean you need to scoot really close to your cow. Belle has never once kicked at us but be cautious with your own cow.
You don’t need to pinch her hard to get her milk out and you shouldn’t be making the tip of her teat “balloon” with milk or else this could harm her teat hole.
If the tip of her teat starts to balloon, you need to gently press it with an available finger (for example, the point or middle finger) to keep it from ballooning. This will also give you greater control over where the stream of milk goes.
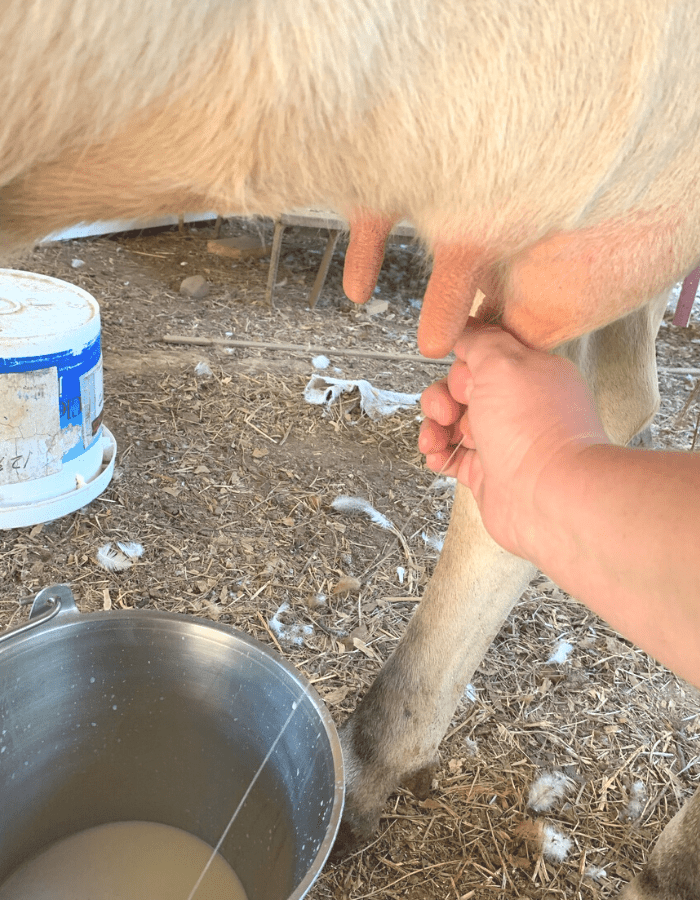
I like to use both hands to milk two teats at a time. If I have my milking buddy with me, he will sit on the opposite side of Belle and milk the front and back teats on his side while I milk the front and back teats on my side. If you’re doing this solo, you’ll have to milk two teats at a time and then milk the other two teats.
You’ll know you’re done milking when the milk stops streaming out. Also, your cow’s udder will be very soft instead of firm.
If you want, you can massage her udder and gently bump each quarter. Her calf bumps her udder instinctively when nursing to help her have another let-down of milk.
Continue milking until you’re satisfied that you’ve collected all her milk. If you plan on putting her back with her baby, don’t worry about not leaving enough for her calf. She will absolutely have another let-down for her baby.
Optional: Pour milk from your milk pail into a second bucket with tight-fitting lid.
We like to keep a second bucket with a tight-fitting lid off to the side when we milk Belle.
When our milk pail gets about half-way full, we will pour off the milk into the other bucket and put the lid on. This way, if Belle accidentally kicks the milk pail, we won’t lose all our milk.
If you’re new to milking or milking a new cow, I’d recommend getting the second bucket. Our second bucket also holds more milk than our milk pail, which comes in handy as Belle reaches her peak lactation.
Step 5: Let your cow out of the stanchion and put her back in her pasture.
When you’re done milking, put the lid on your milk bucket, put your stool back where it belongs, and slowly free your cow’s head from the stanchion. She should go out to pasture and have access to plenty of fresh, clean drinking water.
A word about iodine teat dips and udder balm.
If the calf is still nursing from your cow, you don’t need to put any kind of udder balm on her teats. You also don’t need any iodine. The calf will keep her teats clean.
If you’re weaning your calf and not allowing it to nurse from your cow, you’ll want to use udder balm or iodine with a teat dip cup after you milk her.
I like to use my homemade udder balm that’s made from organic coconut oil, beeswax, and cocoa butter. It’ll make sure no bacteria can get into her teat and it’ll also help her teats stay moist and not chap.
Instructions for How to Filter Raw Milk
Pour your milk through the funnel, filter, and into your container.
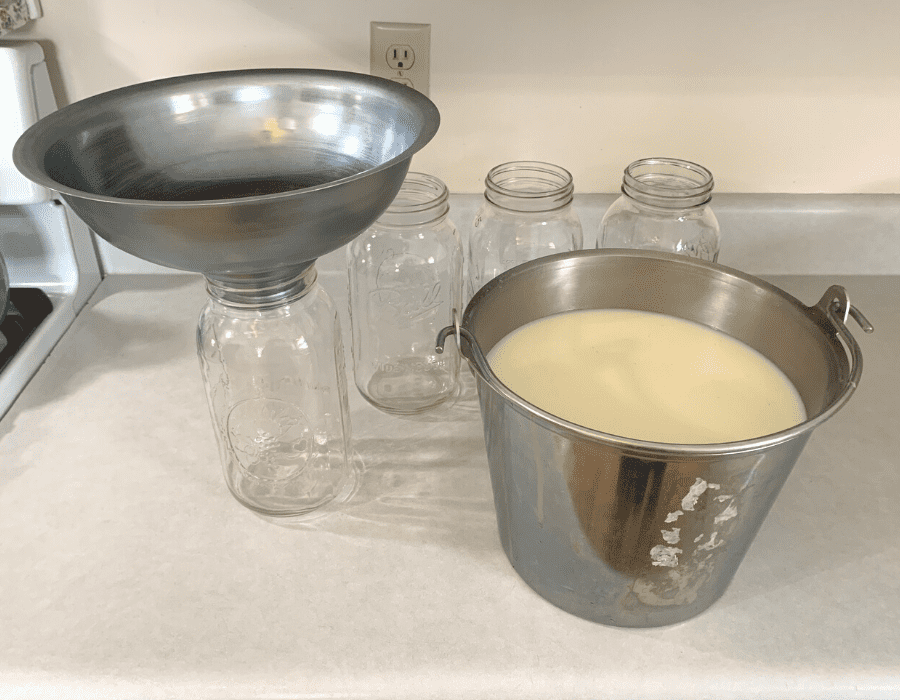
First, always have clean tools when you’re working with raw dairy. You don’t need to go overboard to sterilize the funnel and jars…putting them through the dishwasher is good enough.
As soon as you’re done milking, it’s important to filter your milk and refrigerate it quickly to retain the sweet flavor.
Also, filtering will keep it from developing off-flavors. Sometimes a small cow hair or a bit of dust will fly into the milk bucket. The disposable filters I like to use removes all of those small particles so that I’m left with only pure, raw milk.
You have some options when looking for ways to filter your raw milk.
What I use.
I use a stainless steel funnel with a ring that requires disposable filter disks. The funnels, rings, and filter disks come in multiple sizes. You can also use a funnel that has reusable stainless steel filters.
If you’re using a funnel with a filter disk, first take out the funnel ring and put it on top of your in-line milk filter disk.
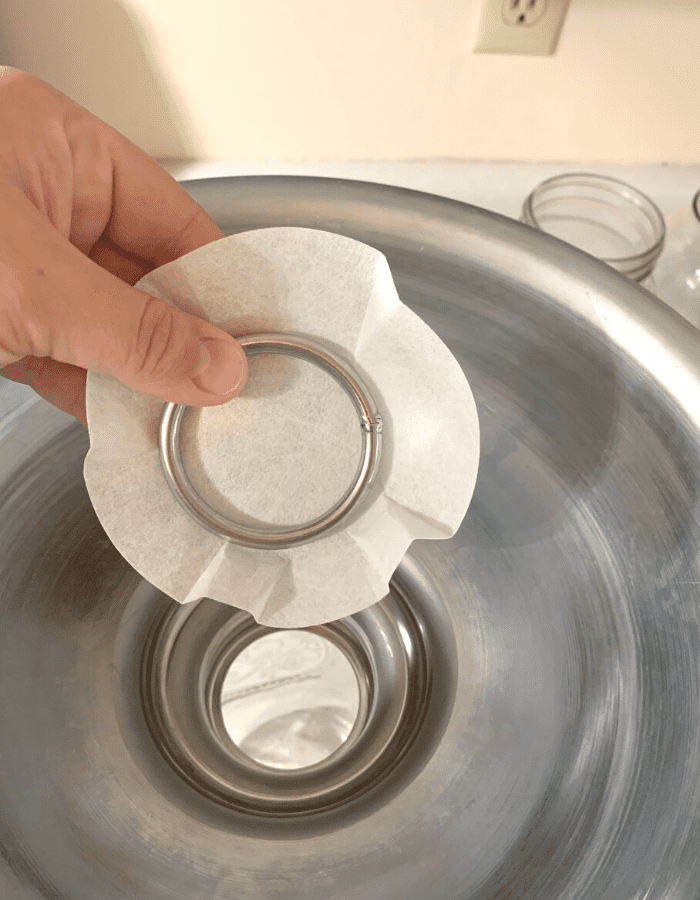
Push your ring and filter disk down snugly into the bottom of the funnel so it’ll stay in place. Then just pour your milk into the funnel and filter it into your jars!
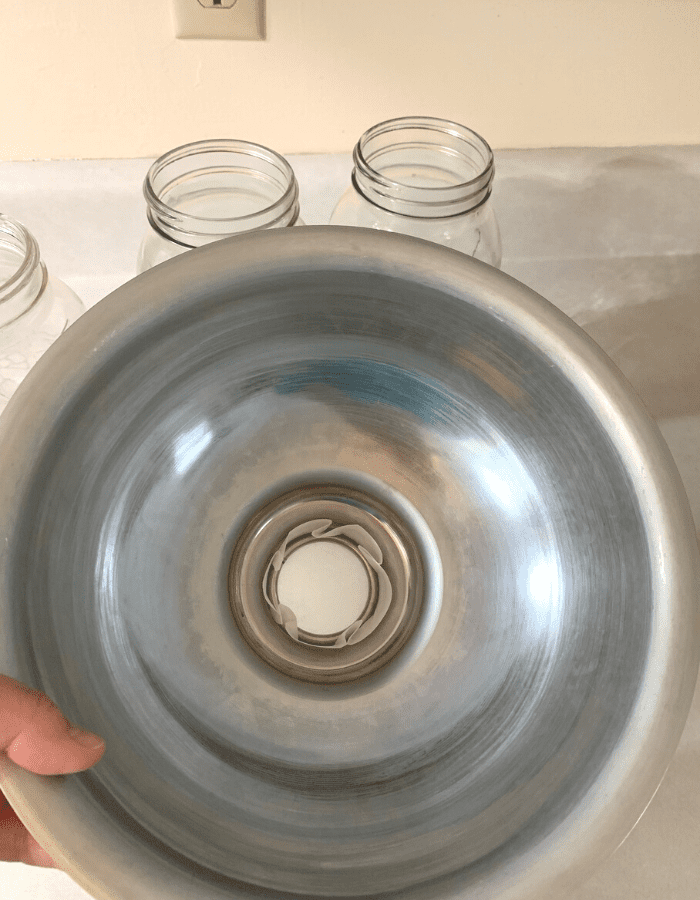
I like using glass mason jars for my milk because they’re versatile and easy to sanitize in a dishwasher. If you use a half-gallon size, it’ll be easier to pour from than using a gallon size. But use what you have on hand.
If there’s a lot of foam, CONGRATULATIONS! That means you milked out your cow very quickly. It also means there’s a lot of butterfat.
Sometimes you’ll have to wait for the foam to pop, but just keep pouring your milk into your funnel and filtering it until you have filtered all your milk. Then throw away your disposable milk filter.

How to Store Your Milk
Make sure you put the milking date on your jars and store them in your refrigerator as quickly as possible. The quicker you filter your milk and cool it down, the sweeter it will be and the longer it’ll stay sweet.
You’ll want to use the FIFO method of inventory here. That’s the First In, First Out method of using up the oldest milk first.
Use a black Sharpie to mark the date. It works great on glass and washes off easily with dish soap.
Milking is First About Perseverance…Then it’s Therapeutic
It generally takes my milking buddy and I about 10-15 minutes to milk Belle out. However, the very first time we milked her it took us about 1 hour.
Unless you grew up hand-milking an animal, your hand muscles will get very sore. You don’t know that your grip is weak until you hand-milk.
But here’s the silver lining. If you push through the soreness, you should get better relatively quickly. After 1 week it took us only about 30 minutes to milk her out. After a month we were able to milk her out in 20 minutes. It won’t be long after that and you’ll get down to 15 minutes or less with a buddy!
I have considered buying a milking machine in the past but I probably won’t take the plunge. It’s so enjoyable and therapeutic to hand-milk.
So unless you are milking more than one cow or don’t have a full range of motion or hand function, I’d recommend hand-milking for you, too.
How Long Will Your Milk Last?
Your raw milk is full of good bacteria and won’t actually go bad. Not in the sense that store-bought milk will spoil.
Raw milk will stay sweet in your refrigerator for several days if not weeks. It all depends on how clean your jars are and how well you filtered your milk, though.
We’ve had milk stay sweet for 2 weeks but eventually it will start to turn sour. Sour milk is great for baking with so don’t throw it out!
Troubleshooting Tips
If you’re new to farm life, hand milking, or machine milking a dairy animal, you may have encountered an issue that’s common but not talked about.
If you started milking your dairy animal but something other than white or creamy milk came out, don’t worry. You’re not alone! And chances are, you likely didn’t do anything wrong.
I wrote a detailed post about something very common after dairy cows have their baby. It’s a temporary issue but you may want some more information. If so, check out Got blood in your cow milk? Why and what to do about it.
I hope you enjoyed this post! And I hope you have the opportunity to milk your own cow one day if you haven’t had the chance already!
Next Steps
If you enjoyed this post, check out the other blog posts in this series!
21 Mistakes to Avoid When Buying a Milk Cow
Easiest Home Pregnancy Tests for Livestock
How Much Milk Does a Jersey Cow Produce?
What are the Health Benefits of Bovine Colostrum?
Take the Homestead Risk Assessment Quiz!
Are you interested in a free tool that can help you see how prepared you would be whenever life happens? I developed a Homestead Risk Assessment Quiz that can help you!

Shop This Post!
KenAg Milk Filter Disks 4-9/16″
Tuffy Milk Filter Disk 4-9/16″
Stainless Steel Funnel with Ring and 4-9/16″ Filter Disks
KenAg Milk Filter Disks 6-1/2″
Tuffy Milk Filter Disks 6-1/2″
Stainless Steel Funnel with Ring and 6-1/2″Filter Disks
Stainless Steel Milk Can with Tight-Fitting Lid (10 liter) (This is the second bucket we pour the milk from our milking bucket into and it fits into the bottom of our dishwasher.)
9-Quart Premium Stainless Steel Milk Pail, Made in USA (This is the bucket that we put under Belle to milk into. It fits nicely into the bottom of our dishwasher. If you can find this bucket with a lid, even better. It’s thick enough that even when Belle occasionally kicks it over, it doesn’t dent.)
Half-Gallon Mason Jars (Check your local hardware store or Walmart. I’ve been able to find these for as little as $5 each.)
Dr. Bronner’s Liquid Castile Soap
Foaming Soap Pump To make your own foaming soap, put about a half-inch of Dr. Bronner’s castile soap in the bottom of your soap pump and fill the rest of the way with tap water.
Other Posts You May Enjoy
The Secret to Raising Livestock for Cheap!
Preparedness Tips to Save Money on Food
Use Vinegar to Acidify Soil (Lower pH) for Blueberries
Pin It For Later!


Excellent post!! Such a great break down of the details. We forget the basics to share with people learning.
Great post! I always like to hear how others are doing it to see if I need to tweak my methods at all. But we’re just about exactly the same! She’s so pretty:) Currently waiting for our girls to calve so no milking for me right now…just waiting!!
So helpful! I’m getting my first milk cow soon 😉
I’m a very details oriented person, my wife will tell you how much that annoys her, and this post fits me. We’re really praying hard about moving out to a homestead to live this life, it sounds so great, even the hard parts
So many great points on milking here… and it applies to goats too! Now I just need the barn! Thank you for all the pictures and directions!
You’re very welcome!
THANK YOU for this wonderfully detailed, step-by-step article! We’re getting our first dairy cow soon and this is by far the best information I’ve come across. I felt much more ready after reading it! Thank you!
I’m so glad you found it helpful!
What is DE you referred to feeding with alfalfa to your cow and where do you purchase it?
Hi Carolyn, We mix in a couple tablespoons of food grade Diatomaceous Earth (DE) into our cow’s alfalfa pellets. I personally like to buy a 50-pound bag of DE from Azure Standard (which lasts us years) because of the purity and because it’s a powdered fresh water shell made of amorphous silica (silica in its naturally occurring state and a trace mineral every mammal on the planet needs to live). You’ll want to avoid crystalline silica, which is extremely dangerous when inhaled or ingested, and it’s not biodegradable. Here’s an affiliate link to the DE we buy from Azure in case you’re interested: https://bit.ly/RiversFamilyFarmDE. If you need a much smaller quantity to try out, Amazon has a great 2-pound bag of DE that is mined & packed in the USA. I hope this helps!
Love, Rebekah