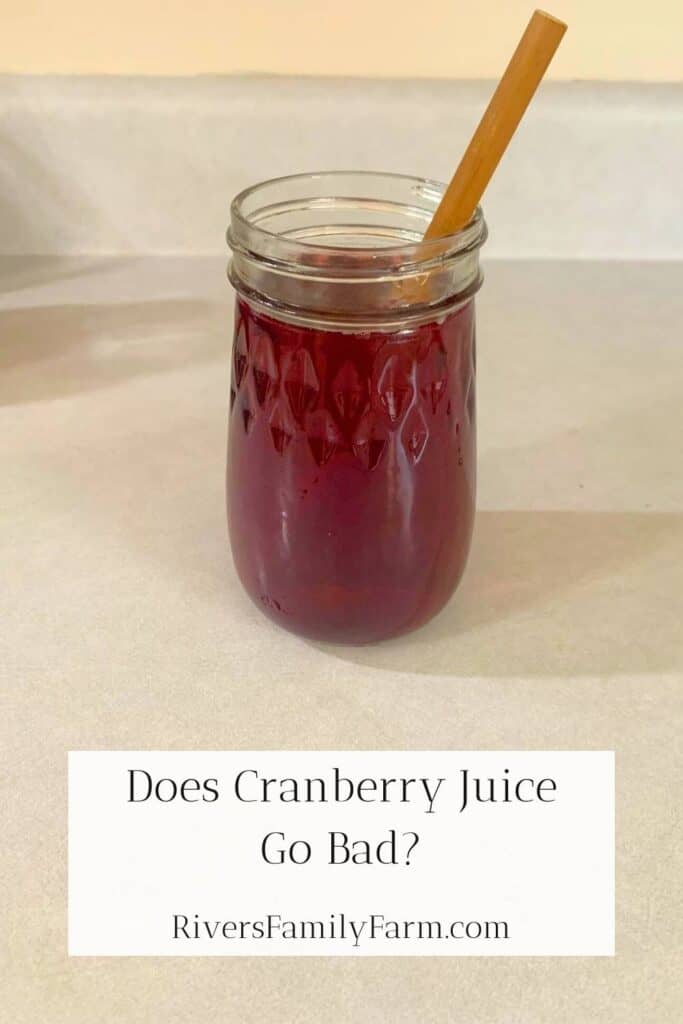
Does cranberry juice go bad? How long does it last?
Does cranberry juice go bad? Learn how long cranberry juice lasts and how to make it last longer using different storage options. I’m sharing my recipe for making cranberry juice plus a tutorial for water bath canning so that you can have a ready supply of the best quality of cranberry juice on your pantry shelf!
If you’ve never made fruit juice before, I want to encourage you to give it a try! Making it at home is simple, plus it is usually the cheapest option.
Does cranberry juice go bad?
The shelf life of cranberry juice doesn’t have a precise answer. In most cases, unopened cranberry juice doesn’t go bad as long as it is stored properly. Opened cranberry juice doesn’t generally go bad…it starts fermenting. However, there are other factors to consider.
Unopened cranberry juice can be stored at room temperature and safely consumed by the expiration date. Homemade juice that has been water bath canned can safely be consumed indefinitely as long as the seal on the lid is not broken.
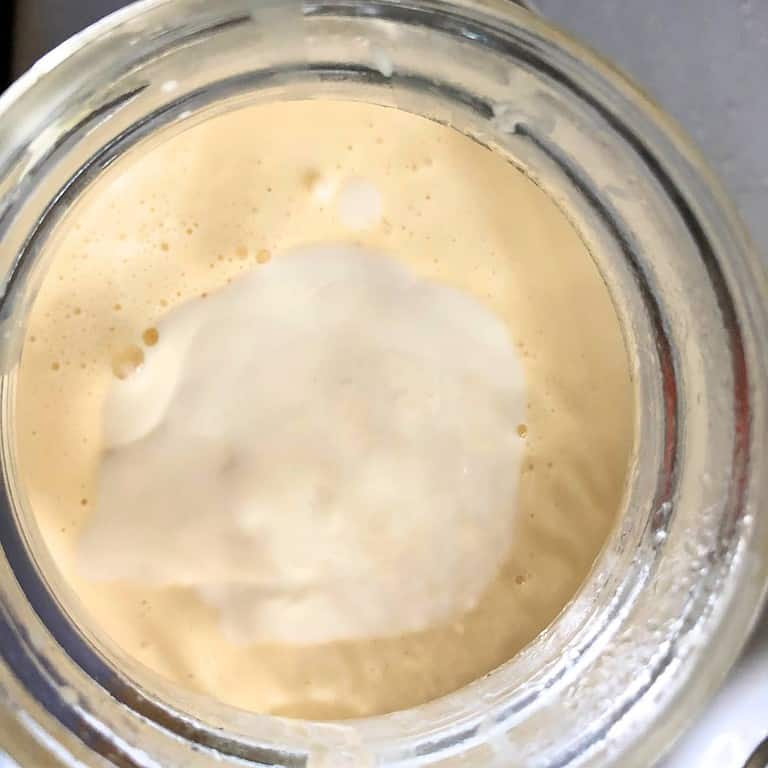
The shelf life of opened cranberry juice depends on bacterial growth native in your kitchen. Cranberry juice doesn’t exactly go bad…it starts fermenting.
Fermentation is a chemical process that occurs naturally when foods that have been submerged in a brine (salt water), or drinks are left out to interact with the native yeasts and bacteria in your kitchen. A SCOBY (symbiotic culture of bacteria and yeast) starts to develop, and the bacteria and yeast consume the starch or sugar content and turn drinks into alcohol while foods become more acidic.
Fermented products prohibit the growth of bacteria (bad bacteria, specifically), and it’s a traditional form of food preservation that has been safely used for centuries.
How long do fruit juices in plastic bottles last?
Unopened bottles of fruit juices that are made commercially should generally be used within the next 12 to 18 months, or by the best-by date or expiration date on the product label for best results. Keep in mind that plastic bottles degrade over time, so you may want to purchase juice in glass jars instead of plastic bottles.
It’s a good idea to store opened bottles of leftover juice in your refrigerator and use it up within 7 to 10 days to preserve its freshness. Alternatively, you can pour your leftover juice into containers (leaving an inch of headspace at the top) and freeze it.
How long does home-canned fruit juices in glass bottles last?
Home-canned food and drinks are best when consumed within 12 to 18 months because nutrition starts to degrade after that. It’ll still be safe to consume for years, though, as long as the seal on the lid stays strong.
Important Information
For food safety, always perform at least two tests on your food and drinks. First, the sight test. Look for signs of spoilage and see if there are any noticeable growths or off colors. Second, the smell test. Smell it to see if it smells normal and pleasant, and don’t consume it if there is an off odor.
Cranberry products including cold-pressed juices and fresh cranberry juice should be prepared in a safe way. Fresh cranberries should be washed very well if you can’t buy organic cranberries, because there is a potential risk of E. coli infections.
Cranberry Juice Recipe and Canning Instructions
When you’re preserving your harvest this summer, don’t forget to preserve something to drink! This homemade, unsweetened cranberry juice is cheap to make and lasts a long time on your pantry shelf.
Healthy, organic juice from the grocery store is expensive. But there’s a much cheaper option. You can make your own cranberry juice at home!
When you make your own juice, you can customize it to exactly what you and your family like.
This post contains affiliate links, which means I make a small commission at no cost to you if you place a qualifying purchase through any of the links. Read my full disclosure here. Thanks for your support!
Ingredients
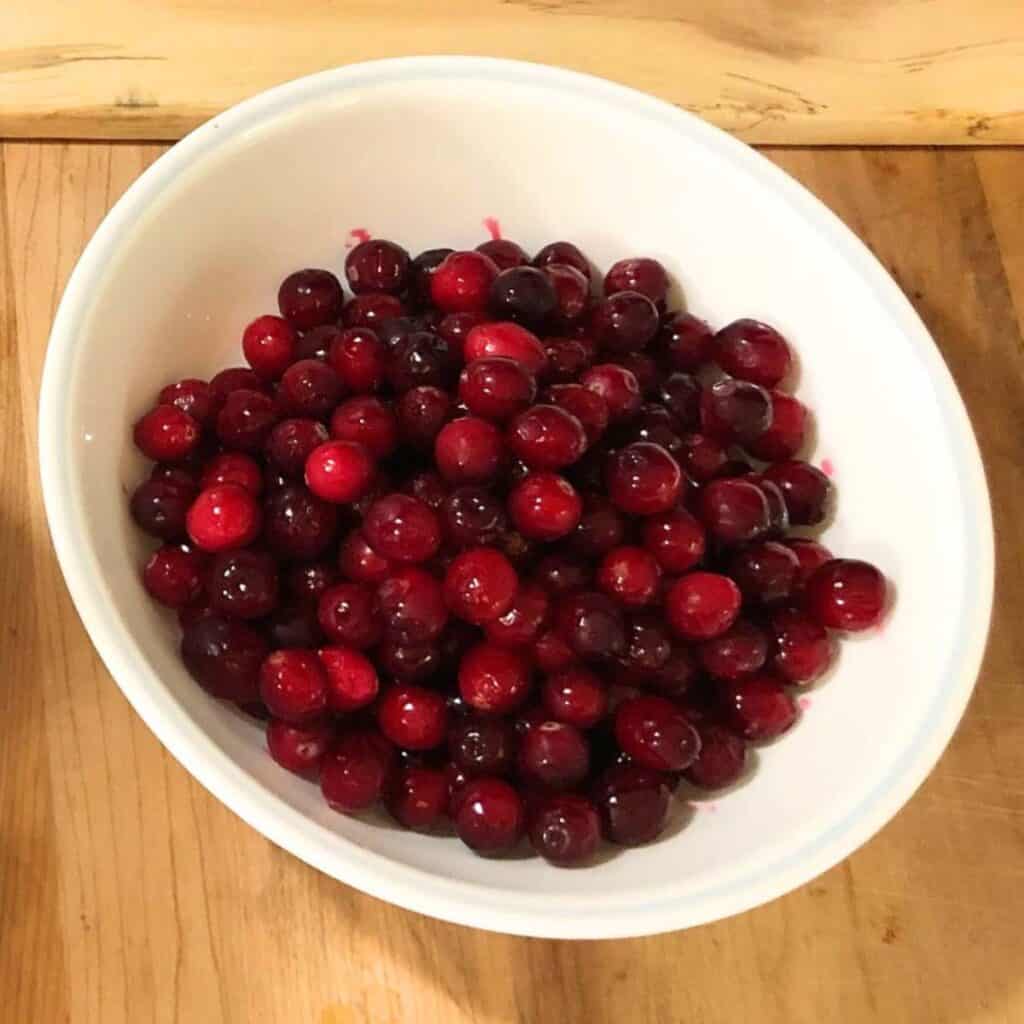
Cranberries – I like to order organic cranberries in bulk from Azure Standard and keep them in the freezer for making cranberry sauce and cranberry juice. They’re also delicious in smoothies! You can also find cranberries on sale during the holiday season, so stock up and store them in your freezer.
Water – It’s best to use filtered water, but you can also leave a pitcher of tap water out overnight so that the chlorine evaporates (if you are on city water).
When it comes to making and canning fruit juices, I like to skip the sweeteners. I will occasionally add different homemade flavored extracts like vanilla extract or almond extract or both. But for this generic recipe, I’ll stick with just berries and water with no added sugar.
Check out this blog post if you would like to learn how to make homemade vanilla extract for cheap and save big bucks!
Tools you may need
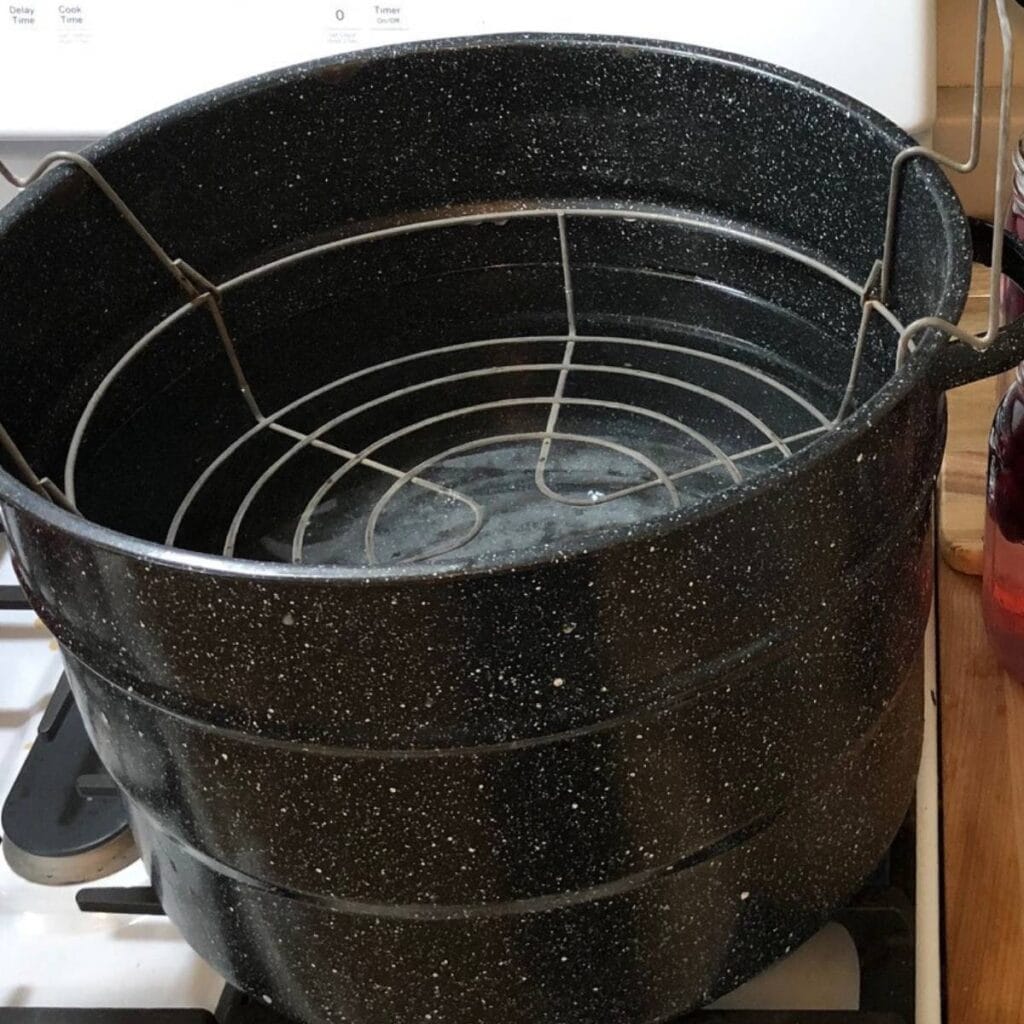
Water bath canner (or large pot and lid) – If you don’t have a water bath canning set with a jar rack, you can use a large pot and lid and make your own jar rack. You don’t want your glass jars to sit directly on the bottom of a hot pot because the glass may shatter. So add a trivet or even use metal twist ties to fasten several canning rings together!
Quart size canning jars and new lids
Measuring cups
Basic Recipe and Canning Instructions
The basic recipe for making and canning cranberry juice also applies to making grape juice, blueberry juice, and similar other juices. And it is amazingly SIMPLE!
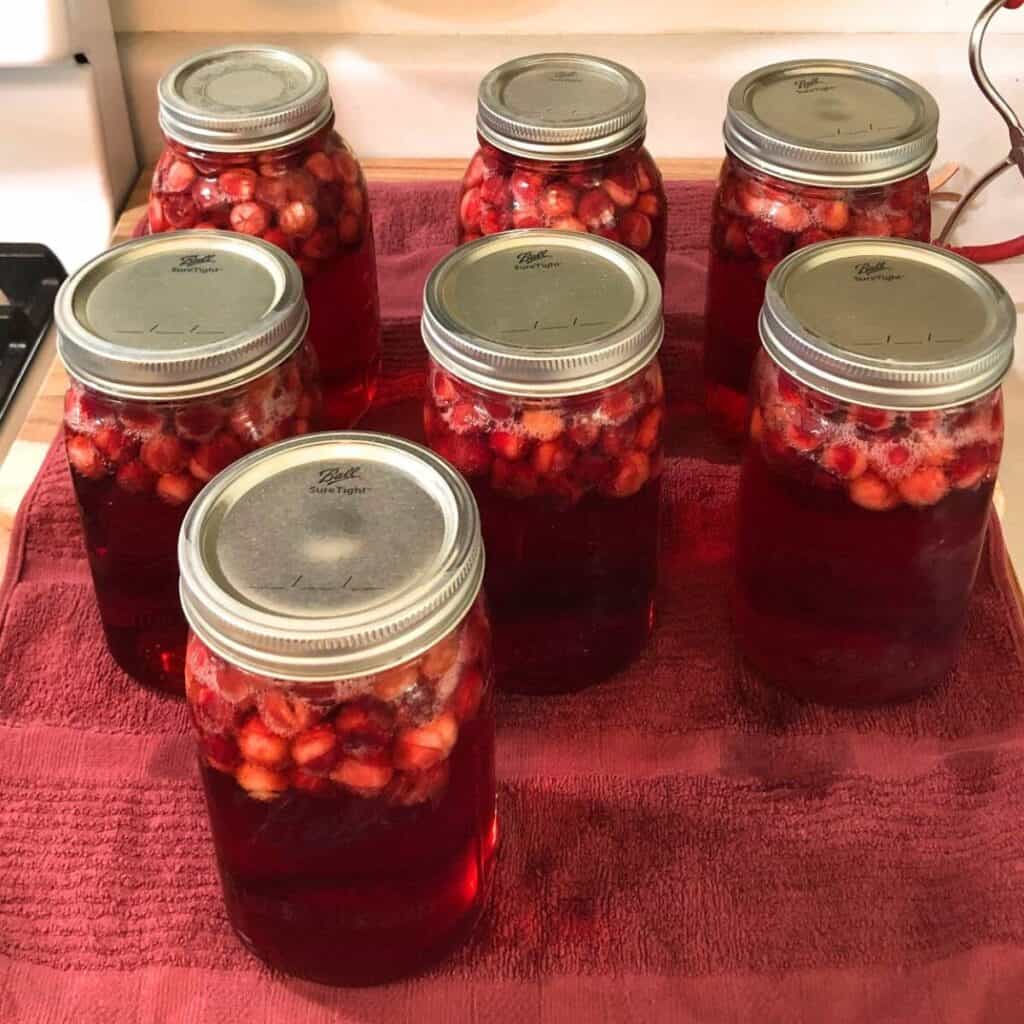
Add some water to your water bath canner and set your canner on your stove, but don’t turn the heat on. Make sure to add your jar rack.
Fill your quart jars with one and one-fourth cups to one and one-half cups of frozen or room-temperature cranberries. Fill the rest of the way with warm water but make sure you leave an inch headspace at the top.
If your berries are frozen, allow them to thaw before canning.
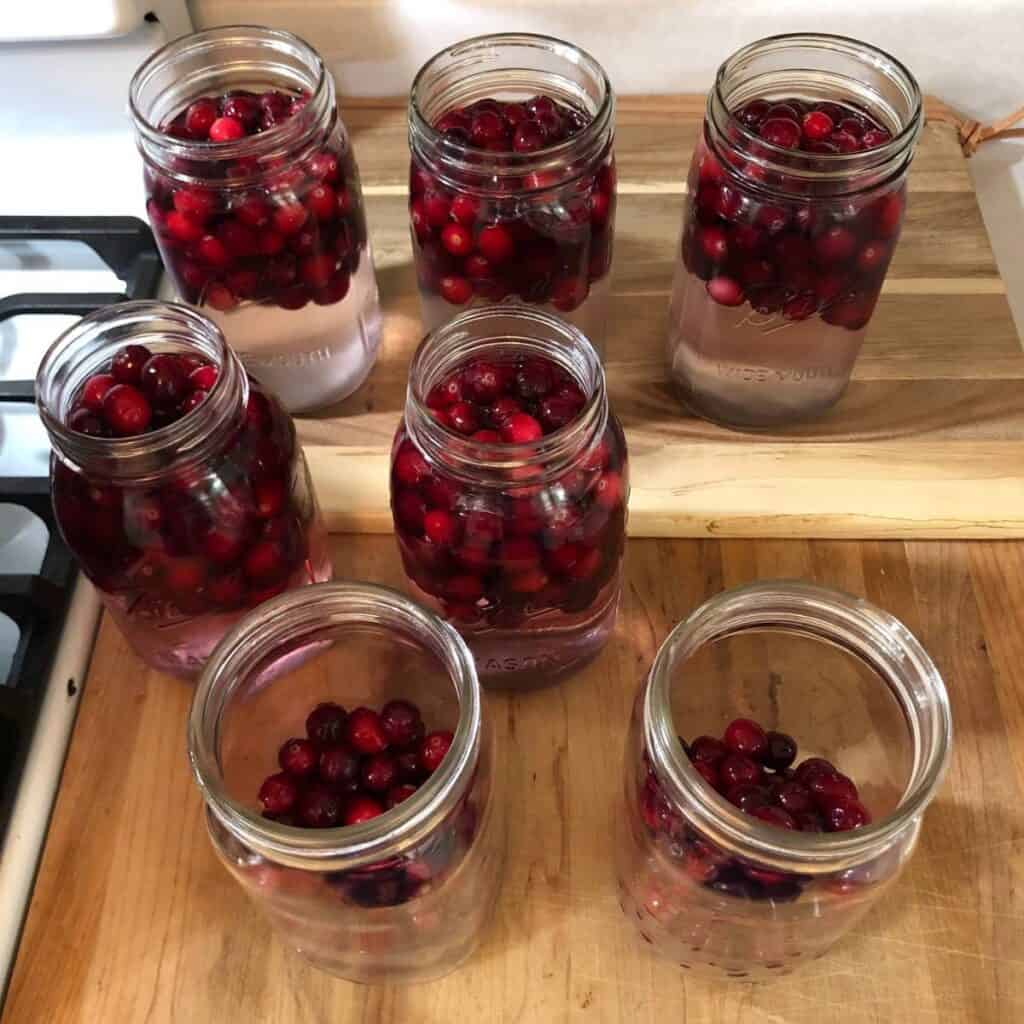
When all your berries are thawed and you fill the jars with water leaving an inch of space at the top, wipe the rims of your jars. Clean rims are necessary to make a good seal with the lid.
Then put your new, clean lids on your quart jars and tighten the bands to fingertip tight. That means you screw the bands on until you just meet resistance and screw a little bit more.
Put your quart jars in your canner rack, lower them into the water, and adjust the water to make sure the jars are covered with at least two inches of water.
If you have hard water and want to prevent mineral build-up, add a little bit of distilled white vinegar to your pot of water.
Lastly, put the canner lid on and turn on the heat to start boiling your water.
Once the water is boiling, set your timer for 25 minutes to create a good berry juice inside each quart jar.
After 25 minutes, turn off the heat and remove the canner lid. Wait 5 more minutes and then remove your jars using your jar lifter, cool overnight, and store in your pantry.
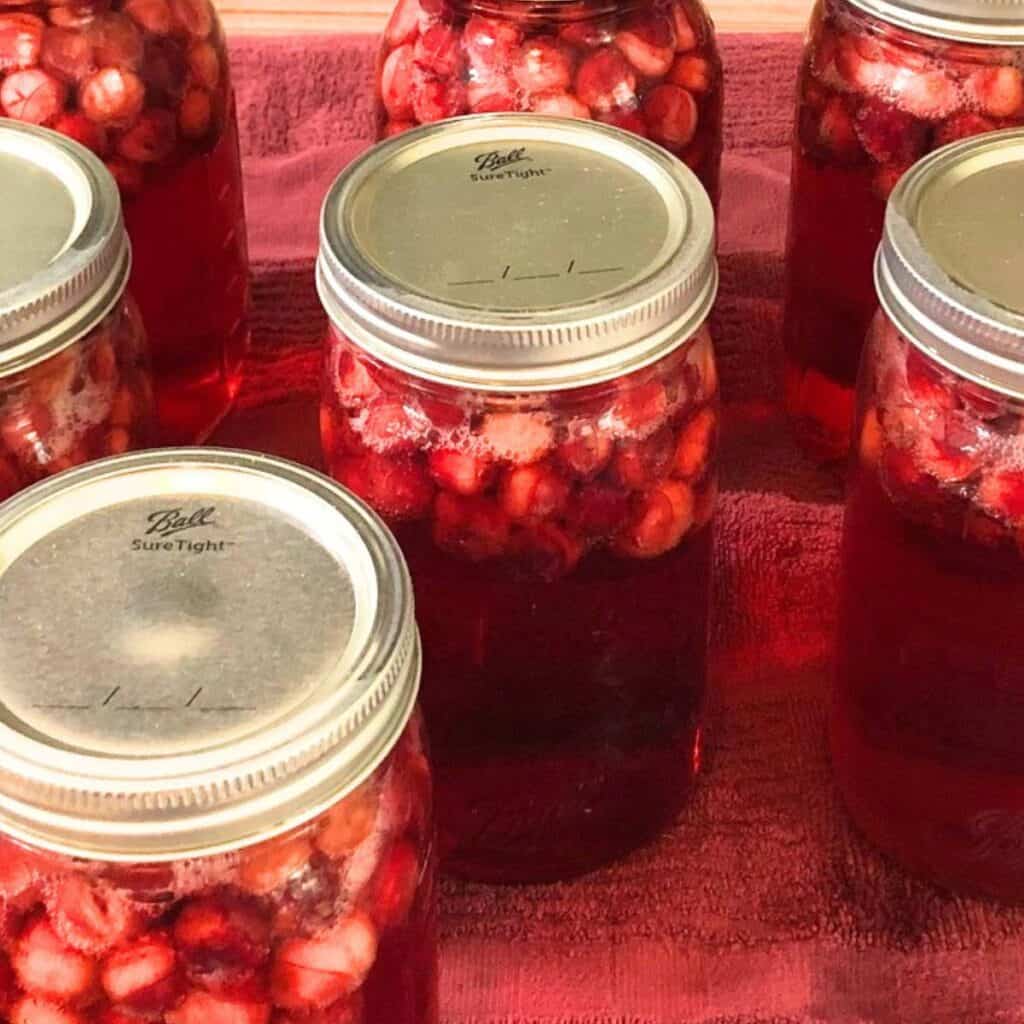
Make sure to always label your canning jars with the contents and the date and remove the bands or rings from each jar before storing them.
This general berry juice will continue to develop a more concentrated flavor over the next month or two, so try not to open up your jars until it develops its full flavor.
Recipe Card for Cranberry Juice

Cranberry Juice
Equipment
- 1 Water bath canner with jar rack (or large pot and lid)
- 7 Quart size canning jars and new lids
- 1 jar lifter
- 1 Magnetic canning lid wand
- measuring cups
- funnel
Ingredients
- 10 cups cranberries
- water
Instructions
- Add some water to your water bath canner and set your canner on your stove, but don't turn the heat on. Make sure to add your jar rack.
- Fill your quart jars with one and one-fourth cups to one and one-half cups of frozen or room-temperature cranberries. Fill the rest of the way with warm water but make sure you leave an inch headspace at the top. If your berries are frozen, allow them to thaw before canning.
- When all your berries are thawed and you fill the jars with water leaving an inch of space at the top, wipe the rims of your jars. Clean rims are necessary to make a good seal with the lid.
- Put your new, clean lids on your quart jars and tighten the bands to fingertip tight. That means you screw the bands on until you just meet resistance and screw a little bit more.
- Put your quart jars in your canner rack, lower them into the water, and adjust the water to make sure the jars are covered with at least two inches of water. If you have hard water and want to prevent mineral build-up, add a little bit of distilled white vinegar to your pot of water.
- Put the canner lid on and turn on the heat to start boiling your water.
- Once the water is boiling, set your timer for 25 minutes to create a good berry juice inside each quart jar.
- After 25 minutes, turn off the heat and remove the canner lid. Wait 5 more minutes and then remove your jars using your jar lifter, cool overnight, and store in your pantry. Make sure to always label your canning jars with the contents and the date and remove the bands or rings from each jar before storing them. *This general berry juice will continue to develop a more concentrated flavor over the next month or two, so try not to open up your jars until it develops its full flavor.
What are the health benefits of drinking cranberry juice?
Cranberry juice is generally safe for most people, and it has several benefits for your health. However, there are some medications that interact negatively with cranberry juice, so check with your healthcare provider if you are on any medications.
One of the most popular reasons for drinking cranberry juice is to clear up or prevent urinary tract infections. Read more benefits of cranberry juice by Medical News Today here.
Antioxidants
Cranberry juice contains antioxidants, which fight free radicals that damage our cells and DNA.
Vitamin C – An 8-ounce cup of cranberry juice contains 26% of the recommended daily value! This antioxidant is popular for boosting our immune system and fighting viruses. It also helps us heal after injuries, produces collagen, and absorb iron.
Vitamin E – An 8-ounce cup of cranberry juice contains 20% of the recommended daily value. This antioxidant is essential for heart, skin, and blood vessel health.
Myricetin – This antioxidant enhances the effects of other antioxidants.
Peonidin – The greatest dietary source of peonidin is raw cranberries, and it’s the antioxidant responsible for giving cranberries their purple-red hue. Like other anthocyanidins, peonidin is pH sensitive, and changes from red to blue as the soil and plant pH rises.
Anthocyanins – A clinical study published in Molecules found that purified anthocyanin supplementation for 24 weeks reduces serum levels of LDL cholesterol and increases HDL cholesterol levels in subjects with moderate hypercholesterolemia. These water-soluble antioxidants lower blood pressure and improve cholesterol levels, which mean they are good for heart health and to fight heart disease!
Proanthocyanidins – Proanthocyanidins are natural glycosidase inhibitors. According to a clinical study published in Molecules, glycosidase inhibitors can effectively inhibit the digestion and absorption of sugars in the digestive tract and are highly sought after by diabetic patients because of their high safety and low side effects!
Quercetin – This naturally non-toxic flavonoid has anti-apoptotic and anti-inflammatory properties and plays an important role in the treatment of aging-related diseases and neurodegenerative disorders like Alzheimer’s disease.
Nutritional Value
Nourish by WebMD lists the following nutritional value of one cup of unsweetened cranberry juice:
- 116 calories
- 1 gram of protein
- 31 grams of carbohydrates
- 0 grams of fat
- 31 grams of sugar
- 0 grams of fiber
It also gives several other vitamins and minerals present in cranberry juice:
- Vitamin B1
- Vitamin B2
- Vitamin B3
- Vitamin B6
- Vitamin K
- Folate
- Calcium
- Magnesium
- Manganese
- Potassium
- Copper
How to drink your cranberry juice.
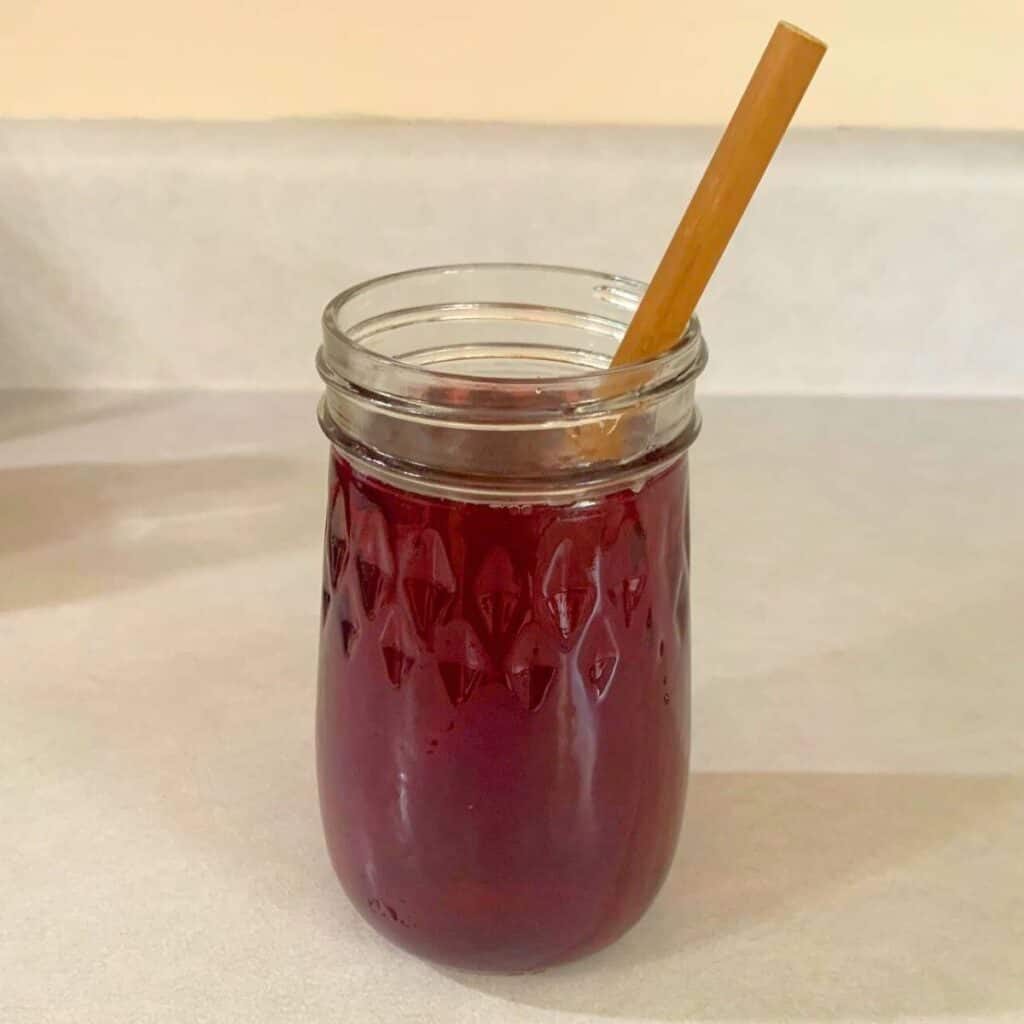
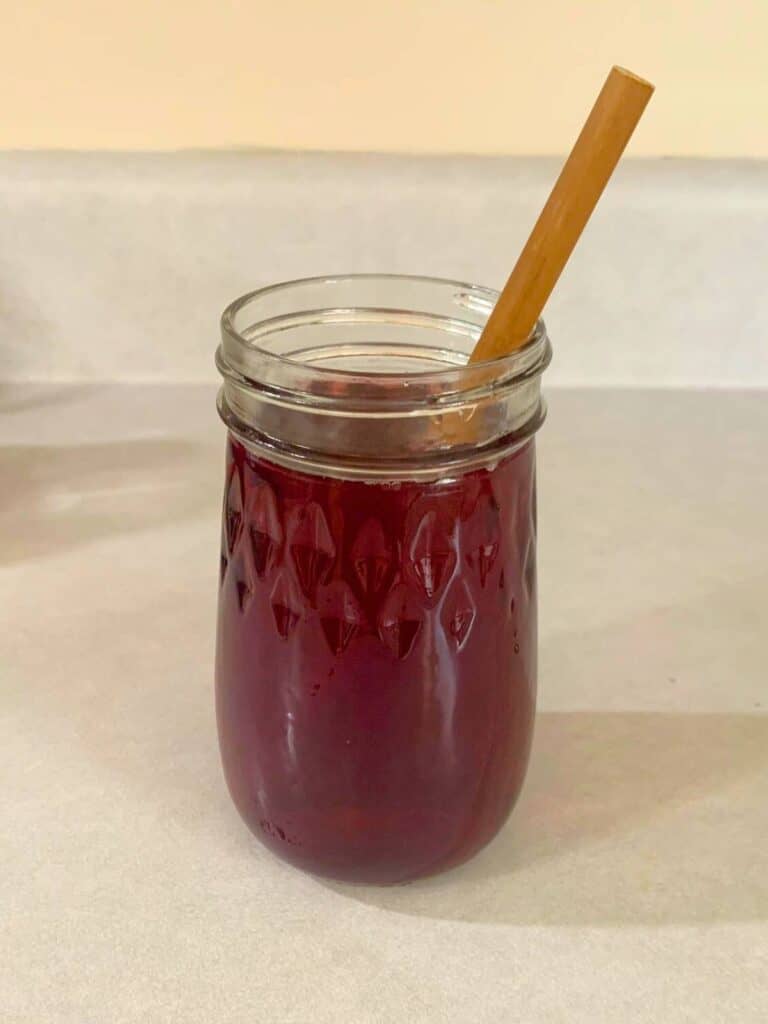
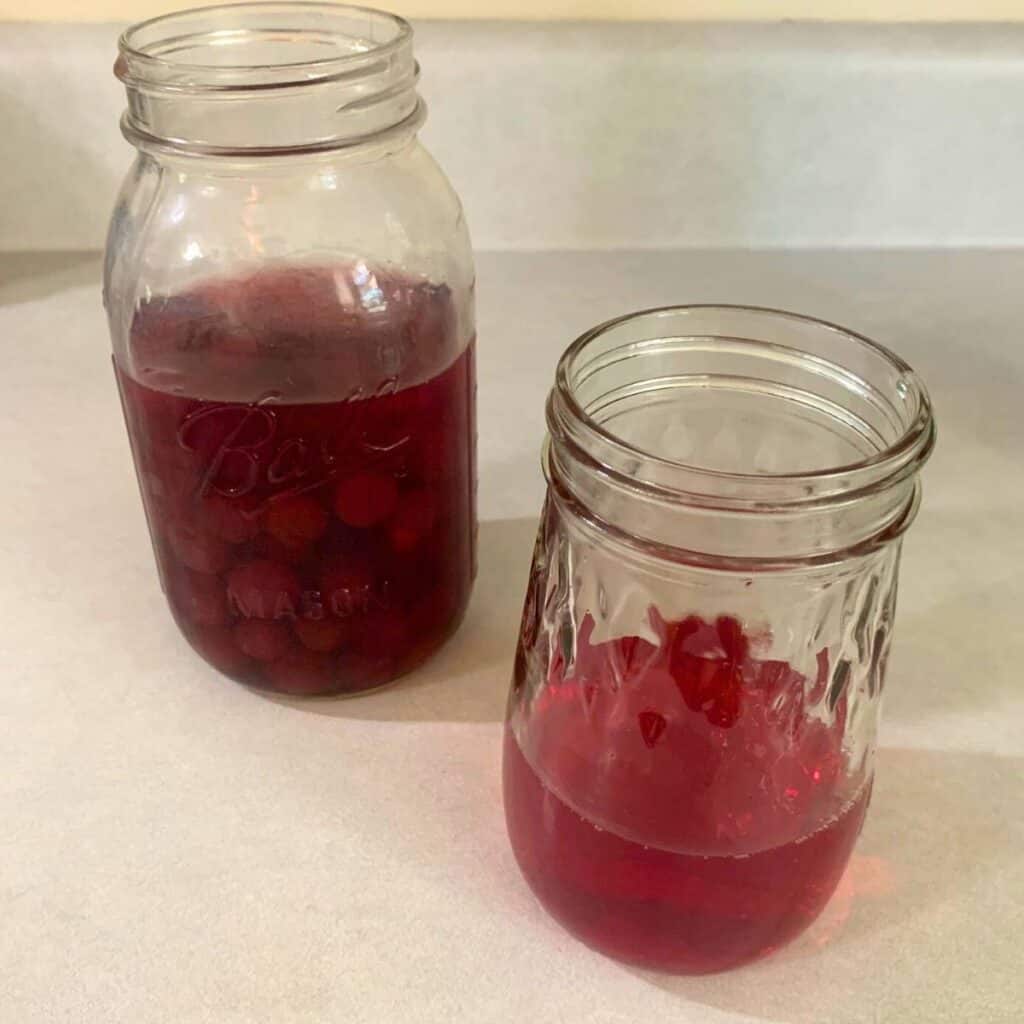
When you want some juice, just pop open your quart jar, strain out the juice (you can eat the fruit or turn it into cranberry sauce or refrigerate or freeze them for smoothies), and either drink it plain or add it to other juices (like orange juice) to make a cocktail.
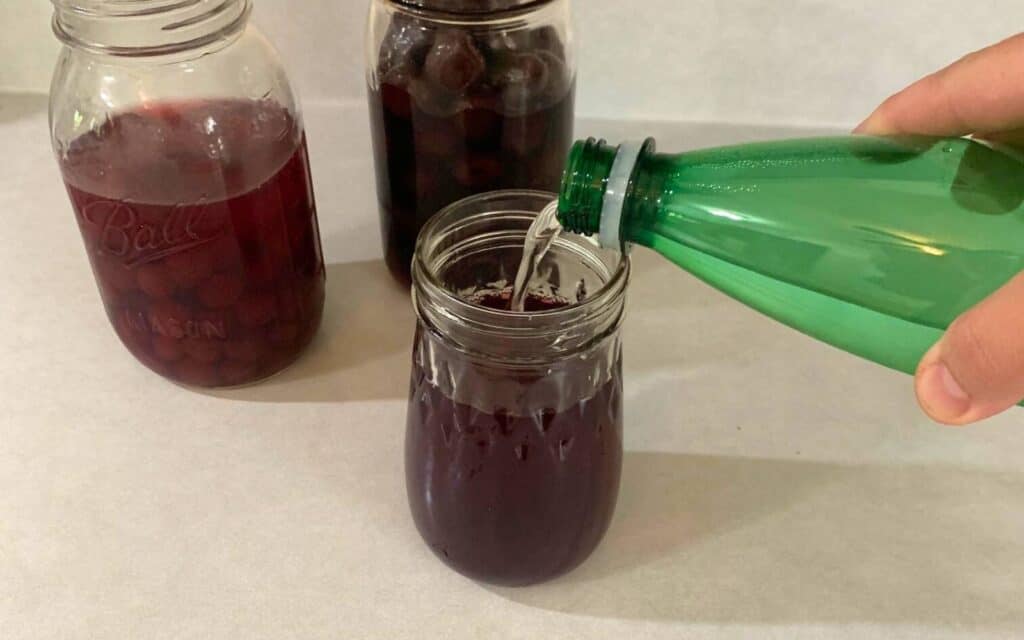
Adding mineral water or water kefir also makes a fun, fizzy drink for kids and adults alike.
Because of the tart flavor of plain cranberry juice, I like to mix cranberry juice with home canned cherry juice that has a sweeter flavor. Then I will often top it off with mineral water for a delicious treat.
How to store your cranberry juice so that it lasts a long time.
Proper storage conditions make a difference to the shelf life. The best way to store most foods and juices (including cranberry juice) is in an airtight container in a dry place.
High temperatures are an enemy to food and drink preservation. The ideal environment for most foods and juices is in a cool area in your pantry out of direct sunlight.
Shop this post!
Pin it for later!