Easiest Home Pregnancy Tests for Livestock
Urine home pregnancy tests for livestock are safe, cheap, and often more accurate than traditional methods used to check livestock for pregnancy. Save time and money by doing this chore yourself!

We get so excited every year when we put our Jersey dairy cow, Belle, in with a bull to get bred.
We wait with bated breath for 6 weeks so that she completes two heat cycles with the bull. And then we wait another 3 to 4 months before we give her a urine pregnancy test to see if she’s pregnant or not.
The process for giving your livestock a urine pregnancy test is so simple to do yourself. It’s also less invasive than having to manually check her. Plus, it’s a lot cheaper, saves time, and is often more accurate!
This post may contain affiliate links. As an Amazon Associate I earn from qualifying purchases. That means I make a small commission at no cost to you if you place a qualifying purchase through any of the links. Read my full disclosure here. Thanks for your support!
What are the easiest home pregnancy tests for livestock?
The easiest home pregnancy test for livestock is a urine pregnancy test using a livestock pregnancy test kit.
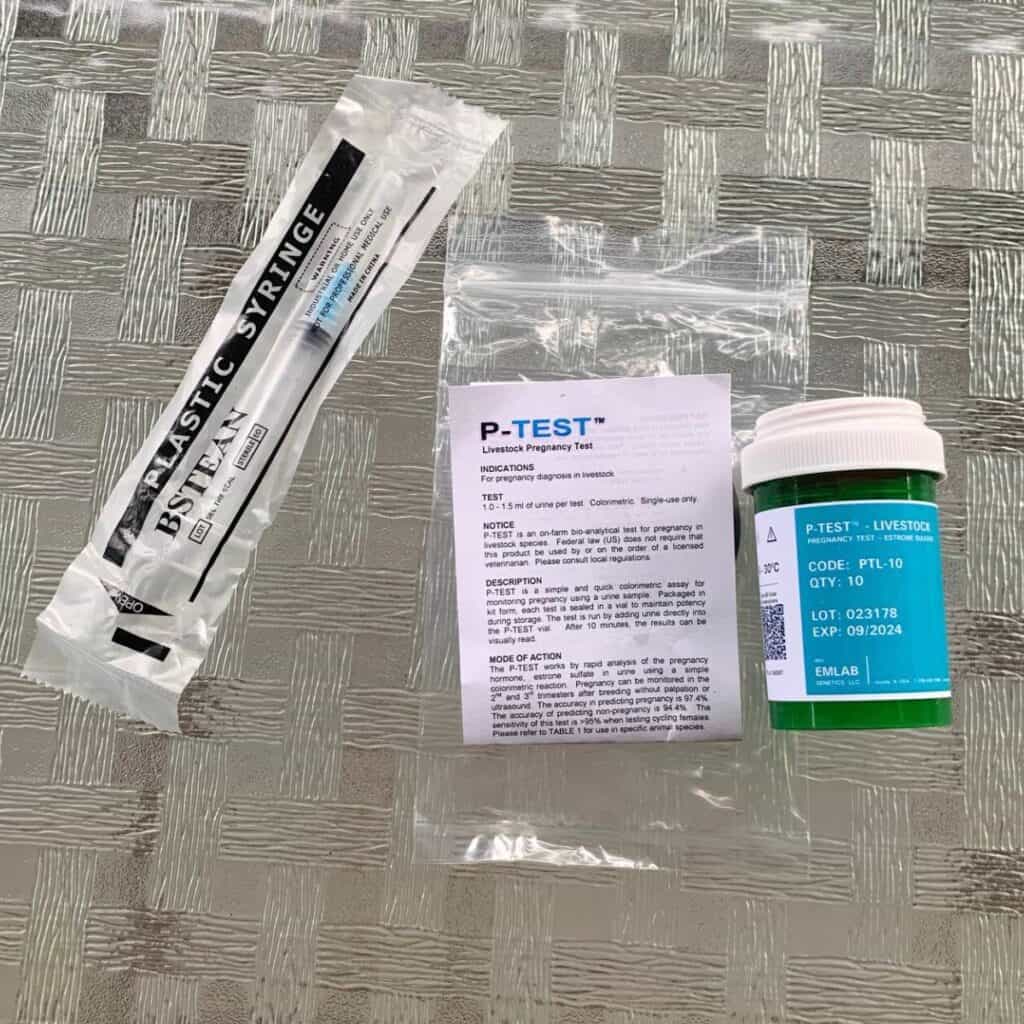
If you aren’t aware of urine home pregnancy tests for livestock, I’d love to introduce you to a great company that we get our pregnancy tests from. We are not affiliated with them, but I really love their products. It’s EMLAB Genetics from Illinois, USA.
EMLAB Genetics offers many products geared toward farmers, ranchers, and backyard homesteaders.
There are two simple options for testing livestock urine for pregnancy. You can add the urine to a test vial that has a reactive powder at the bottom, or you can dip a test strip into the urine. Both options will react and turn specific colors if the livestock pregnancy hormone is present.
Their livestock pregnancy test is good for the following animals:
- Cow
- Sheep
- Goat
- Pig
- Deer (White-Tail)
- Elk
- Alpaca
- Llama
- Camel
- Rabbit
Traditional livestock pregnancy test methods.
The three methods traditionally used to determine whether livestock are pregnant are palpation, ultrasound, and blood or milk tests.
Palpation
Per rectum palpation is the most frequent procedure used around the world for pregnancy diagnosis in livestock. It’s also an expensive procedure if you don’t perform the test yourself and need to hire a veterinarian.
Just like the name implies, per rectum palpation requires someone (the palpator) to slip on a shoulder-length glove, apply lubricant to the glove, and insert the hand and arm into the livestock’s rectum while she is confined. The developing baby is in the womb just beneath the rectum, so the palpator will feel around for any developing amniotic sacks.
Palpation requires a lot of prior experience to be able to determine if livestock are pregnant. Even experienced farmers and veterinarians sometimes get the diagnosis wrong and say that a cow (or other livestock) is not pregnant when she is, or vice versa.
I want to mention here that there is some evidence to suggest that palpation may lead to negative pregnancy outcomes such as pregnancy loss and malformations in the baby.
Ultrasound
Internal and external ultrasounds (also called “sonograms”) for livestock have gained popularity over the last few decades, but it still requires expensive equipment and a trained technician to give a pregnancy result.
In an ultrasound, a transducer sends sound waves through the abdomen. When sound bounces off soft or hard tissue, the transducer picks it up and sends it to a computer for imaging.
There is currently some debate on the safety of ultrasounds. While most sources say that ultrasounds are safe, I do want to mention some research that I came across that might give some people pause about using an ultrasound for pregnancy diagnosis.
According to the British Medical Ultrasound Society, “Particular care should be taken to reduce the risk of thermal hazard when exposing the following to diagnostic ultrasound: an embryo less than eight weeks after conception; the head, brain or spine of any fetus or neonate; [and] an eye….”
It turns out that ultrasounds raise the thermal temperature of the tissues, which is why technicians are told to use the shortest time necessary to capture ultrasound images. According to the report, “cell damage might lead to fetal anomalies or subtle developmental changes.”
Additionally, “[t]he presence of bone within the beam greatly increases the likely temperature rise, due to both direct absorption in the bone itself and conduction of heat from bone to adjacent tissues.”
Blood and Milk Tests
Blood and milk tests are less invasive than palpation and internal ultrasounds.
For pregnancy blood tests, you first need to draw blood from your livestock animal. Then add a few drops of blood to the test strip, and wait for the results. The test looks for specific pregnancy-related proteins in the blood.
A milk pregnancy test requires someone to milk an already-lactating livestock animal. Then the milk is tested for pregnancy-associated glycoproteins (PAGs), which are only produced when the female is carrying an embryo or fetus.
Urine pregnancy tests for livestock are accurate and affordable.
The best part about urine home pregnancy tests for livestock is that they’re accurate and affordable.
Urine pregnancy tests for livestock are accurate about 92% of the time because it checks for the pregnancy hormone (estrone sulfate) present in the cow urine. It’s very similar to a human urine pregnancy test, except it checks for a different hormone.
Urine home pregnancy tests for livestock are also affordable!
EMLAB Genetics offers a few different pregnancy test options and kits. The tests are suitable for all budgets and range from $4.50 for one test strip and up to $45 for ten test vials (at the time of writing this post).
Urine home pregnancy tests for livestock are safe and fast.
Urine home pregnancy tests for livestock are safe and fast.
As mentioned above, palpation and ultrasound may not be as safe as people think. But there’s nothing risky about collecting a sample of urine from your calm animal!
Performing a urine home pregnancy check is also a less invasive way to determine if your animal is pregnant.
There’s no need to call the vet to check if your cows, goats, sheep, or other livestock are pregnant. Do it yourself!
Tutorial: Urine Home Pregnancy Tests for Livestock
Before you begin, here’s the tools that you’ll need:
- urine home pregnancy test kit for livestock
- a clean 5-gallon bucket
- clean rag(s)
- rubber gloves (optional)
Follow these steps when using the vial to do the urine home pregnancy test for livestock.
- Collect a sample of urine from your livestock animal.
- Add the appropriate amount of urine to the syringe.
- Transfer urine into the test vial.
- Mix the vial gently, about four times, until the blue tablet is dissolved. Do Not Shake!
- Let the vial sit undisturbed for 10 minutes.
- Read the color results after 10 minutes.
- Document the pregnancy test results.
- Responsibly dispose of the used test kit supplies.
- Optional: Repeat the test for confirmation.
Step 1. Collect a sample of urine from your livestock animal.
To collect urine from your livestock animal, you’ll need a clean rag(s) and a clean 5-gallon bucket. If you’d like to wear rubber gloves for this part, get them ready, too.
Collecting urine from the early morning will give you more accurate results.
When your livestock animal is calm or otherwise confined in a stanchion or elsewhere, use the rag(s) to start rubbing her rear upward just beneath her rectum. The rubbing will initiate a biological response and your animal will urinate.
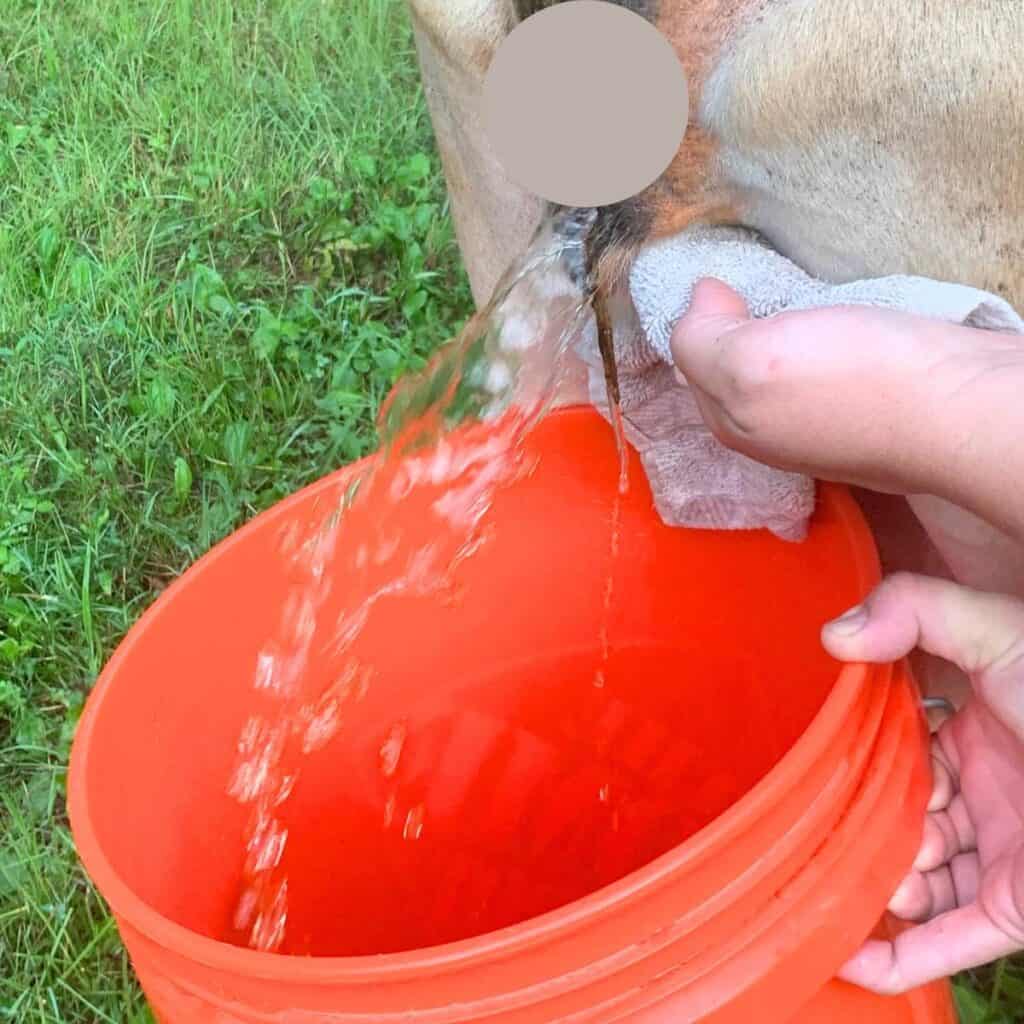
She will raise her tail, hunch her back up, and release a stream of urine. So have your 5-gallon bucket handy to catch it!
I wouldn’t use anything smaller than a 5-gallon bucket for a cow.
Step 2: Add the appropriate amount of urine to the syringe.
Use caution with the syringe and needle.
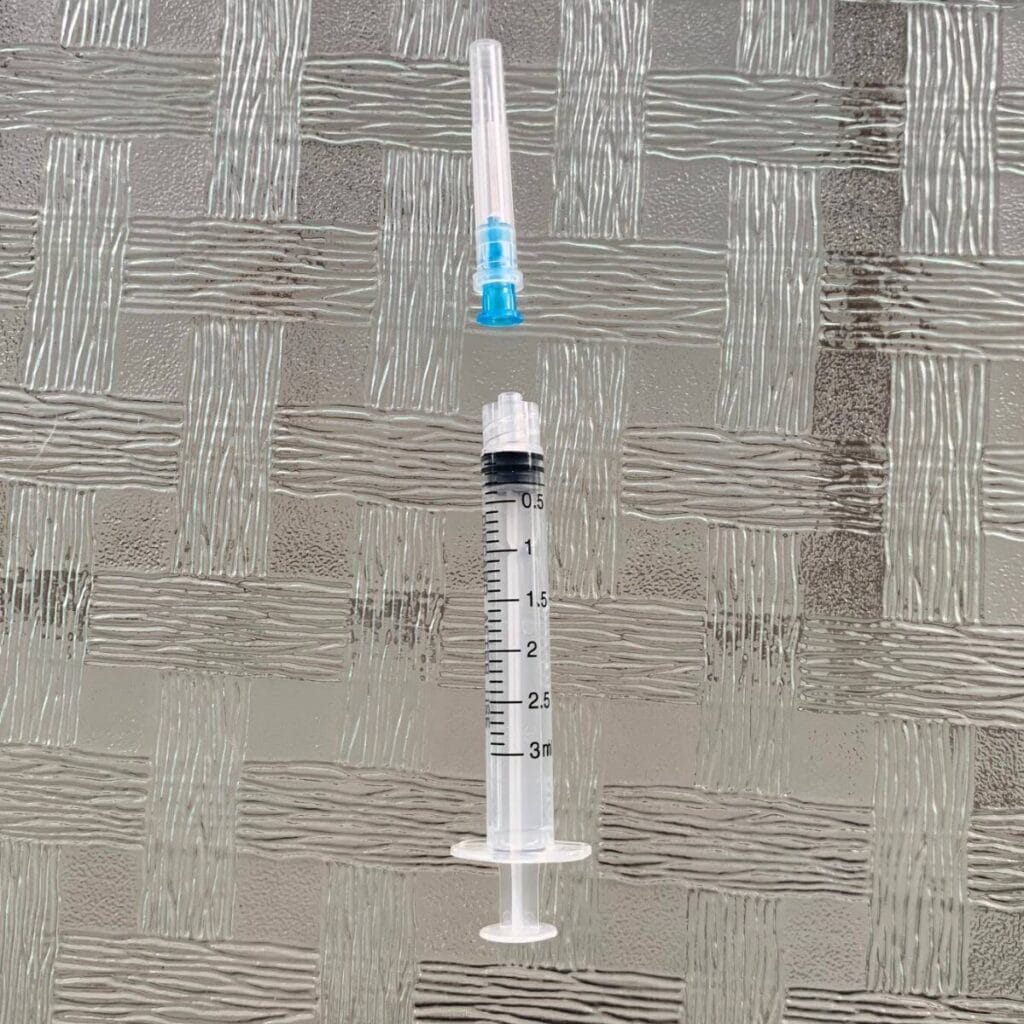
Twist off the capped needle from the pregnancy test kit syringe and put it somewhere safe.
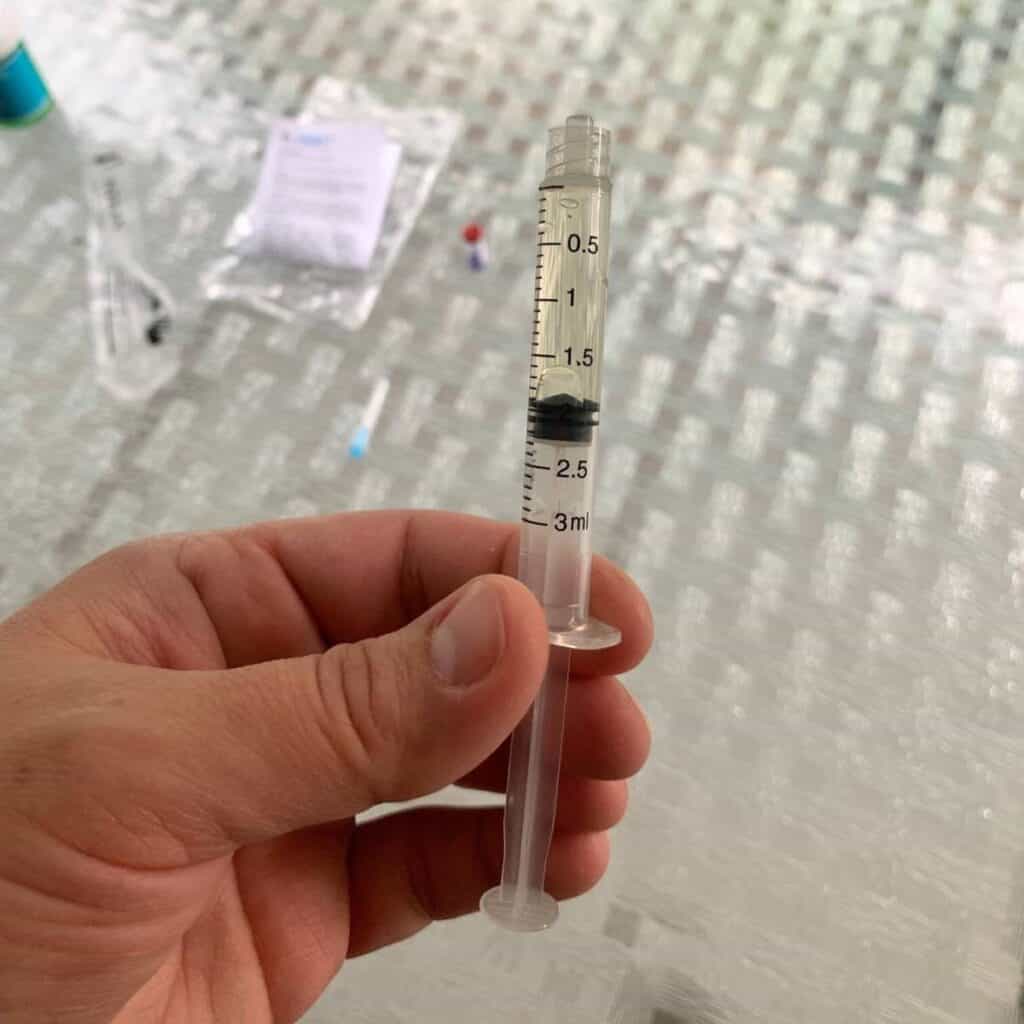
Next, insert the syringe into the livestock urine and draw up about 2 ml of urine.
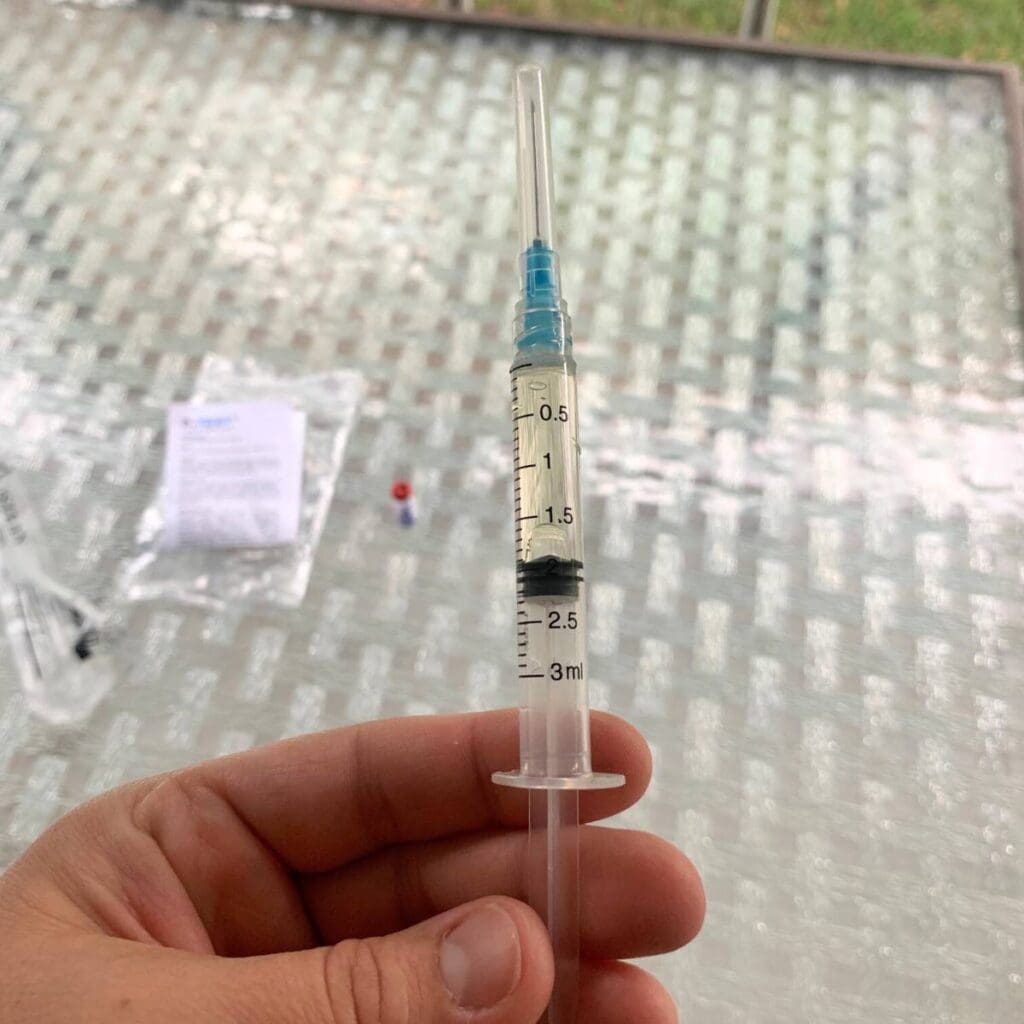
Then twist the capped needle back onto the syringe. Push out the extra air.
Step 3: Transfer urine into the test vial.
It’s time to transfer the urine into the glass vial.
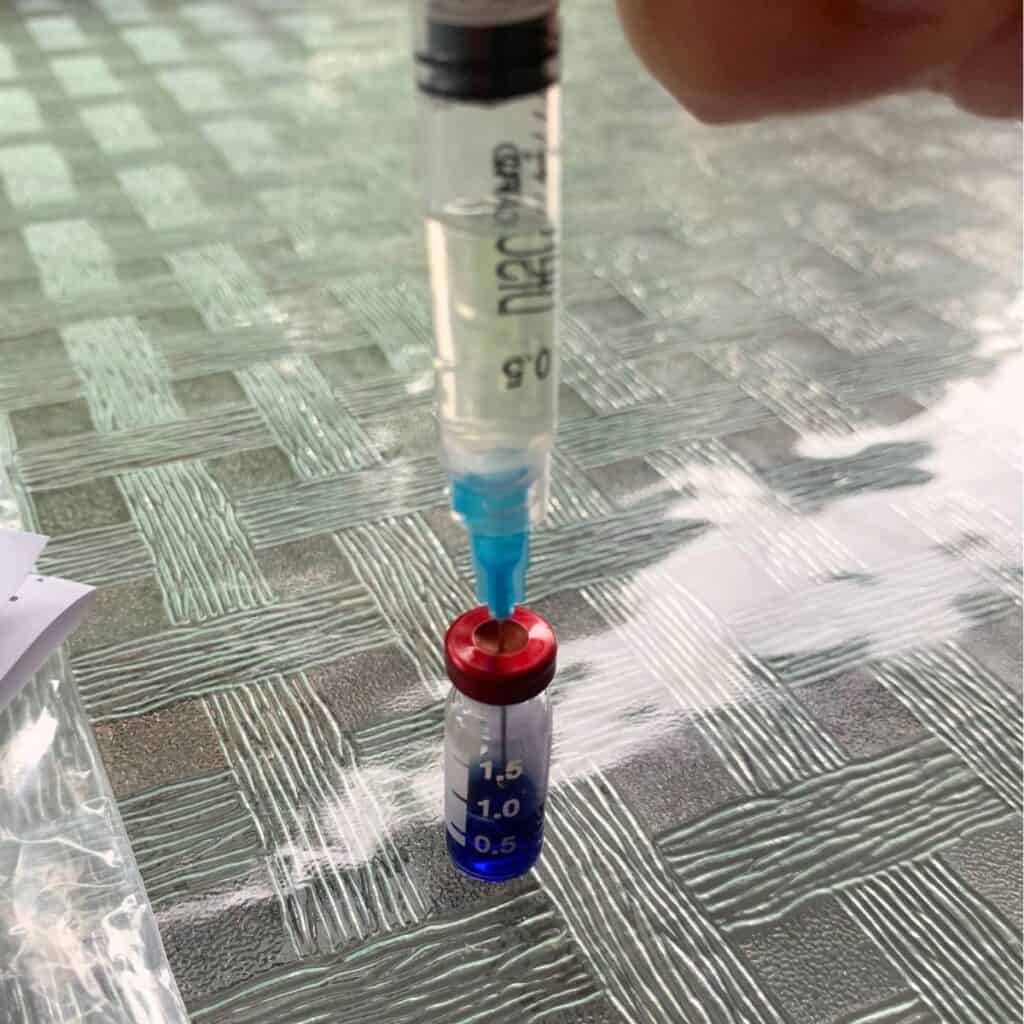
Line up the syringe needle with the center of the glass vial lid. Then insert the needle into the soft spot on the vial lid. Add the urine slowly into the test vial so that you don’t introduce air bubbles.
We added 1.5 ml of urine into the test vial.
Step 4: Mix the vial gently, about four times, until the blue tablet is dissolved.
Time to mix the urine and the blue pellet together.
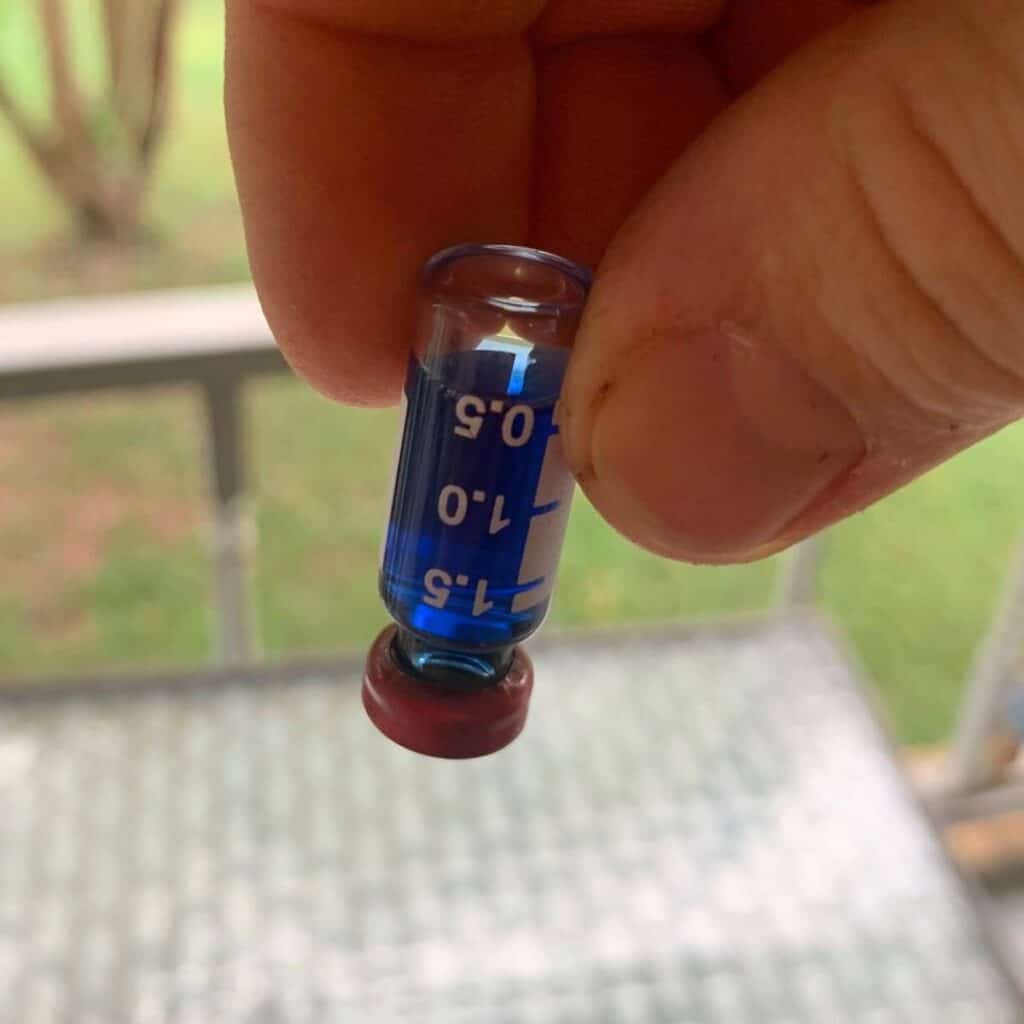
Pay no mind to my stained garden hands! Once the urine is added to the glass vial, gently invert the vial, turning it up then down, three to four times. Do NOT shake the vial harshly according to the instructions.
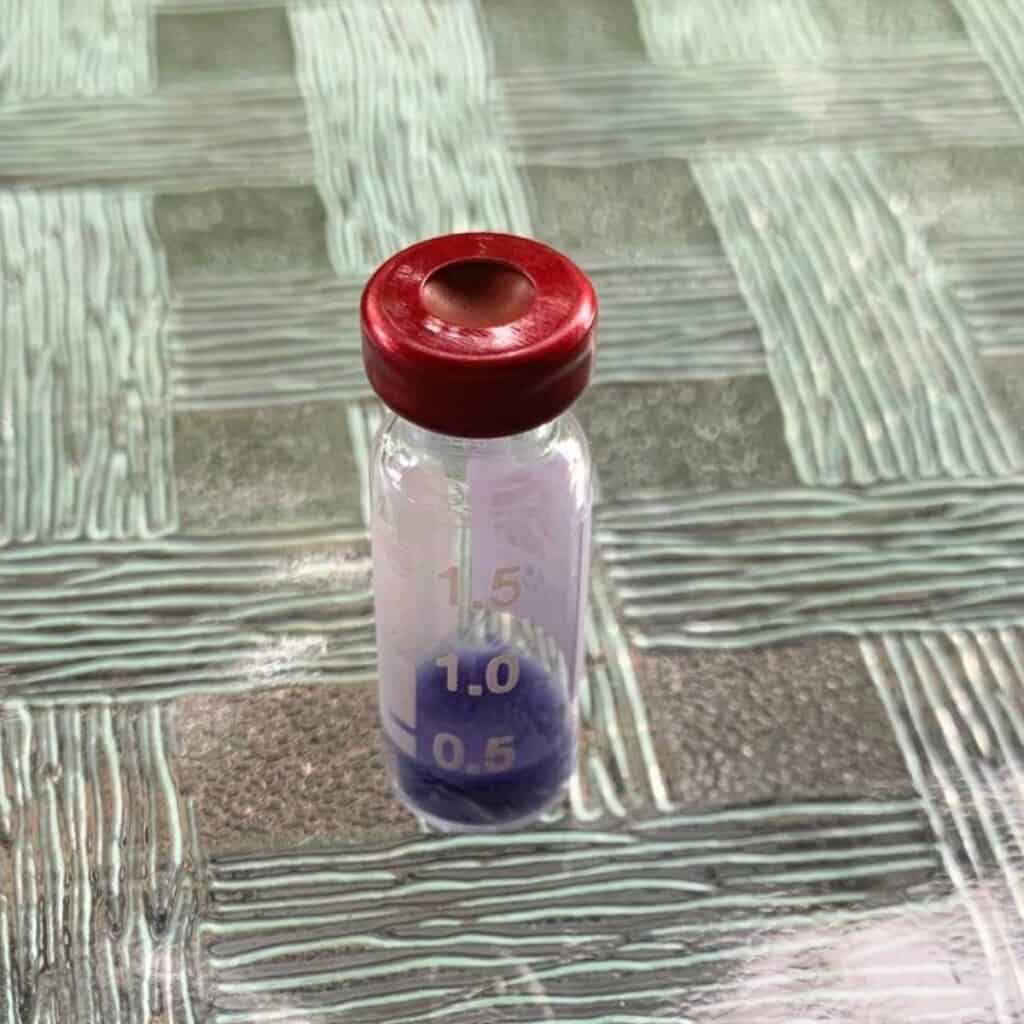
The vial has a blue pellet at the bottom that needs to dissolve completely. The solution will first become a dark blue color and then it will start changing to the appropriate color for the test results.
Step 5: Let the vial sit undisturbed for 10 minutes.
Now let the solution do its work to see if the pregnancy hormone is present.
Try to sit your vial in a location where little hands won’t find it for at least 10 minutes.
Step 6: Read the results after 10 minutes.
After 10 minutes, you can read the pregnancy test results.
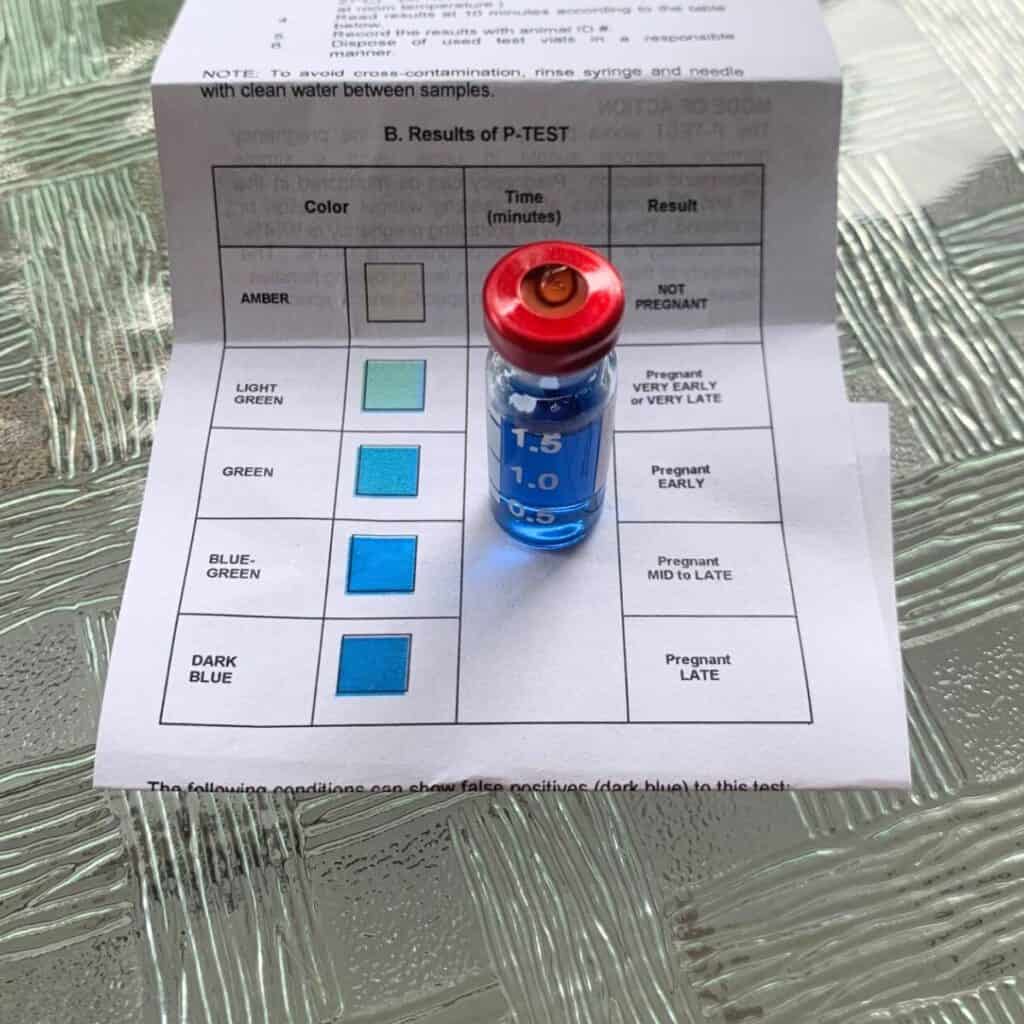
The instructions sheet in the test kit has a table of colors and their corresponding meanings. I find it easiest to put the glass vial directly next to each of the colors so I can determine which color is the closest match.
Yay! Belle is pregnant!!
If you’d like to know what a negative pregnancy test looks like, check out the picture below.
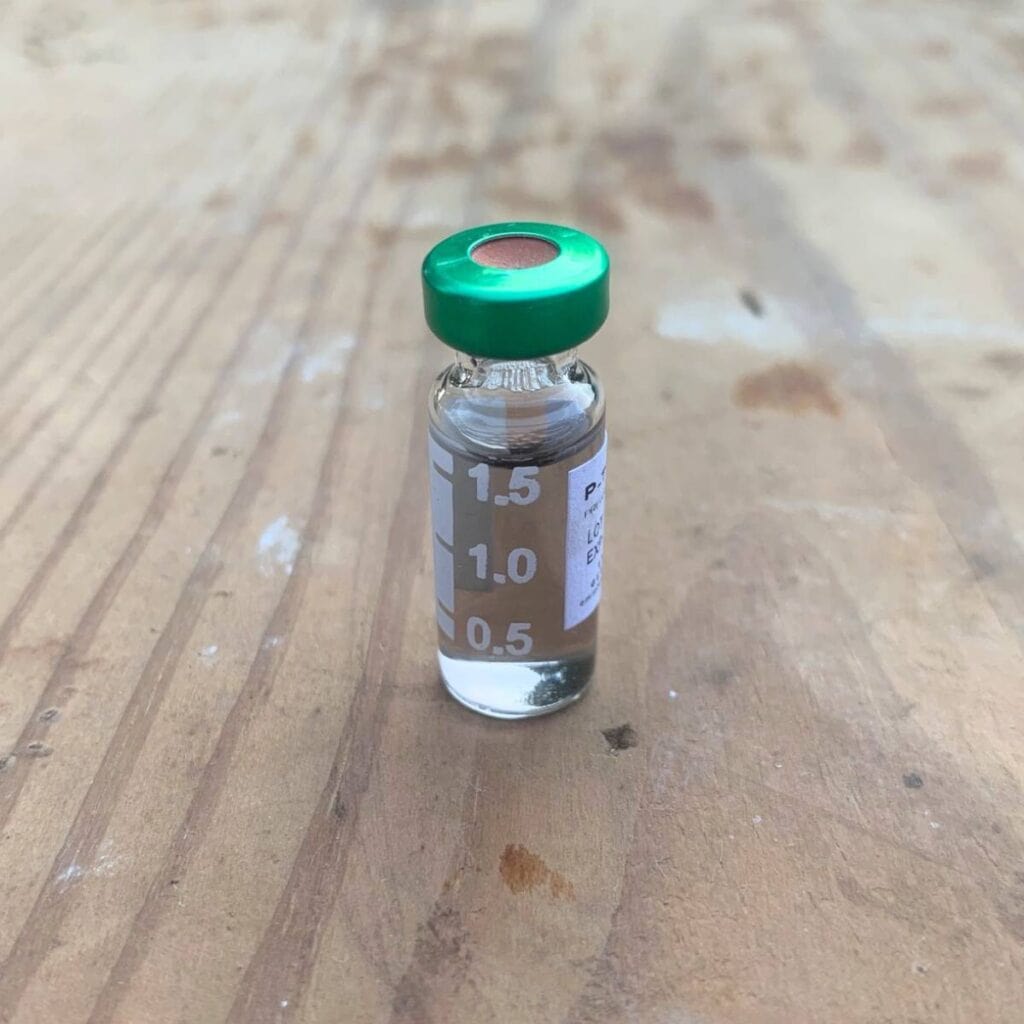
EMLAB Genetics must change the vial lid color every couple of years. The prior vials we bought had a green lid. In any case, this was a negative pregnancy test.
Step 7: Document the pregnancy test results.
If you’re testing more than one animal, keep track of the pregnancy test results for each animal.
Step 8: Responsibly dispose of the used test kit supplies.
Once you’re done reading and documenting your test results, remember to put the cap back on the syringe needle and properly dispose of it. Remember that the vials and test strips are single-use.
Step 9: Optional: Repeat the test for confirmation.
This step is entirely optional. However, if you would like confirmation that your livestock animal is pregnant, you can repeat the test using the above steps.
Summary Steps: Urine Home Pregnancy Tests for Livestock
Here’s a recap of the steps you should take when doing a urine pregnancy test for livestock using the vials from EMLAB Genetics.
- Collect a sample of urine from your livestock animal.
- Add the appropriate amount of urine to the syringe.
- Transfer urine into the test vial.
- Mix the vial gently, about four times, until the blue pellet is dissolved. Do Not Shake!
- Let the vial sit undisturbed for 10 minutes.
- Read the results after 10 minutes.
- Document the pregnancy test results.
- Responsibly dispose of the used test kit supplies.
- Optional: Repeat the test for confirmation.
Next Steps
If you enjoyed this post, check out the other blog posts in this series!
21 Mistakes to Avoid When Buying a Milk Cow
Pin It For Later!
Shop This Post!
EMLAB Genetics urine pregnancy test strip for cattle (1 strip): $4.50 TWO YEAR SHELF LIFE
EMLAB Genetics urine pregnancy test vials (10 single-use vials): $45 ONE YEAR SHELF LIFE


I was just thinking I should test my goats. My buck has been in Rut since early August, and it seems like my does have totally just taken his lead and have all gone into heat way earlier than usual. He’s a Boer buck, first time breeding my dairy girls with his breed, but I’m feeling like they’re all going to throw kids in the depths of winter now! Thanks for sharing!
You’re welcome and good luck! If your goats do kid during the cold winter like ours did last winter (which was during the bomb cyclone of 2022), we had good success putting up a couple of chicken heat lamps inside their shelter. It was warm and toasty inside!