How to Make Easy Sandwich Bread
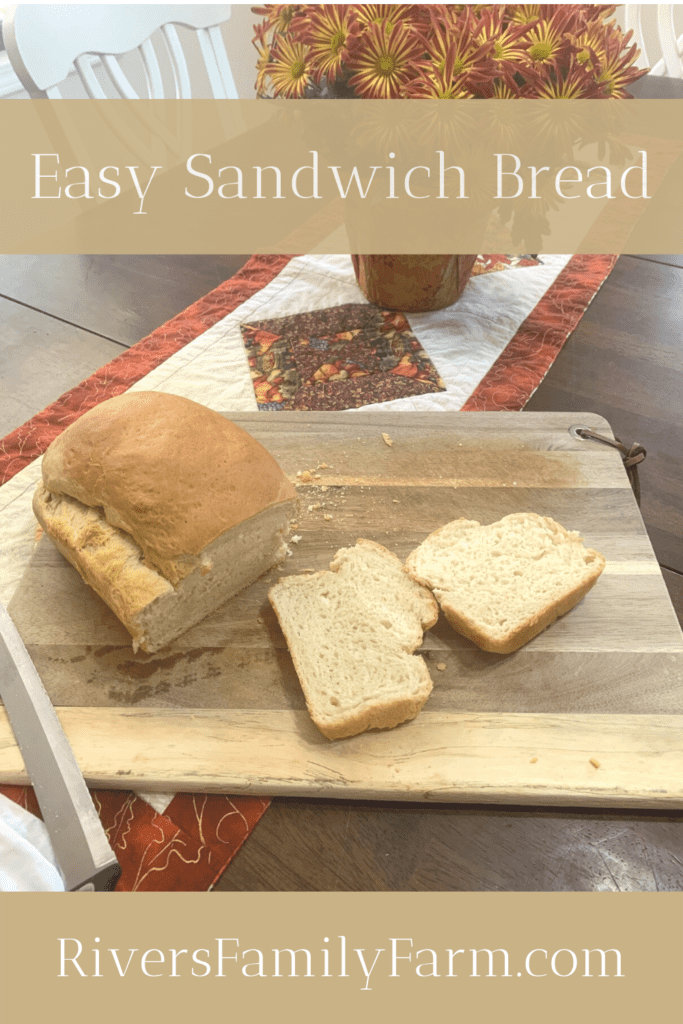
One of the simple pleasures in life is spreading butter on a warm slice of homemade sandwich bread fresh from the oven. Can you smell and taste it now? Yum!
Bread from the store just simply does not compare to the freshness of homemade bread. And the good news is you’ll save money every time you bake your own bread instead of paying grocery store prices. Bonus: It’ll be healthier, too!
This post contains affiliate links, which means I make a small commission at no cost to you if you place a qualifying purchase through any of the links. Read my full disclosure here. Thanks for your support!
Now that autumn has arrived and the weather is getting cooler, I find that I’m baking more bread. I want to share my easy sandwich bread recipe because I hope you’ll find time to make your own sandwich bread in these cooler months.
If you buy bread from the grocery store, read the ingredients label the next time you browse. You might be surprised with some of the ingredients. Soybean oil is common but we should avoid it, in my opinion, because it’s such a highly-processed oil. (Read this article for more information: America’s most widely consumed oil causes genetic changes in the brain.)
Depending on the brand of bread you buy, there are often a lot of other chemicals and preservatives added to increase the shelf life that we might not want to be ingesting.
I made two loaves of this sandwich bread the other night and the kids just wanted to eat bread and jam for supper. That was fine by me because I did, too!
You’ll never believe how easy this recipe is and it’s great for sneaking in whole grain flours.
You can use all-purpose flour to start with if your family hasn’t acquired a taste for stronger, denser whole grain flours. Or you can use half all-purpose flour and half whole grain flour. It’s up to you!
I wrote a whole blog post about whole wheat flour, how to grind wheat berries into flour, how to store it, and more. Check it out if you want to learn more! What is whole wheat milled flour?
What You Need for Making Easy Sandwich Bread
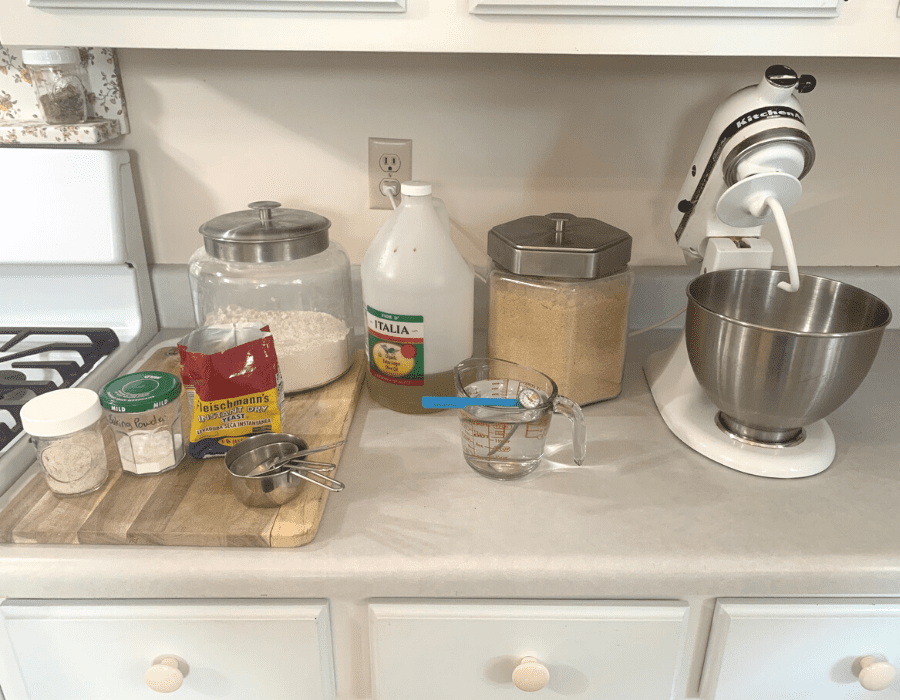
Equipment You’ll Need
Although it’s possible to knead bread dough by hand, I find it a lot quicker to use my stand mixer with the dough hook attachment. If you have a stand mixer or Bosch mixer, I’d recommend using it.
You’ll also need two loaf pans (I prefer stainless steel loaf pans), a liquid measuring cup, dry measuring cups, measuring spoons, wire whisk or fork, and it’s helpful if you have a hot liquid thermometer.
It’s also helpful to have a wooden cutting board and a curved bench scraper for scraping your dough out of the bowl and cutting it in half. However, you can also use your clean kitchen counter and scrape the dough out by hand.
Ingredients You’ll Need for Baking Two Loaves of Easy Sandwich Bread
You will need 7 cups of flour, 1 teaspoon of salt, 4 tablespoons of instant yeast, 4 tablespoons of any sweetener, 2 cups of warm water, and 1/2 cup of olive oil.
You can be flexible with the sweetener and use what you have on hand or omit the sweetener altogether. I prefer using organic cane sugar but you can also use coconut sugar, maple sugar, date sugar, sucanat, or even honey or maple syrup.
If you do want to use honey or maple syrup, I’d recommend only putting in 2 tablespoons versus the 4 tablespoons that the recipe calls for. That’s because they have such a strong flavor. I love honey but 4 tablespoons was even too much for me to enjoy!
Instructions for Making Easy Sandwich Bread
1. Make your bread dough.
In your stand mixer bowl, add 2 cups of warm filtered water. I like my water to be 120°F (about 50°C). This is where that hot liquid thermometer comes in handy.
Then add 4 tablespoons of instant dry yeast, 4 tablespoons of sugar, and 1 teaspoon of salt. Mix it together with a whisk or fork and let it sit.
After a minute or so, add 1/2 cup of olive oil to the yeast water in your bowl and slowly add in 7 cups of flour until the dough starts to pull away from your bowl. Add just one cup of flour at a time so it gets incorporated well.
Also, depending on which type of flour you are using, you may need less or more flour. Just keep adding flour little by little at the end so you don’t make your bread dough too dry.
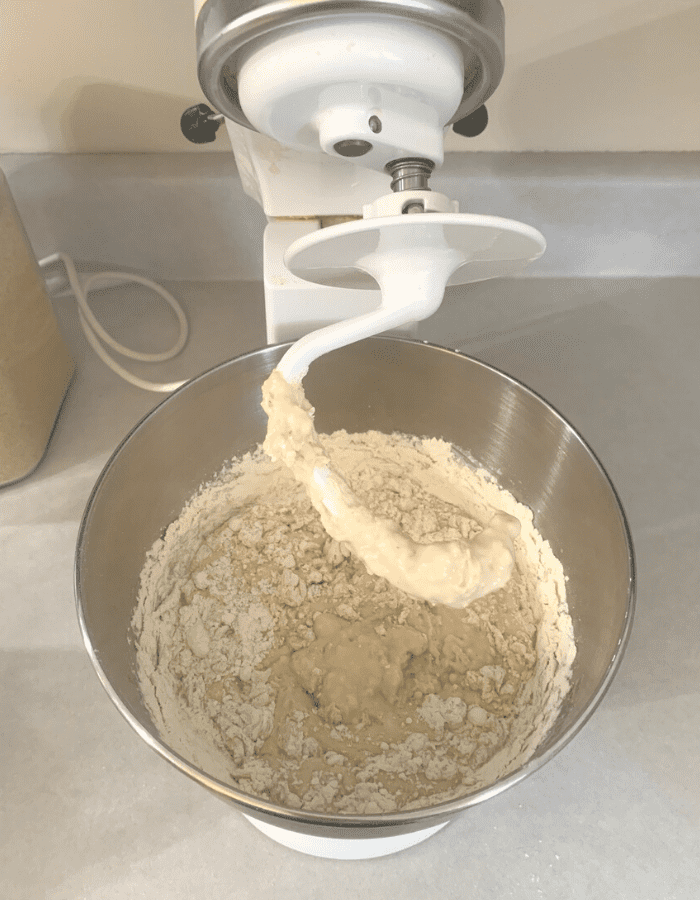
To avoid flinging flour everywhere, start out at the lowest speed setting until the flour starts to soak in the liquid. Once all your flour is added and your dough starts pulling away from your bowl, slowly increase your mixer speed. I like to set my stand mixer on 4 or medium speed and set the timer for 5 minutes to let it knead.
It’s pretty comical to see me at this point because I have to hang onto my stand mixer or else it will wobble off my counter. Does anyone else’s mixer act like that? I’m just curious.
Update: My sweet husband and my mom gave me a Bosch Universal stand mixer for my birthday and it works so well for this heavy dough! I don’t have to worry about it wobbling off my counter like my other stand mixer!!
The recipe here uses instant dry yeast. If all you have is traditional dry yeast, that’s fine to use but you’ll need to let your dough rise for a total of 90 minutes. I’m a fan of saving time so I almost always use instant dry yeast for this.
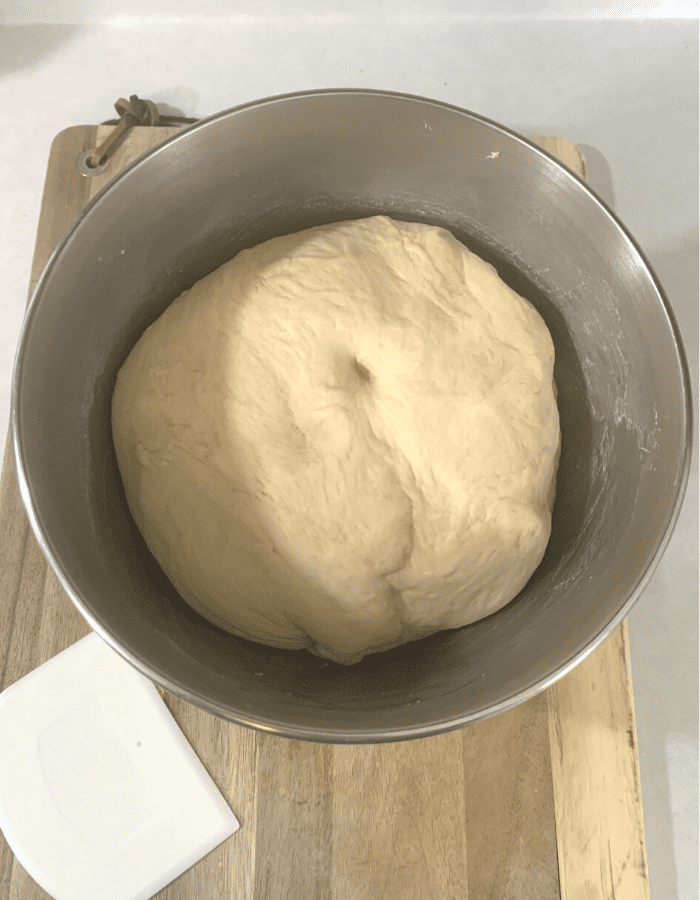
Your dough should be soft and smooth after it finishes kneading.
How to tell if your yeast is dead.
If you think your yeast has expired or is dead, you can test it beforehand by adding your yeast to the warm water and letting it sit for about 10 minutes. If it “blooms,” bubbles, and doubles in size then it’s fine to use.
However, if it doesn’t do anything, throw the yeast outside to your chickens and get another package of fresh yeast. When you use dead yeast, your loaves won’t rise and will be heavy bricks. Been there, done that.
Does your bread dough pass the windowpane test?
After kneading your dough for about 5 minutes, pull off a chunk of dough about the size of a golf ball and roll it in your hands.
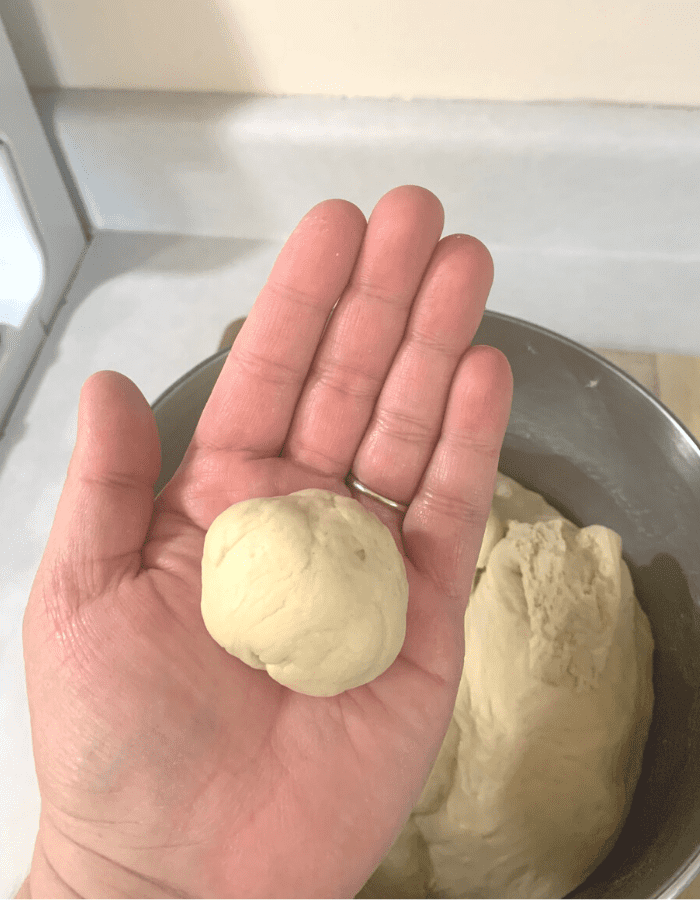
Then start flattening your dough ball by pressing your hands together and using your fingers to flatten and stretch it out. The goal is to get it flat and thin so that light can be seen through it before your dough breaks.
This is called the windowpane test. If your dough breaks as you gently stretch it out and it’s not thin enough to see light through it, you NEED to KNEAD it more.
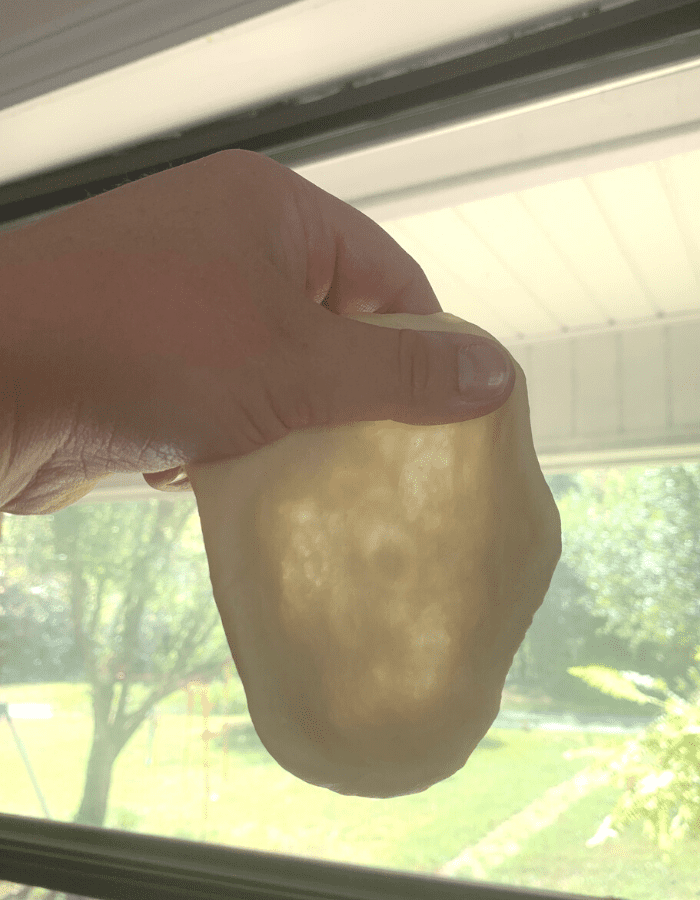
If your dough is very soft and stretchy and light passes through your flattened dough, it’s perfect!
2. Shape your loaves and let it rise.
Dump your dough out onto a lightly floured wooden cutting board (or your counter) and cut it in half the best you can.
Then grease your two loaf pans. I like to use home-rendered lard. However, you can also use butter or oil. Just make sure your loaf pans are coated well so that your bread doesn’t stick in your pans.
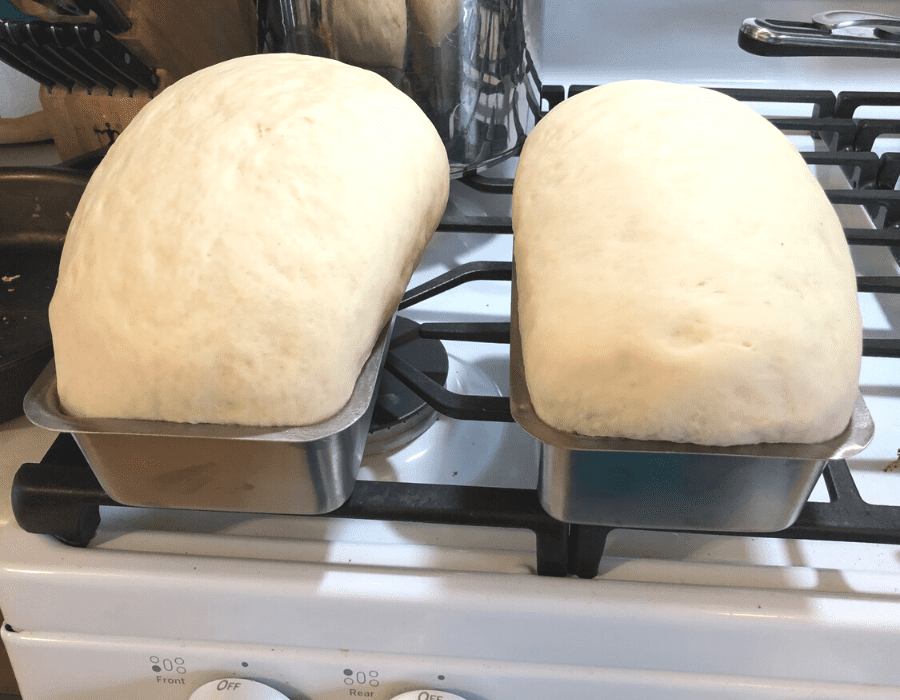
Shape your two loaves and put them into the loaf pans to rise for 40 minutes.
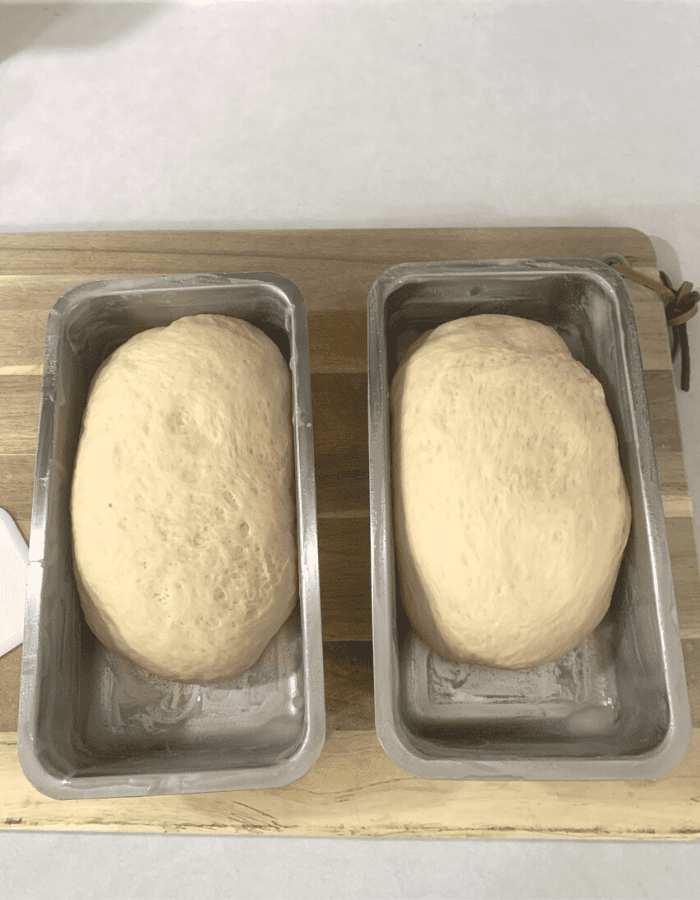
I like to keep my loaves in a warm spot so they will rise. This can be in your oven with just the light turned on or you can put them on your counter with a dish towel over the top.
Your dough will rise over the next 40 minutes. If you’ve used regular dry yeast and not the instant dry yeast, increase your rise time to 90 minutes or until you have a nice dome on top, depending on how warm your kitchen is.
Your dough should get a nice dome on top.
3. Bake your bread and enjoy!
Preheat your oven to 350ºF (about 180°C). Then bake your bread loaves for 45 minutes until they have a nice golden brown top.
Once your bread is out of the oven, it’ll have a dry top that’s more rustic. I often leave it just like that. However, if you smear some butter over the top, it’ll add some gloss and make the crust softer. My kids usually enjoy the softer crust.
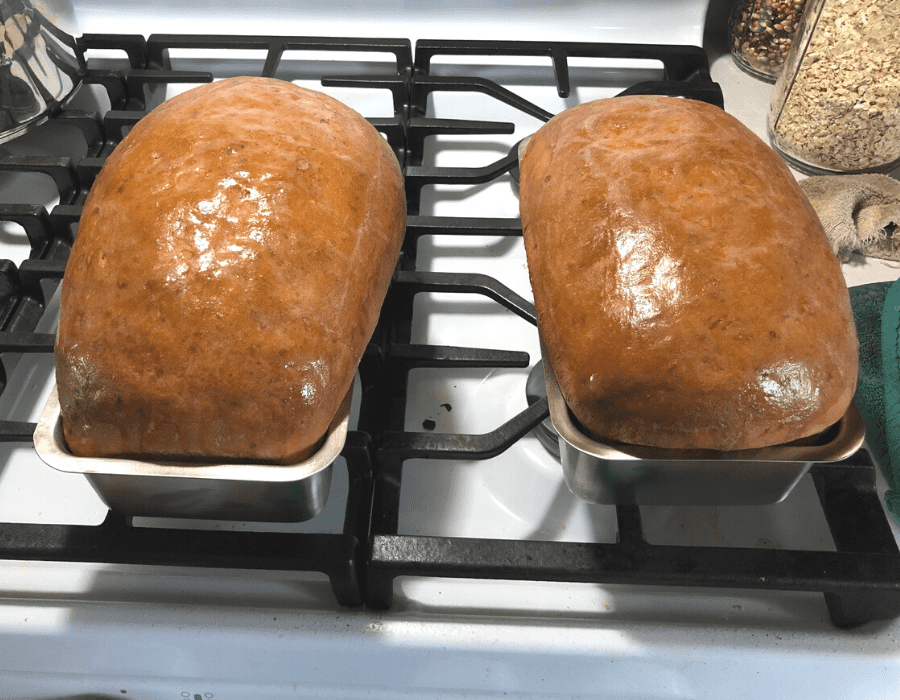
Then take your loaves out of the pans and set them on a cooling rack to cool down. Lastly, savor and enjoy!
How Long Will Your Bread Last?
Since we aren’t using preservatives and chemicals, your bread will only last about a week if left out. You can store your loaves in the freezer if you want to make several loaves in advance, though.
If you have any bread scraps, save them in your freezer so you can use them in your next casserole!
Recipe for Easy Sandwich Bread
Easy Sandwich Bread
Equipment
- stand mixer with dough hook attachment (optional but saves time)
- measuring cups and spoons
- wire whisk or fork
- hot liquid thermometer (optional but handy)
- cutting board (optional but handy)
- bowl and bench scraper (optional but handy)
Ingredients
- 7 cups flour
- 4 tbsp sugar
- 4 tbsp instant dry yeast
- 1 tsp fine salt
- 2 cups warm water (about 120°F)
- 1/2 cup olive oil
Instructions
- Add water, yeast, sugar, and salt to your mixing bowl. Mix it well and let it sit for about a minute.
- Add the olive oil and mix it in. Then add the flour one cup at a time until the dough starts to pull away from the bowl as it mixes.
- Once you've added all your flour and your dough pulls together, set your mixer to medium speed and let it knead for 5 minutes. The dough should be soft and stretchy.
- Check that your dough passes the "windowpane" test by stretching a small ball of dough in your hands and seeing if light passes through. If it doesn't stretch, keep kneading.
- After your dough passes the windowpane test, dump your dough onto your cutting board and cut it in half the best you can.
- Grease your two loaf pans well with lard, tallow, butter, or oil.
- Shape your two loaves and place them in your greased loaf pans. Set in a warm place to rise for 40 minutes.
- Preheat your oven to 350°F and bake your two loaves for 45 minutes until they are a nice golden brown.
- Cool your finished loaves on a cooling rack.
- Optional: Smear butter on the top of your cooked loaves when they come out of the oven for a glossy, softer crust.
How to Cut Perfect and Pretty Sandwich Slices
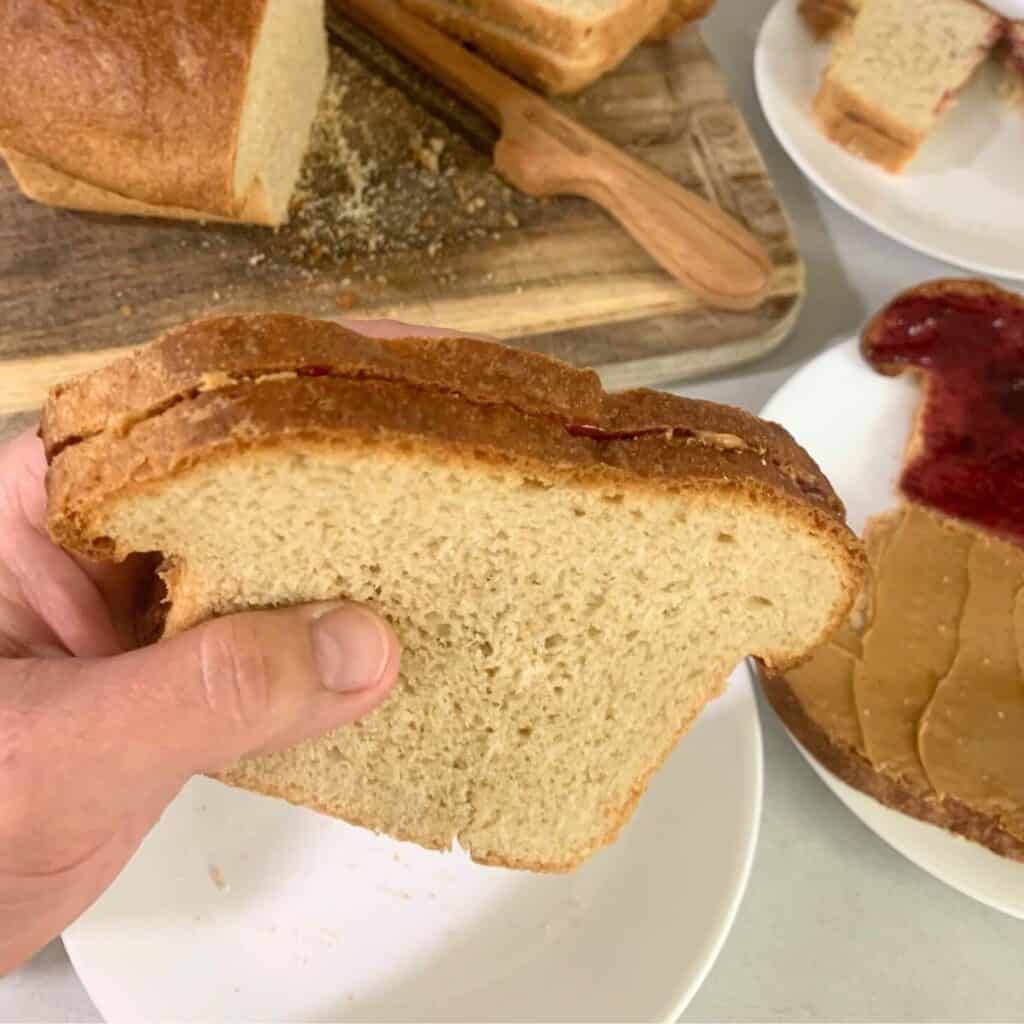
Once you’ve gone to the trouble of making your delicious and healthy sandwich bread, you want to be able to cut it into nice slices! While a regular serrated bread knife will get the job done, it doesn’t always cut the prettiest slices and I find that I can’t cut the bread as thin as I would like.
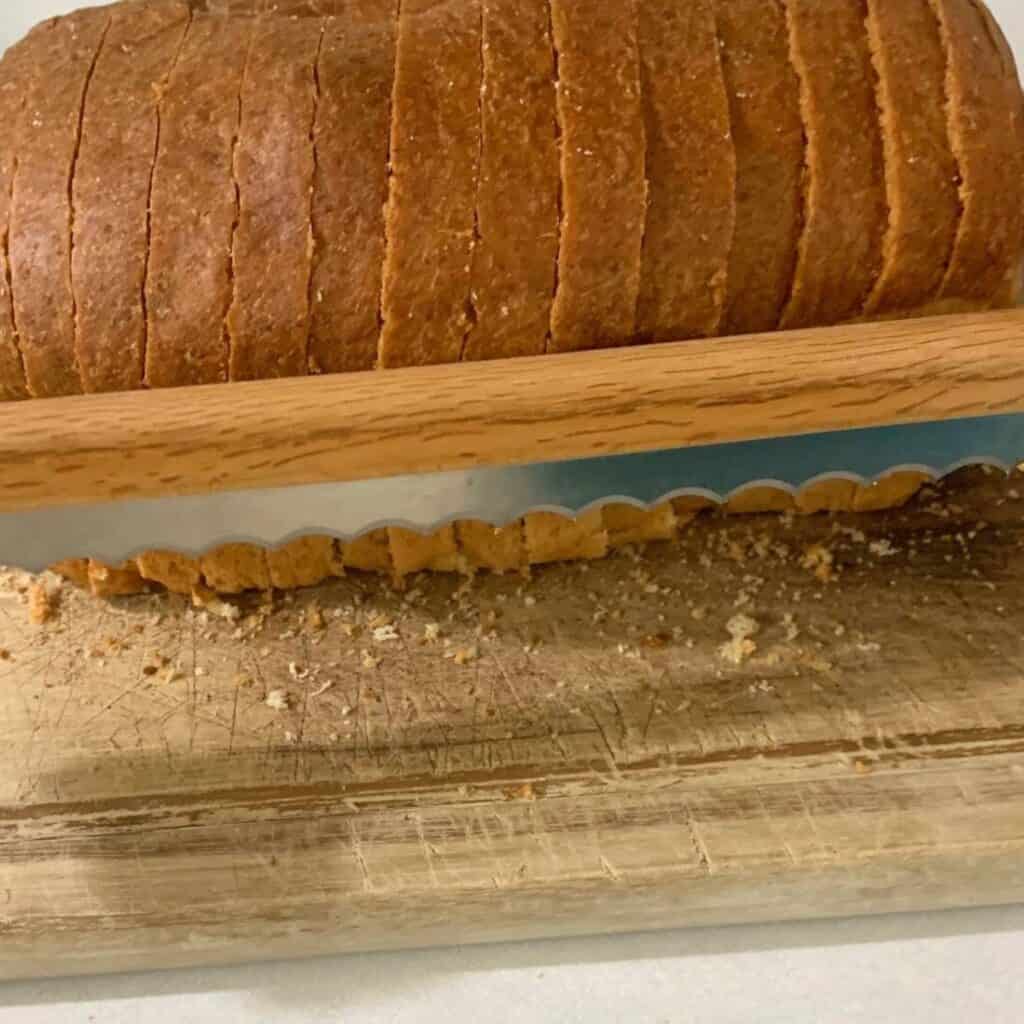
My favorite tool for cutting perfect and pretty sandwich slices is a fiddle bow bread knife. It’s also called a bread bow knife.
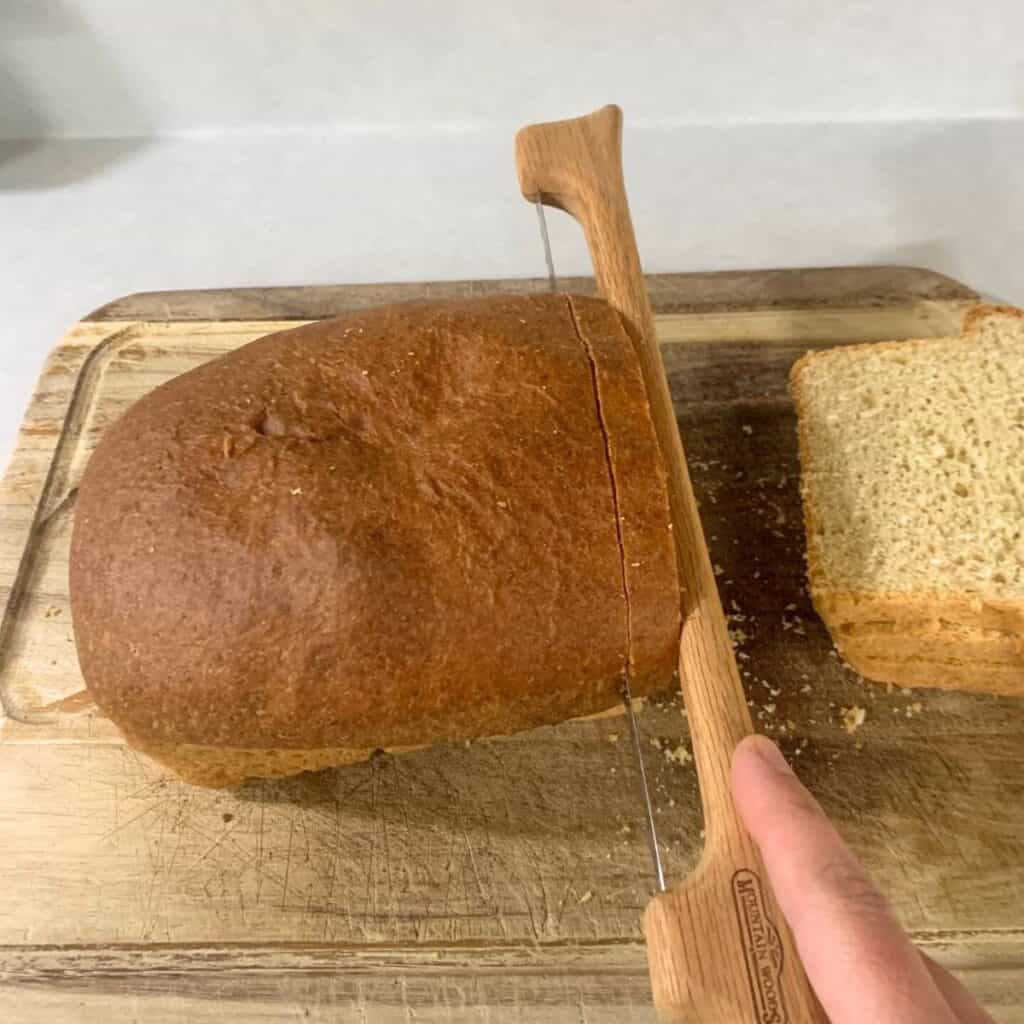
My parents gave me this bread knife several years ago. I’m not really sure where they got it from, but it came in a nice box that I still keep it in when it’s not being used. It cuts the bread slices thin without tearing or breaking the bread.
I found this similar fiddle bow bread knife if you’re interested in getting one for yourself or the bread baker in your life.
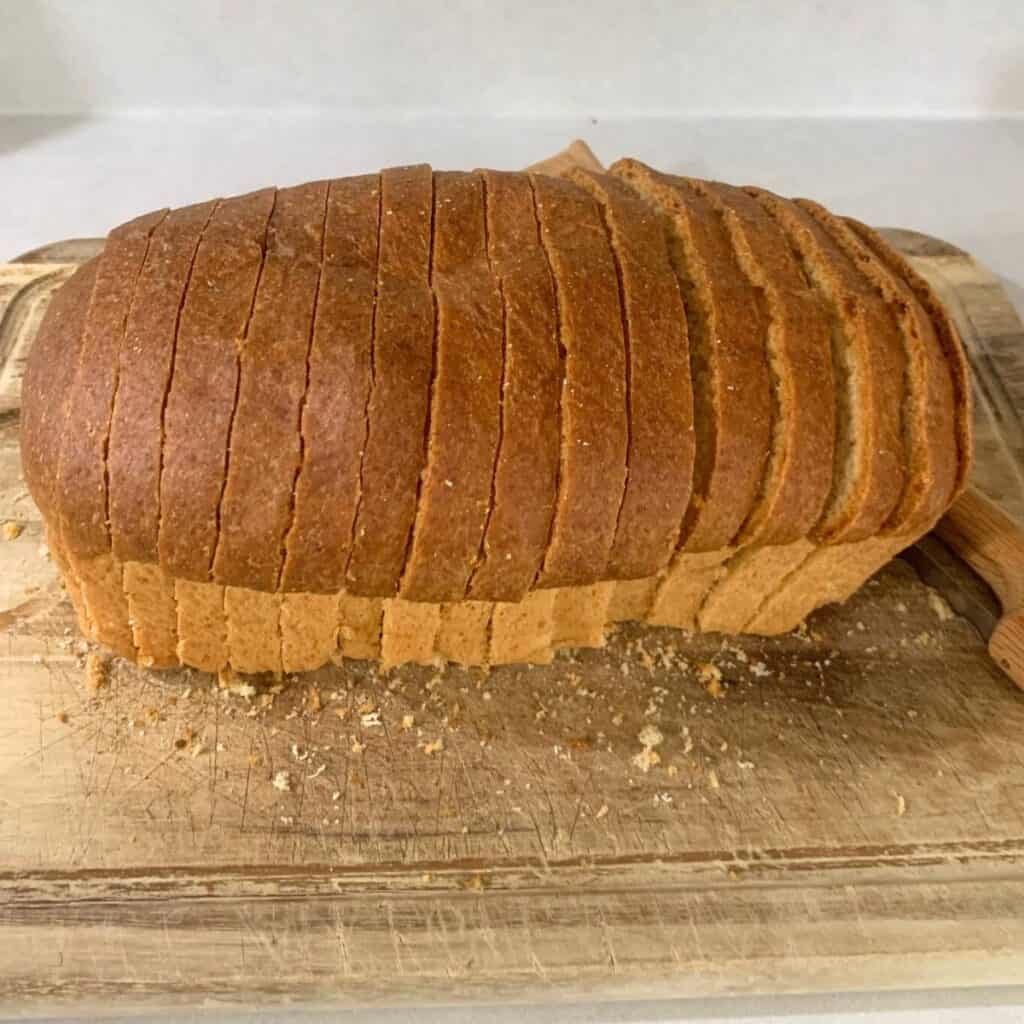
It easily slices through the bread with the large serrated blade. And it’s my go-to knife for making pretty sandwiches that my family will enjoy.
Shop This Post!
Other Posts You May Enjoy
Quick and Easy Homemade Biscuits From Scratch!
Salmon Patties for a Nourishing Lunch or Supper
Leave a Comment
Please let me know if you love baking your own bread, too!
Pin It For Later!
