How to Make Cream Cheese
Learning how to make cream cheese is really simple. If you’re just getting into making your own dairy products at home, I recommend starting with simple projects like making your own butter, yogurt, buttermilk, sour cream, and cream cheese.

Cream cheese, butter, and mozzarella are the dairy products that I make huge batches of and stock up on when we have tons of extra milk that we need to use up. And that only happens when we are weaning a calf off of Belle.
Drowning in Milk…Sometimes.
Most of the time, Belle has a calf that nurses on her and we only milk her when we need and want to. That’s roughly 3 or 4 days per week.
But when her calf reaches about 6 to 7 months old, we will usually wean it off of her. For us, we put the calf in a separate pasture with other cows.
We’ve learned that no matter how old the calf is, and no matter how long it has been weaned off of her, it will go right back to nursing from Belle if given the chance. And she lets them. (She’s sweet like that.)
Milking becomes a daily chore for us after we wean the calf off of Belle. We can’t skip any milking days and the milk REALLY starts to drown us in the house.
We have a separate dairy refrigerator in our basement but it doesn’t take long for it to be filled up with half-gallon mason jars of milk. That happens when you bring in close to 14 gallons of milk per week!
Last April and May we only had to milk Belle every day for about 6 weeks before we dried her off. That’s because we dry her off at least 2 to 3 months before she has another calf. But Belle hasn’t been bred back yet and Brownie (her newest calf) is already 3 months old. In order to save our sanity, I believe we will leave Brownie on her quite a bit longer than normal.
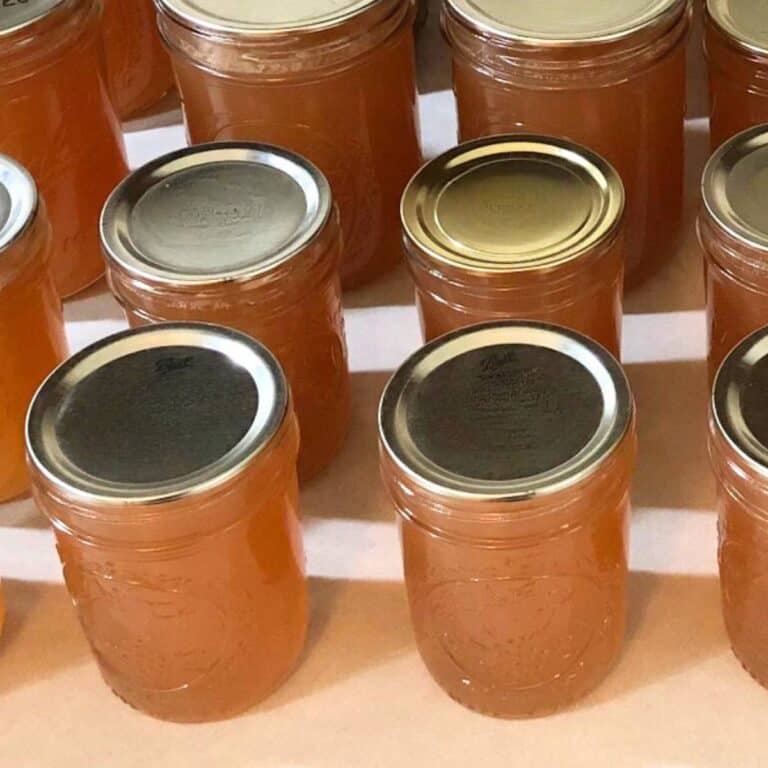
So when we are drowning in milk, and especially in the spring when the milk is the richest, that’s when I make a large batch of something every day. I made nearly 38 pounds of cream cheese and we still have plenty in the freezer!
But you don’t have to be a homesteader or own your own dairy cow in order to eat like it. Let me show you the simple steps for how I make cream cheese!
This post contains affiliate links, which means I make a small commission at no cost to you. See my full disclosure here.
How to Make Cream Cheese
This recipe is for a mock cream cheese or yogurt cheese. Commercial cream cheese is made in factories with cream, milk, gums, and sometimes other thickeners under pressure. We can’t really duplicate that in our home kitchens, but this mock cream cheese tastes exactly the same and can be tailored to your family’s preferences!
Ingredients
Plain yogurt – All you need to make your own cream cheese is plain yogurt! I like to use my homemade yogurt, but store-bought yogurt works just as well.
If you use homemade yogurt, you can control exactly how tangy you let your yogurt…and therefore cream cheese…become. Just shorten the culture time if you want it less tangy or increase the culture time if you want your cream cheese to be tangier.
Tools
Fine mesh sieve (or colander) – You will need a large fine mesh sieve or colander.
Flour sack towel – You’ll need to line your sieve or colander with a flour sack towel, and you’ll need a couple other smaller pieces for later in the process.
Large measuring cup (or bowl) – You need to set your sieve or colander over a bowl or other vessel.
Storage containers with lids – I like to use glass storage containers but use what you have on hand.
Bench scraper (or knife) – It’s optional, but I also like to use a bench scraper to cut pretty blocks of finished cream cheese.
Kitchen scale (optional) – I like to use a mechanical kitchen scale and weigh out my cream cheese so that I can label it correctly when I’m finished.
Plastic wrap (optional) – You’ll need to wrap your finished cream cheese if you’re making a lot and plan to store it in your freezer for future use.
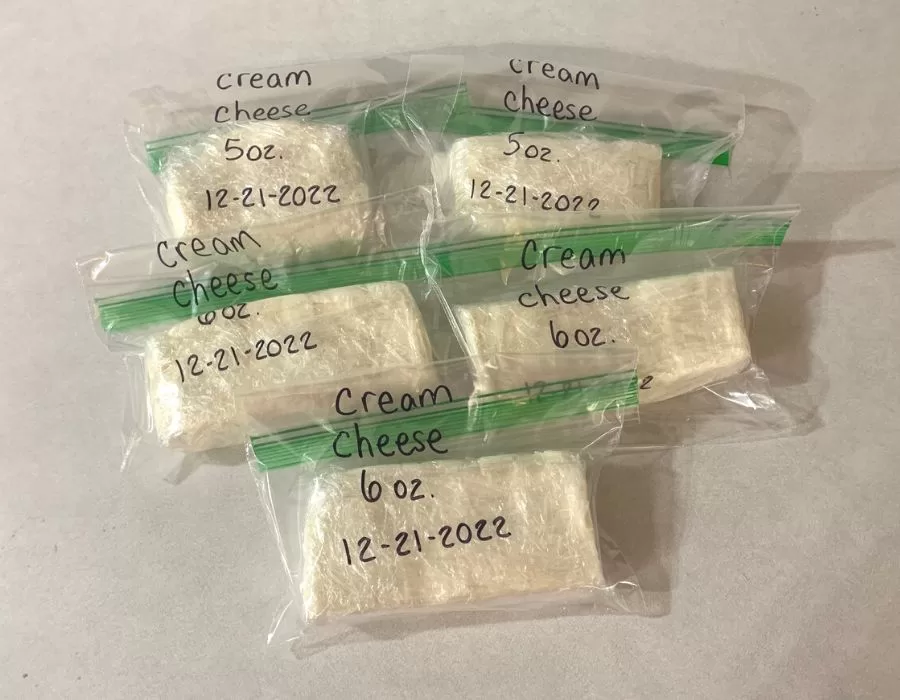
Sandwich bags (optional) – If you’re making a lot of cream cheese at once, freezer bags will come in handy for storage.
Instructions for How to Make Cream Cheese
I had some homemade yogurt and some leftover store bought yogurt in the fridge that I needed to use up. (The store bought yogurt was the starter culture I used to make my homemade yogurt.)
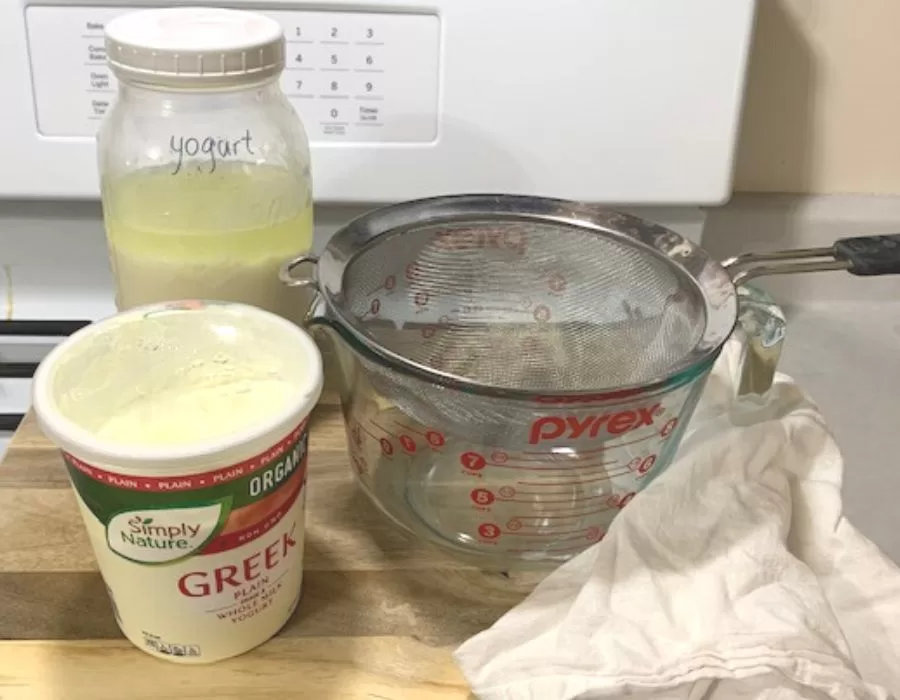
Line your colander or fine mesh sieve with a flour sack towel. Then put that into a bowl or over a large measuring cup as I’ve done below. Next, pour your yogurt into the flour sack towel.
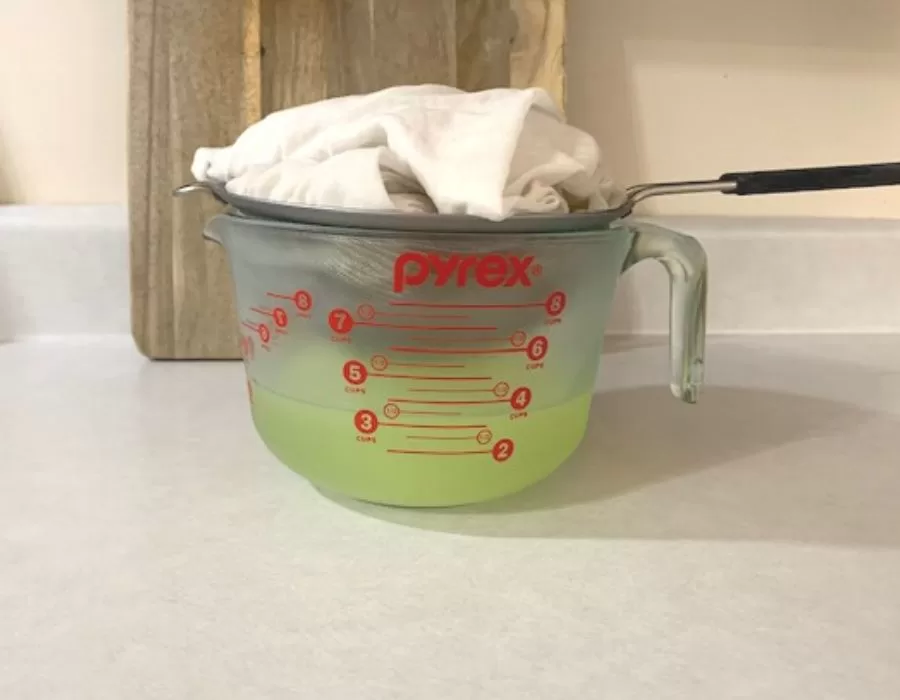
I’m mixing my homemade and store bought yogurt in the example below. There is a texture difference at first because of all the whey I had in my homemade yogurt. However, the texture is identical after all the whey drips out.

Gather the flour sack towel and cover the yogurt. Then stick it all inside your refrigerator for 24 hours to let the whey drip out.

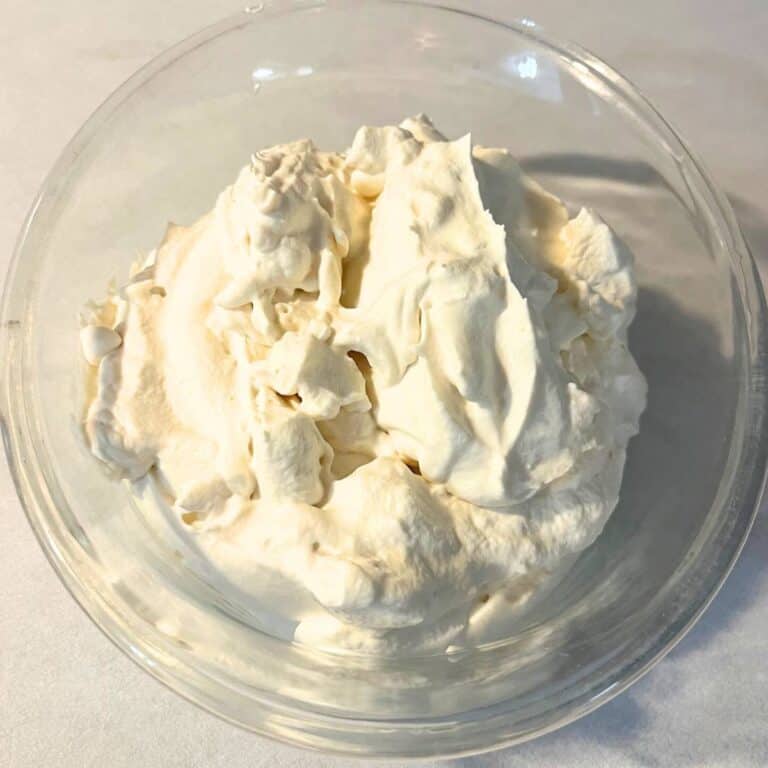
After 24 hours most of the whey will have dripped out of your yogurt.
You can save the whey for other uses and it will keep in your refrigerator for several weeks. Or you can pour it down your sink if you have a septic tank. The live cultures will help you keep your septic system in good working order.
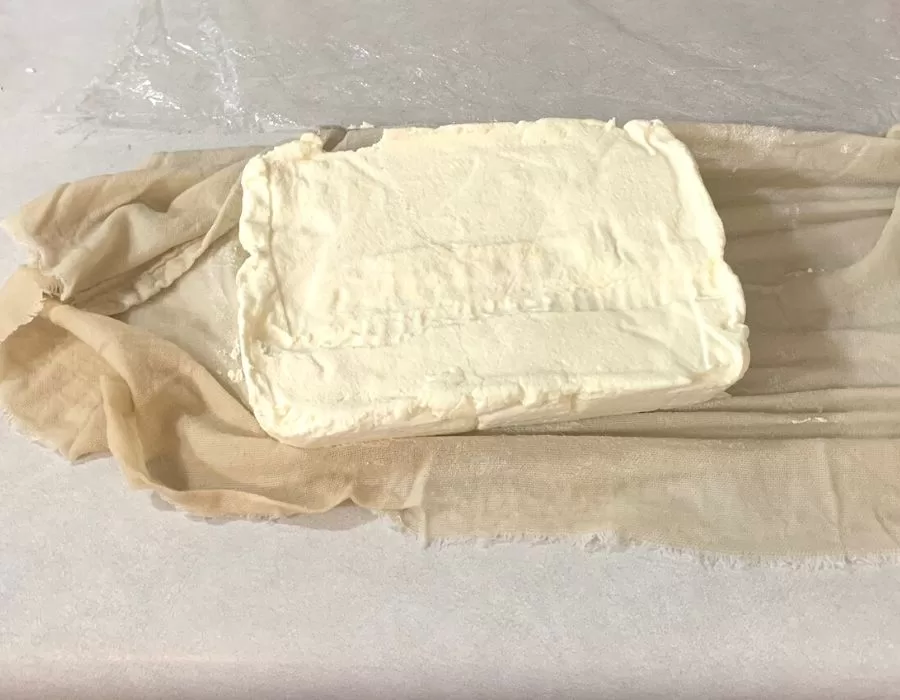
Line a glass storage container with a cut piece of flour sack towel. Then scoop out your cream cheese and put it inside your storage container.
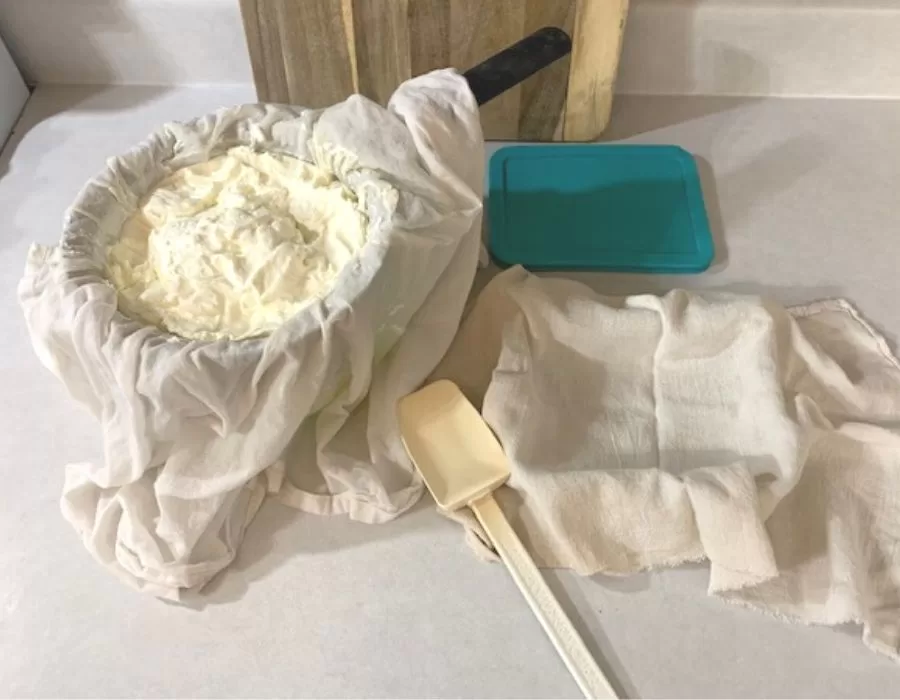
Smooth it out the best you can.

Fold the extra flour sack towel over the cream cheese. The goal here is to have enough flour sack towel to soak up any remaining whey.

Then put your lids on your storage containers, label them, and refrigerate for one week.
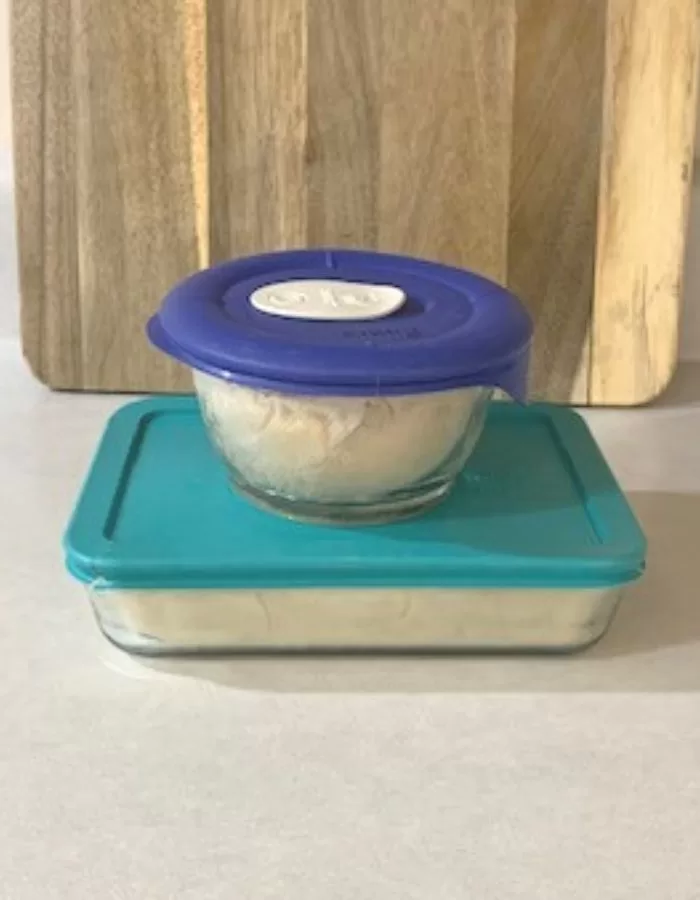
After one week, unwrap your cream cheese. It’ll look similar to the picture below. The flour sack towel will be soaked with whey.
Get out your kitchen scale if you’re going to weigh out your cream cheese and get some plastic wrap ready. I like to use the flat end of my bench scraper to cut a nice block but a knife would work well, too.
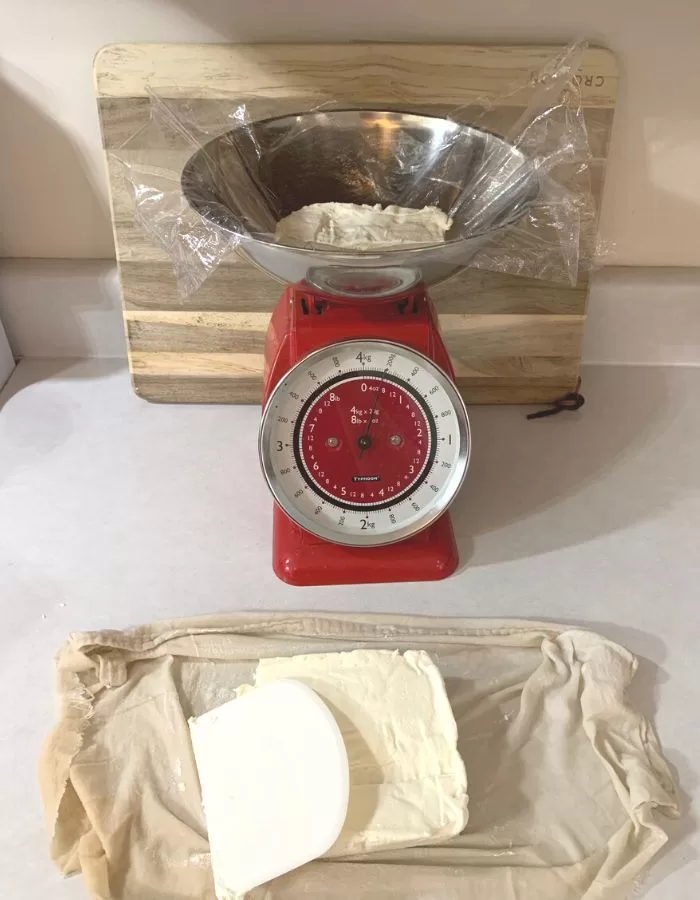
Once you get your desired weight, wrap up your block of cream cheese with your plastic wrap.

Store your homemade cream cheese in sandwich bags and label them appropriately. They will store in your freezer very well.
That’s all!
Ways to use homemade cream cheese
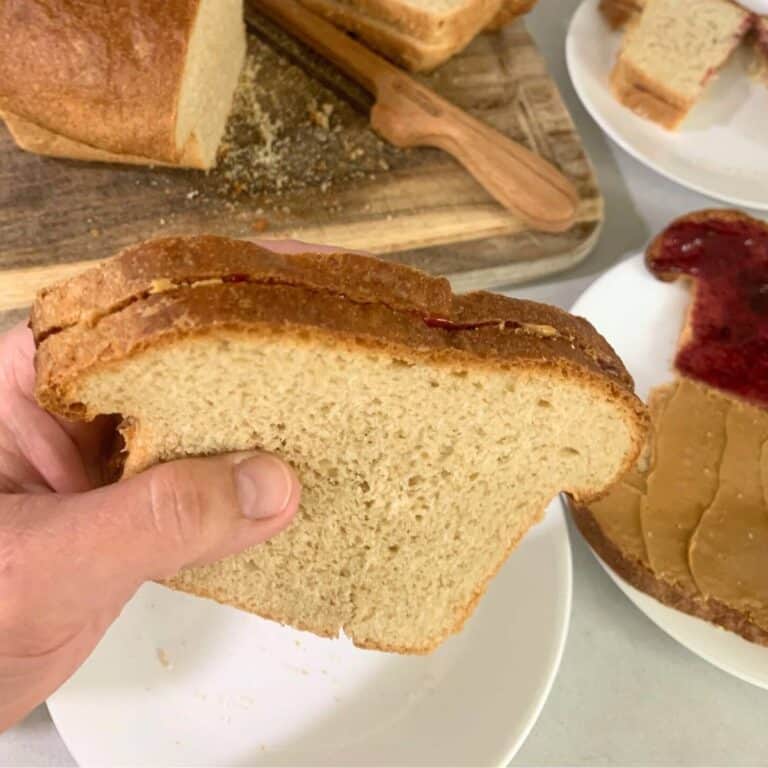
You can use your cream cheese exactly as you would use store bought cream cheese. They also make excellent homemade gifts.
I use our homemade cream cheese mostly for cream cheese icing but also in these cream cheese sugar cookies.
How to store homemade cream cheese
You can keep your homemade cream cheese in your refrigerator if you plan to use it within 2 weeks. For longer storage, wrap up your cream cheese in plastic wrap and freezer bags and keep it in your freezer.
Leave a comment if you enjoy making your own homemade dairy products!
Shop This Post!
Retro Mechanical Kitchen Scale
Fine Mesh Strainer (fits inside the measuring cup listed above)
Other Posts You May Enjoy
Cream Cheese vs Butter: Which is Healthier?
How Long Can Cow Milk Sit Out?
The Best Cream Cheese Sugar Cookies
Pin It For Later!


Wow, I had no idea making cream cheese was so simple. I already make homemade yogurt, so now I can’t wait to try this to!
That’s so great!
Next time we get our fresh milk from our local farmer, I will try to make this cream cheese! Thank you for your post!
You’re so welcome!
Wait, so it’s just making your own yogurt and then further draining, aging it a little bit, and pressing it into a block? Did I miss anything?
No wonder my last batch of yogurt that I drained a little longer than usual was a bit different than expected… 🤔
Yep! That’s all there is to it!! =) And you can customize the tanginess of your cream cheese to your preference, just like you do with your homemade yogurt!
Do you ever salt it a little?
I don’t personally salt my cream cheese, but you can certainly opt to do that if that’s what you like.
This really isn’t cream cheese…..it’s yogurt cheese. Cream cheese is made with cream or half and half, but I imagine yogurt cheese would be a little healthier for you with the probiotics.
Hi Linda, You’re absolutely right! This is a mock cream cheese using yogurt cheese. The cream cheese you buy in grocery stores uses a cheese culture and different gums to thicken it up under pressure in a factory. This mock cream cheese or yogurt cheese option is easier for us home cooks to make in our kitchen but it still tastes just as good.
Love, Rebekah
Can you use regular yogurt or should we use greek yogurt, if you don’t make your own?
Hi Penny, You can use regular yogurt or Greek yogurt! My philosophy is to use what you have on hand. Sometimes there is a bit of a texture difference between the two yogurts, but the cream cheese from both will still be delicious. I hope this helps!
Love, Rebekah
Can this cream cheese be used as a spread on crackers? Will it have the same taste as store bought?
What I love about this cream cheese is the ability to tailor it to exactly what you want. If you want a more spreadable, creamy cream cheese for crackers, I would use regular yogurt and not Greek yogurt which would have a more dry and crumbly texture. If you follow the rest of the steps, it will be very similar to store bought cream cheese! Then you can get fancy and add salt, preserves, or anything else you want for your crackers. I hope this helps!
Love, Rebekah
Hi, I was wondering if you can substitute this diy cream cheese for Philadelphia Cream Cheese in a recipe like cheese cake?
Hi Nancy, Yes – You can substitute this DIY cream cheese for packaged cream cheese. I love that you can customize the cream cheese flavor by letting it sit longer (making it tangier) or finishing it quicker (for less tangy flavor). The texture of your cheese cake may change a little bit depending on if you’re making cream cheese from the Greek yogurt, which will make your cheesecake have a bit of a crumbly texture, or traditional yogurt, which gives it a creamier texture. Good luck and let me know how you like it in your recipes! (I really love using this cream cheese in my cream cheese sugar cookies.)
Love, Rebekah
Hi! I’m so very excited to try this. Can I sub cheese cloth? I was making cream cheese with milk and lemon juice, but we found it very dry and my kids don’t like it! Hoping this will be closer to texture of Philadelphia! My kids are missing it so much I wanted to see if this will be better! Do you control the tangyness with how long you cook the yogurt? I normally do 8 hours..
Hi Kamy, As long as the cheese cloth isn’t the loose, gauzy type and more of a traditional close-knit cotton cheese cloth like a flour sack towel, then yes! Otherwise, you’ll lose too much of your curds when you strain it, and it won’t do much in the way of absorbing the extra liquids as it sits in your fridge. And you’re absolutely right; you control the tanginess by letting your yogurt sit shorter or longer! (I also let mine sit for 8 hours.) Also, if you want creamy cream cheese, be sure to use regular, plain yogurt and not Greek, plain yogurt which has a drier texture as it develops. You may also want to keep more of the liquid in your end product so that it’s a texture your kids will love. So check your cream cheese after 3 or 4 days and see if it’s the texture that will make them happy. I hoe this helps!
Love, Rebekah
I have several kitchen towels that strain nicely. Very close-weaved, plain towels, like flour sack towels that are fresh from being laundered.
Hi Donna,
Yes, you can’t beat flour sack towels!
Love, Rebekah
I make my own yogurt at home with raw milk, my yogurt is usually pretty thin so I end up draining a lot of the whey out to more of a Greek yogurt to make it thicker and easier for my kids to eat without so much mess. Would you recommend doing the yogurt for cream cheese before I strain it to Greek yogurt? Or after when it is thicker or will it not matter since you drain out the whey anyways? I’ve made cream cheese by bringing it up to heat and then straining the curds and then putting it in the food processor. But the flavor isn’t quite what I want and don’t feel confident enough to make frosting out of it. Would the yogurt have more of a store bought flavor?
Hi Randi, My kids love our homemade raw milk yogurt, too! A couple of things.
First, to answer your questions. It doesn’t really matter when you strain out the whey (after yogurt or during cream cheese-making) but I would save time and do it once. Strain it once in the fridge while making your cream cheese. As far as the flavor goes, it depends on what you and your family prefer. My kids and I don’t like a very tangy yogurt or cream cheese, so I tend to let my yogurt sit and culture for a shorter period of time (6-8 hours). The longer you let your yogurt sit, the tangier it will be. Store-bought cream cheese doesn’t have as tangy a flavor, so I recommend making yogurt for just 6-8 hours. Taste it at 6 hours and if you want it tangier, taste it again every hour until it’s the flavor you enjoy. Your cream cheese frosting will be as tangy as your yogurt. You can also play around with your cream cheese frosting recipe. When my cream cheese is tangier than what I want for frosting, I just use half or even less of it. Adding your other ingredients will mellow out the flavor.
Second, you didn’t ask about this but I think it will help you. If you’re unhappy with the yogurt texture you currently have, I would recommend getting a new starter culture from a reputable company for Greek yogurt. Depending on how long you’ve kept your yogurt going and saving a bit from each batch to use as a starter for the next batch, it might be time to refresh with a new culture anyway. Did you know that cultures we use and save from batch to batch (yogurt, buttermilk, etc) will get tired after a long time of use? It’s important to start from scratch when that happens. I like using Cultures for Health starter culture…that’s the one I use for our Greek yogurt. I hope this helps, and good luck!
Love, Rebekah
We use Fage yogurt as our culture. It tastes great!
Thanks for your article – it was really helpful.
Hi Donna,
That’s a neat culture and I’ll have to try it!
Love, Rebekah